This is the first pigeon loft I have built. I have a small store-built loft for my pair of Birmingham Rollers, Cher Ami and Commando, but as I am expecting eggs and want to get some Homers I decided I needed to expand.
We found an old open-top wooden box at a desirable trash station and took it home for free. We also got a board to act as a roof.

My original plan of where the windows and doors would be.
The box sat in the yard until we got serious a couple months later.
August 1, 2020
We bought four 2x4s for legs from Lowes. They were about eight feet long, so we cut them in half to make eight four-foot long posts.
We flipped the box upside-down to screw on the legs. We did two posts per corner so it would be extra sturdy, an idea we got after our first pigeon loft blew over in a storm (don't worry, the pigeons were okay ).
).
We flipped it right-side-up to test how sturdy it was. It's sturdy!

Picture of the box on legs.

Close up of a leg from the inside.
September 7, 2020
After a...er...short break we are back to working on the loft!
We cut out the windows and door, then put some hardwire cloth we found laying around over the windows and made the door. Now it looks more like a pigeon house than an old box!


The front has a door, a medium-sized window, and two small windows. On both sides there are two large windows, and the back is blank. There is a possibility that one day we will turn one of the small windows into a hand door or a pigeon trap door!
We flipped the loft over and added perches. I had heard that pigeons like to perch flat-footed so we made the perches a mix of 1x2s, 1x3s, and 2x4s. We made sure to leave plenty of flying space!

(Close-up of a couple of the perches)
We added hardwire cloth to the bottom. It only needs a few more staples! We figured that wire would be okay because the pigeons will come down only to eat and drink. Besides, if they need it we can lay a piece of cardboard down on the bottom for a while.
We were going to finish the loft tonight but a windstorm came up and I almost got hit by a humongous tree branch! But that is another story...
September 8, 2020
We spent most of the day cleaning up after the windstorm (wind+trees+lawn don't get along well) and only had a few minutes to work on the loft.
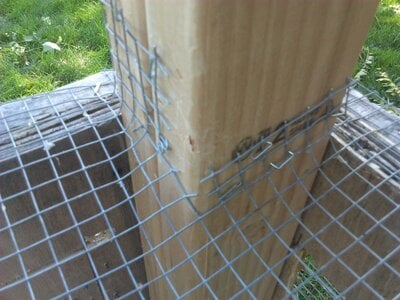
I finished stapling the wire down. The corners were tricky, but we managed.


We cut some boards and plan to finish the whole loft tomorrow!
September 9, 2020,
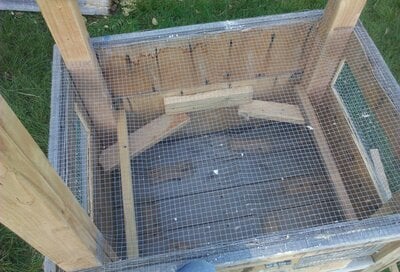
I screwed in some boards to support the wire from below and stapled the wire to them from the inside. Warning: stapling upside-down is NOT easy or fun. In the end, I climbed into the loft, only to realize I needed a refill on staples ( ). It was a tight fit, and not recommended because of all the loose staples I sat on. Don't laugh. I know you are laughing. Stop!

(Inside of the loft after we flipped it over. In this picture you can see the beams supporting the wire.)
The roof is on! I placed a board on one end and a smaller one in the middle so the roof will be slanted. Before winter we want to get a metal roof to protect the wood better.

The loft is finished!


I think we did pretty good for a first-time loft build! I guess we'll see what the pigeons think tomorrow!
September 10, 2020
Due to a busy day all we did was move the loft into the chicken coop. It was heavy! Next time I build something will put the roof on after I move the loft instead of before!
September 11, 2020
As I went to move the pigeons, I saw something awesome: an egg! Yes, the pigeons had layed an egg just before I planned to move them. Convenient, right? Maybe they like that loft more than I thought...
Anyways, I will have to put off the move until the baby pigeons are out of the nest. If my research is correct, that should be in about 43-47 days.
September 17, 2020
They didn't end up hatching. I moved them into the new loft and they loved the extra flying room!
Expenses:
Good luck with your own loft!
P.S. If you want to see more of my builds, check out this link: PioneerChicks' Farmyard
Last updated 8/20/22
We found an old open-top wooden box at a desirable trash station and took it home for free. We also got a board to act as a roof.
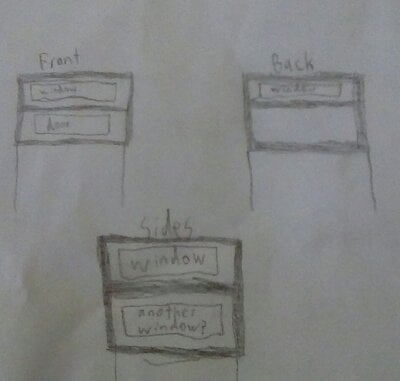
My original plan of where the windows and doors would be.
The box sat in the yard until we got serious a couple months later.
August 1, 2020
We bought four 2x4s for legs from Lowes. They were about eight feet long, so we cut them in half to make eight four-foot long posts.
We flipped the box upside-down to screw on the legs. We did two posts per corner so it would be extra sturdy, an idea we got after our first pigeon loft blew over in a storm (don't worry, the pigeons were okay
 ).
).We flipped it right-side-up to test how sturdy it was. It's sturdy!
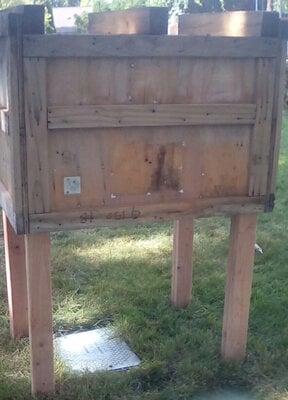
Picture of the box on legs.
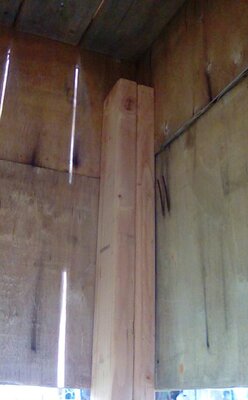
Close up of a leg from the inside.
September 7, 2020
After a...er...short break we are back to working on the loft!
We cut out the windows and door, then put some hardwire cloth we found laying around over the windows and made the door. Now it looks more like a pigeon house than an old box!
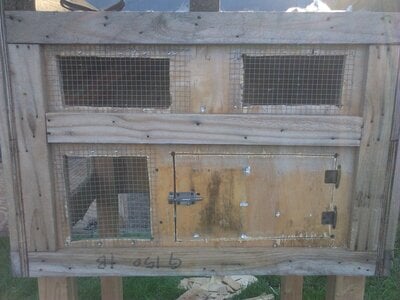
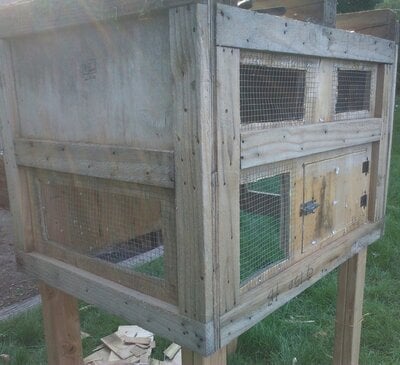
The front has a door, a medium-sized window, and two small windows. On both sides there are two large windows, and the back is blank. There is a possibility that one day we will turn one of the small windows into a hand door or a pigeon trap door!
We flipped the loft over and added perches. I had heard that pigeons like to perch flat-footed so we made the perches a mix of 1x2s, 1x3s, and 2x4s. We made sure to leave plenty of flying space!
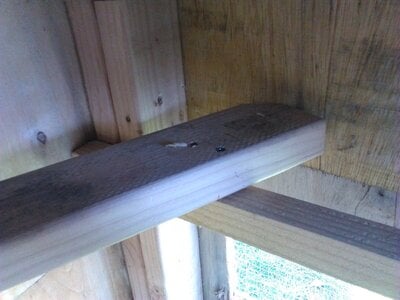
(Close-up of a couple of the perches)
We added hardwire cloth to the bottom. It only needs a few more staples! We figured that wire would be okay because the pigeons will come down only to eat and drink. Besides, if they need it we can lay a piece of cardboard down on the bottom for a while.
We were going to finish the loft tonight but a windstorm came up and I almost got hit by a humongous tree branch! But that is another story...
September 8, 2020
We spent most of the day cleaning up after the windstorm (wind+trees+lawn don't get along well) and only had a few minutes to work on the loft.
I finished stapling the wire down. The corners were tricky, but we managed.
We cut some boards and plan to finish the whole loft tomorrow!
September 9, 2020,
I screwed in some boards to support the wire from below and stapled the wire to them from the inside. Warning: stapling upside-down is NOT easy or fun. In the end, I climbed into the loft, only to realize I needed a refill on staples (
 ). It was a tight fit, and not recommended because of all the loose staples I sat on. Don't laugh. I know you are laughing. Stop!
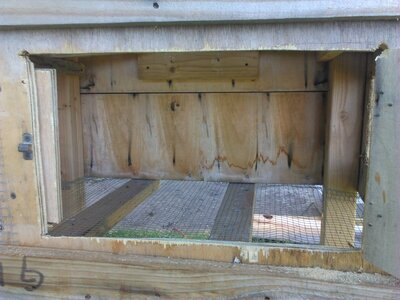
(Inside of the loft after we flipped it over. In this picture you can see the beams supporting the wire.)
The roof is on! I placed a board on one end and a smaller one in the middle so the roof will be slanted. Before winter we want to get a metal roof to protect the wood better.
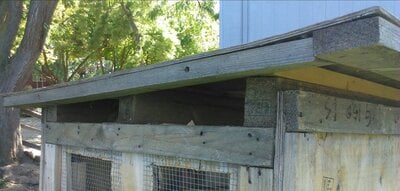
The loft is finished!
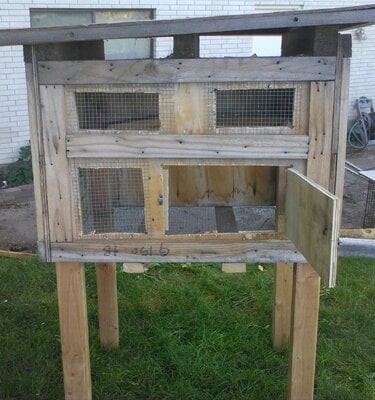
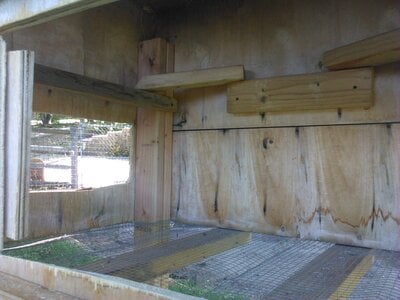
I think we did pretty good for a first-time loft build! I guess we'll see what the pigeons think tomorrow!
September 10, 2020
Due to a busy day all we did was move the loft into the chicken coop. It was heavy! Next time I build something will put the roof on after I move the loft instead of before!
September 11, 2020
As I went to move the pigeons, I saw something awesome: an egg! Yes, the pigeons had layed an egg just before I planned to move them. Convenient, right? Maybe they like that loft more than I thought...
Anyways, I will have to put off the move until the baby pigeons are out of the nest. If my research is correct, that should be in about 43-47 days.
September 17, 2020
They didn't end up hatching. I moved them into the new loft and they loved the extra flying room!
Expenses:
- 2x4s cost $7 each (I bought four)
- Paint cost $10
Good luck with your own loft!
P.S. If you want to see more of my builds, check out this link: PioneerChicks' Farmyard
Last updated 8/20/22
