UTILITY TRAILER BROODER 03-22-2009
We have 25 chicks on the way, and plan on an incubator full of eggs soon. Due to this, we built a larger brooder, and wanted to be able to easily separate chicks. We live in Madison County, Iowa which is known for temperature variances in March and April (from freezing to 70 degrees is always a possibility) as much as it is known for covered bridges. We thought there might be days when the chicks would enjoy the Iowa sunshine but need to be back inside the garage for the cold Iowa nights this spring, and rolling a trailer in and out seemed reasonable to accomplish this. We also do not yet have our coop built (next project on the list...) so we needed a brooder with "growing room" for a couple of extra weeks.
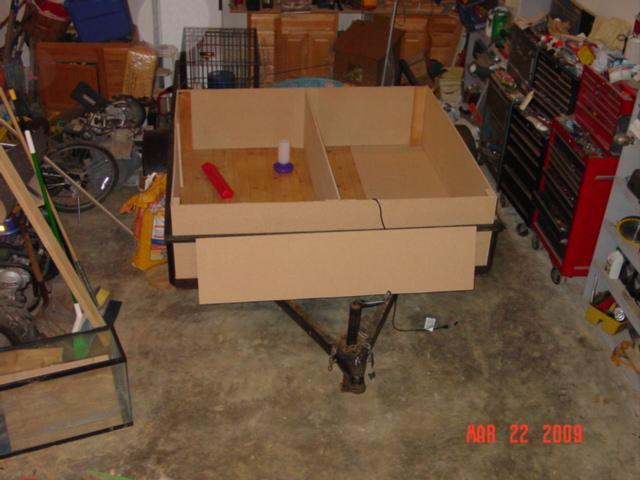
With all this in mind, we decided a "mobile" unit was our choice.
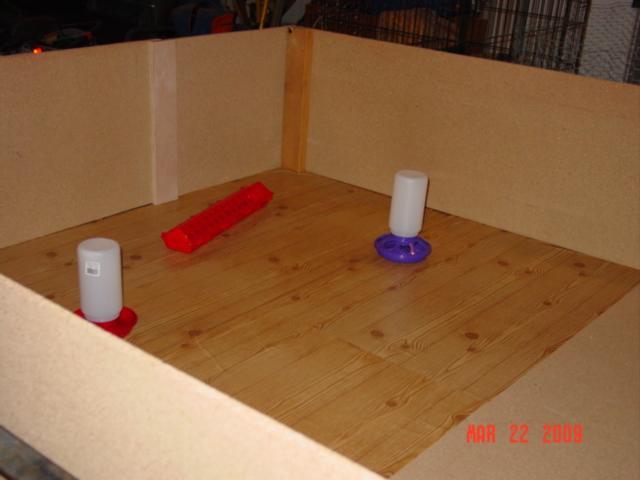
We began with our simple utility trailer. We recently built a new home and have lots of scrap lumber around. We put MDF pressboard bottom on the trailer and set a simple box frame on top of it. The box measures 6' by 6' which was the width of the trailer and about half the length of the trailer. The walls are 20" in height. We placed contact paper (sometimes called 'shelf paper') on the bottom which provided an easy clean up vinyl bottom. We will use wood-chips on top of this.
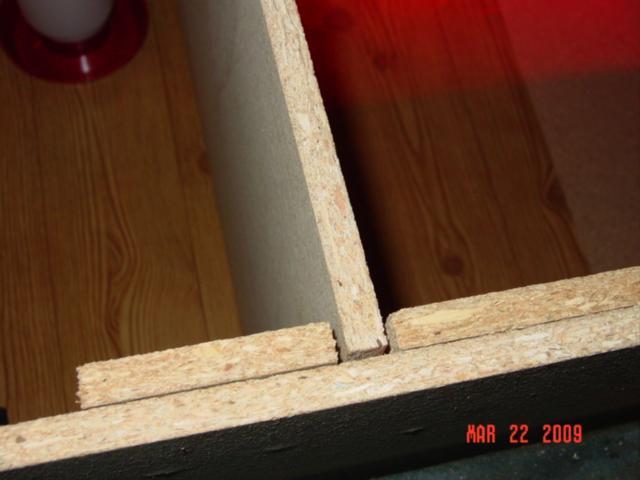
We then added a barrier down the middle to allow us to separate groups of chicks by size or other varying reasons. We have meat chickens and egg chickens coming, and expect the Cornish Rocks to grow much faster. It will be good to separate them from the others. Here's how we placed the removable sliding barrier:
And here's what it looks like in place:
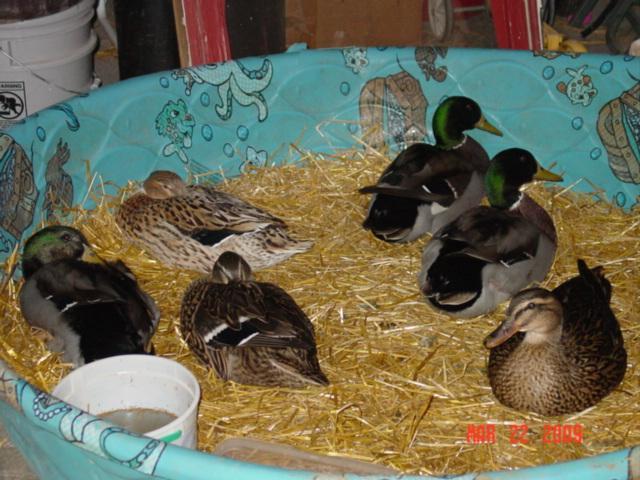
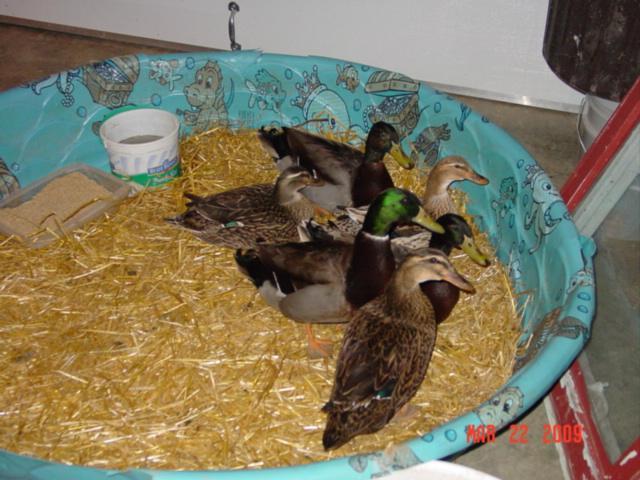
Our ducks watched us build the brooder with anticipation:
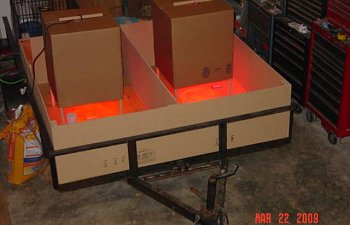
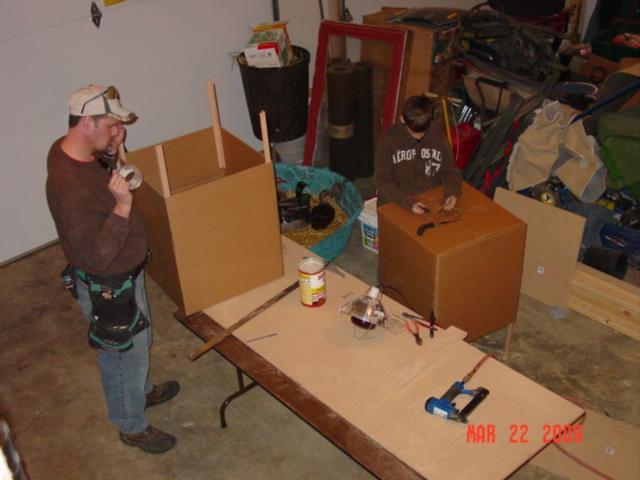
We build two heat boxes with a heavy duty cardboard box, 10" legs on the box stapled in place firmly, a hole cut from the top to allow us to raise/lower the heat lamp accordingly. Here's a picture of building these heat boxes:
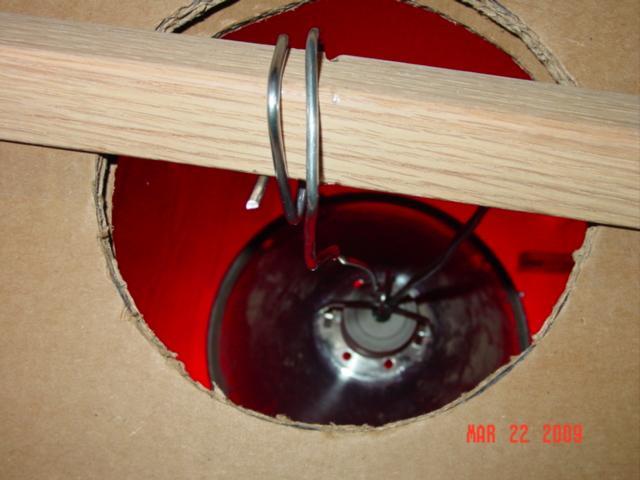
Here's view of the top of the box, a vent hold allows extra heat to rise and allows us to view the height of the heat lamp. The heat lamp is hanging from aluminum wire which easily allows us to adjust the triangle molding piece to raise/lower the lamp.
Here's what the heat boxes look like once in place in our new mobile brooder:
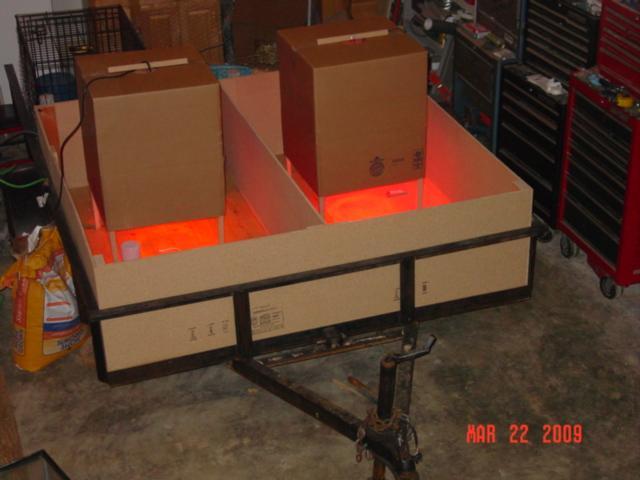
We have a chicken wire top that will be placed when the chicks are old enough to fly/escape. These heat boxes worked quite well to hold heat in place as we tested our temperatures and could easily adjust 10 degrees with a couple of turns of the lamp wire adjuster.
The walls of our brooder break down to flat with a couple of screws to be unscrewed, and the floor is not attached but just sitting under the wall frame. We can easily store our brooder walls/floor in a flat position for the winter. The heat boxes will take up about 4 square feet of floor space in the attic when stacked for the winter. When the brooding is done, we can have the utility trailer back for other purposes. We also planned for the 20" walls to be placed in the grass with the chicken wire top in place to allow some warm weather "tractor" action for the growing meat chicks.
The ducks got bored with our project and went to sleep, but we hope you didn't while you checked out our mobile utility trailer brooder.