I've been using 1/2 gal ball/mason jars with plastic sprouting lids for sprouting grain (BOSS mix, oats, barley, wheat) for over a year now. I let them soak overnight so 8-12 hours. Then I drain, fill with water, drain, and sit the jar upside down at an angle. I rinse the grains morning and night for 2 1/2 to 3 days before feeding them to my flock. Almost all the grain is sprouted by then and some are starting to show some green. I started some last night and they will be ready to feed on Friday morning. If I let them go past 3 days, they are hard to get out of the jar. I let my flock backyard range so I spread the sprouted grains all around under the bushes and the girls spend a couple hours happily foraging.
So far I've only checked Walmart for the half gallon ball jars... no go.
Can you share what type of store you bought yours at?
I currently have 4 plastic (almost 1 gallon) containers that had plastic lids. I had my son cut out the lids leaving an "x" through the middle using a dremel. I cut out circles of that white plastic canvas stuff for crafts for kids. It looks kind of like cross stitch fabric but its plastic and has lots of holes in it. These work fantastic for sprouting but I'd like to expand the operation and I cannot find any more of those particular containers.
I have a new source for my sprouting bags. As you all know I am always on the lookout for easy, cheap ways to make the sprouting bags. I found if you get the knit polos from garage sales for a quarter you can get two bags from them, here is how.
Draw a line across just under the arm holes and then down the center. The top line stitch a straight line across, and the middle line stitch along each side of the drawn line leaving about 3/4 to 1 inch between stitched lines.
Cut down the middle and across the top
There are your two bags, using the bottom of the shirt the tops are all neat and hemmed.
I have found using the knit shirts there is less root growth through the bags and more root matting, so easier to take off the bag.
Just one more option. I now have sprouting bags out of burlap, pillow cases, wash clothes, and old knit shirts.
The 1/2 gallon jars will be w/the canning jars... I've found them at Menards before. If they don't have them on the shelf, ask them if they have them in storage. They don't leave them out all year but usually have a supply....at least at our local Menards.
Big R carries them if you have a Big R.
Some hardwares have them if they sell canning jars.
I think the pillow cases and knit shirts. Pillow cases are absolutely no sew, if you want you can cut them in half and get two for the money, and the knit shirts have no raveling. I am finding the cheap wally world wash clothes don't stand up well to wear and tear. Using the burlap is easy and great and they wear well, but the mice outside like to eat holes in them, and making them is messy w/ all the raveling and fiber shedding.
I originally used the countertop sprouting method and it worked great for a small flock. But last year I started doing your sprout bags and made the burlap. I'd almost like to try the knit shirt ones to see if I like them better. I love being able to hang the bags on a post out in the run for them to pick clean.
********************************************************************************************************
Oh...and I guess I'll re-post the countertop method I was using since It's been a Looooonnnnnnngggggg time since I put it out. I will say that I started using jars like several of you are talking about now and they were EXTREMELY FRUSTRATING and a hassle to work with. Using the "countertop" method was way easier to maintain....
So...here it is....
My Simple Sprouting Method
This whole process takes less than a minute each time I attend to it.
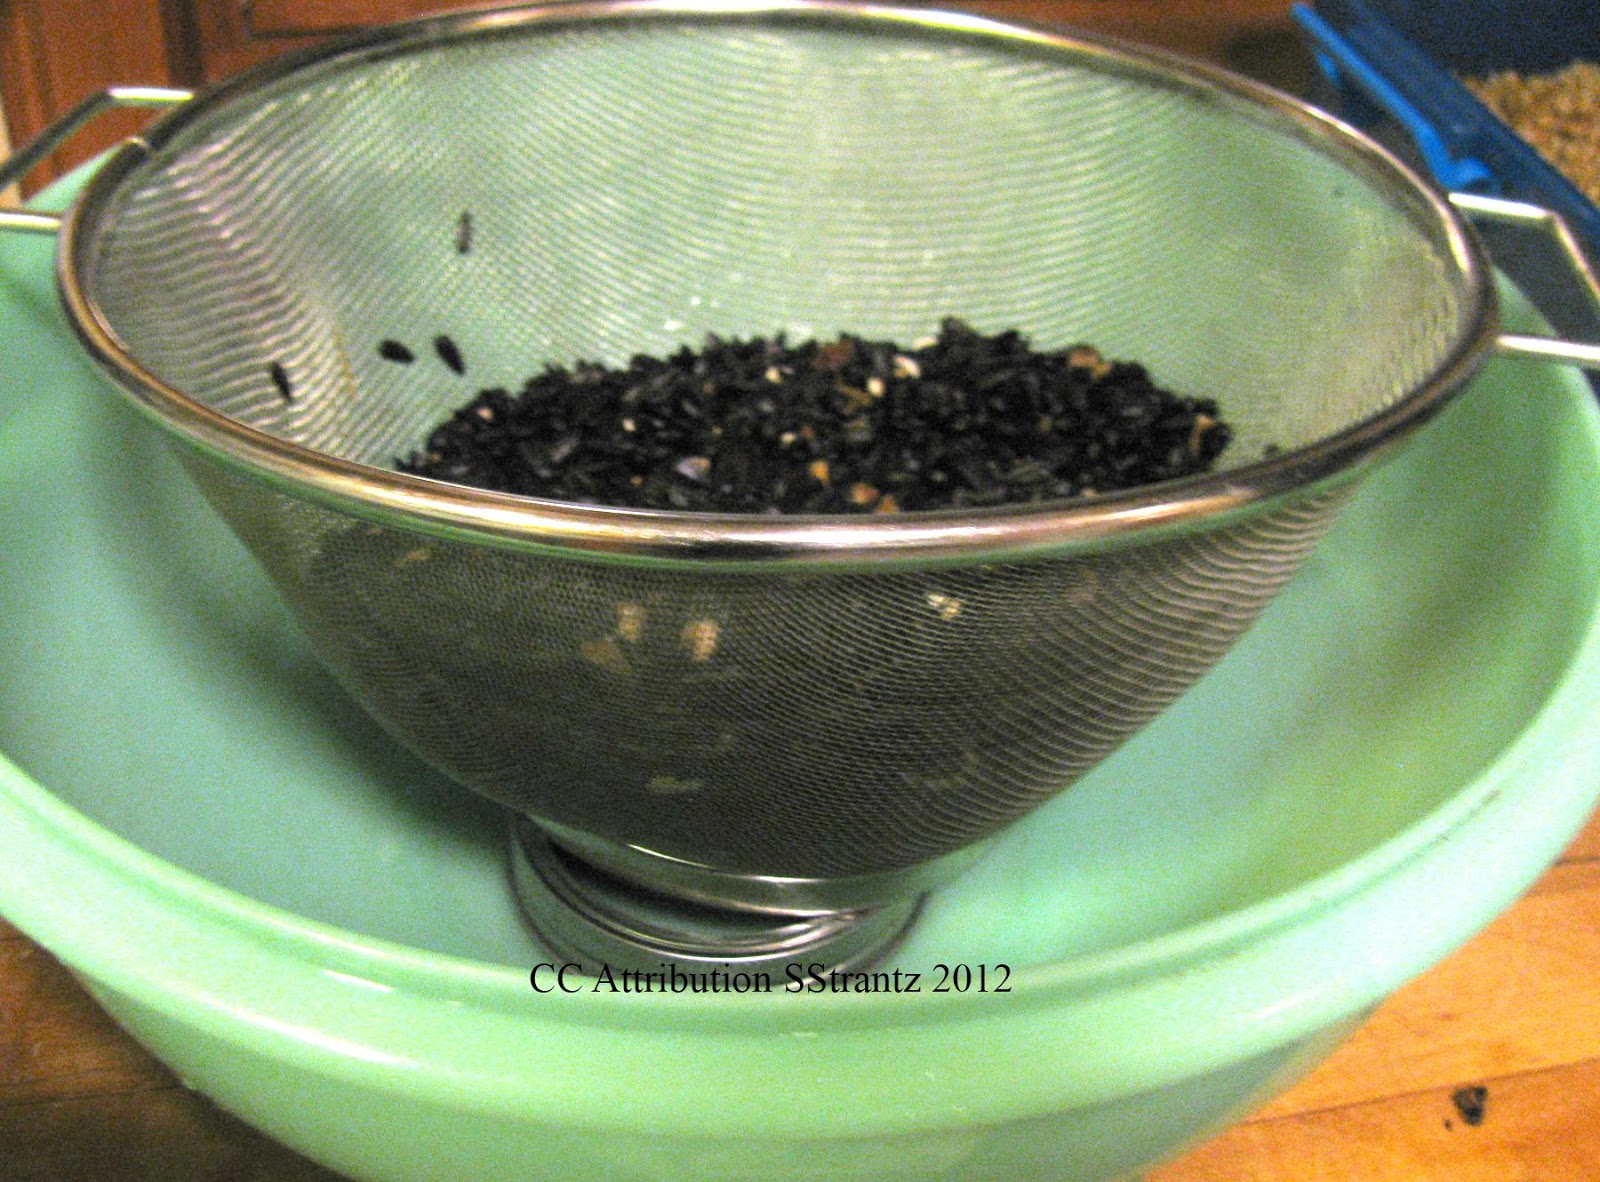
For a small flock of birds, sprouts can be done right on your kitchen counter taking very little time or effort. For the small flock, I use a stainless steel strainer and a large bowl.
1. Put as many seeds you want to sprout into the strainer(s)
2. Put the strainer(s) in the large bowl(s) and cover with water. Let soak overnight.
Photo: Sunflower Seeds Soaking
Photo: Wheat Berries Soaking
3. Drain off the water in the morning by lifting the strainer out of the bowl. Dump out the water left in the bowl, then rinse the seeds by running water over them from the faucet and shake out the excess water into the sink.
4. Put a canning jar ring in the bottom of the empty bowl and set the strainer with the seeds on top of it. This lifts up the strainer and allows room for any moisture to drain from the strainer while keeping the seeds from sitting in the water below. (If you don't have a jar ring, get creative and find something to use that you DO have! The goal is to allow the strainer to drain without having the seeds sitting in water in the bottom of the bowl.)
Keep the bowl in an area where it won't receive direct sunlight. Sometimes I just put a paper towel over the top to keep out excessive light.
5. One or 2 times daily, lift the strainer out of the bowl and rinse under cold water from the faucet. Then either toss the seeds around a bit in the strainer (like tossing a pizza dough) or give them a little stir with your hand and replace the strainer back in the bowl on the ring. (The rinsing and tossing or stirring with your hand is important. This will keep any molds from growing in your seeds.)
6. Repeat step 5 for 2-3 days (until short root tails appear on the seeds).
Photo: Wheat Sprouts
Photo: Sunflower Sprouts
Photo: Mixed Sunflower and Wheat Sprouts
7. Feed by tossing on the ground. Chickens are designed to peck and scratch for their food on the ground. They love the treasure hunt!