I have been wanting to set up a smaller incubator than larger styrofoam cooler incubator I made back in the summer. The original bator is huge and can set a flat of eggs (2.5 dozen) at one time. I don't want to have to regulate and run that big box just to hatch a few eggs at a time.
I was trying to think outside of the box. I asked myself what can a chickenloving housewife use to make a small incubator out of inexpensively? How can she do it safely and without worrying about the electrical and know she did it right?
So, I built a new one.
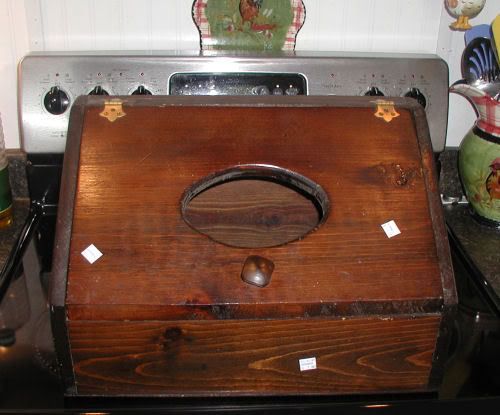
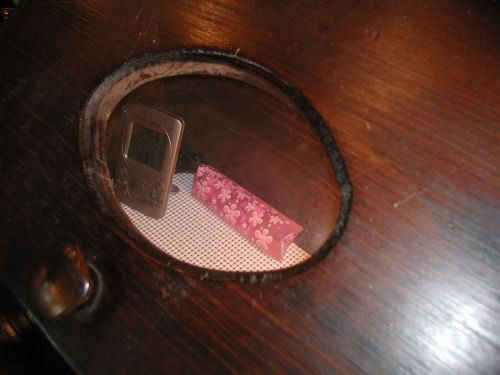
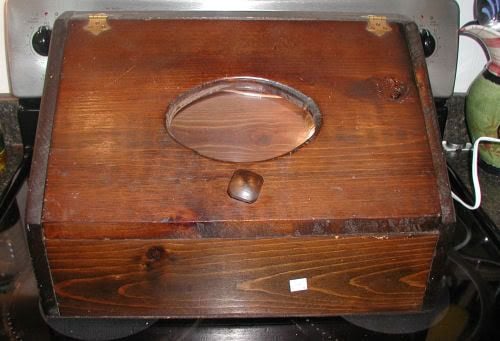
I used an old breadbox with a plexiglass window insert that I found at the goodwill for $7. You probably have one or know someone with an old one they don't use any more. If I was back home in Georgia I know my sister has 2 I couldhave gotten!

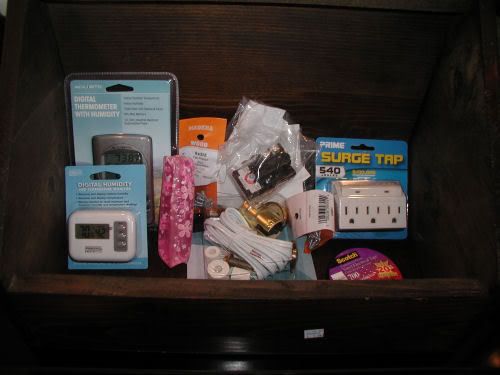
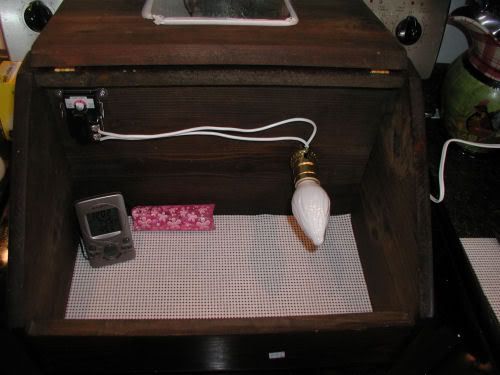
I picked up one of the $11 thermometer/Hygrometer with probe combos by acurite (I have one but I wanted a second one incase I decided to use both bators at one time), a water wiggler $0.88, $5 a bottle lamp kit, and an $8 single pole hot water heater thermostat. I already had some little wood screws, electrical tape and a surge protector.
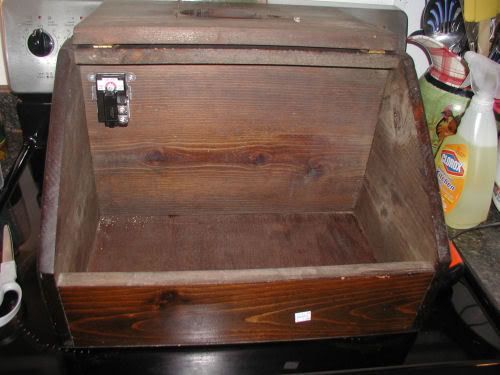
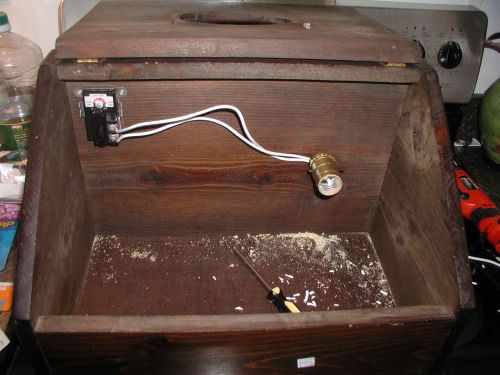
First I secured my thermostat to the upper top corner of the breadbox. I did so because I want the thermostat as far away from the heat source as possible. I want to be sure the eggs on that side don't get too cool.
Next I drilled a hole for the lamp kit making sure the lamp neck was placed so that when the lid closes the light bulb is not touching or extended out too far.
Using the bottle lamp kit I threaded the hollow metal tube through the hole and then threaded the electrical wire through the tube and screwed down both ends to make it tight.
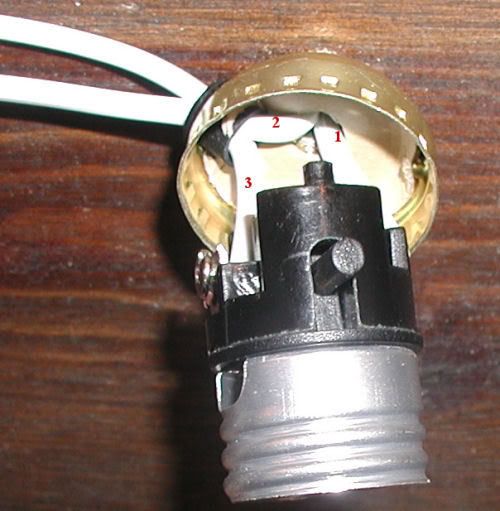
Following the lamp instructions I wired the ribbed wire to the brass screw (see #1). I then cut a piece of the wiring and ran that from the silver screw through the side hole to the thermostat (see #3). I took the other wire coming into the box and threaded it through the side hole and wired it to the other screw on the thermostat (see #2).
It wasn't hard. You can do it. Take your time. If you wire it wrong when you plug it in your breaker will trip. You'll know then what to do. LOL
I then cut a piece of shelf liner and laid it in the bottom so the eggs would be coushioned and not roll.
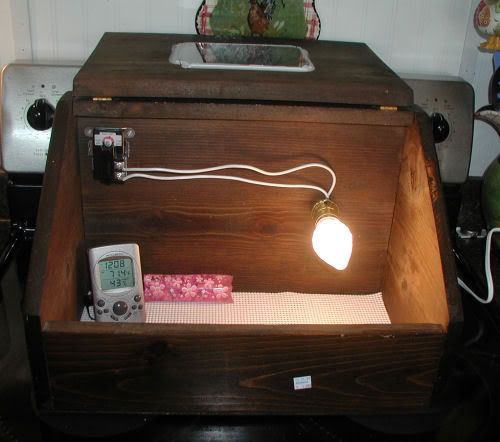
The light works, the thermostat works.
I did caulk around the little window so that warm air wouldn't easily escape and cause the light to run more than it needed.
I did not drill any vent holes in mine for 2 reasons. The humidity in my house is at 52% and has beed holding that for the past week. The lid has a lillte gap along one side that I think will let the bator breath properly. If I need more venting it won't take 1 min to drill out a hole. We'll see.
If you build one you might need to drill holes and plug them with a cork as needed.
Now it is sitting and warming up. It will run from now until the Blue Orpington eggs Cynthia is sending me has their 21+ days in the incubator.
I am not one to count my cicks before they hatch so wish me luck. The eggs went in the mail this morning. I am on pins and needles hoping they make it to me intact.
** I will update this as needed if I have to change anything.
I also want to add that this little bator can sit on my kitchen counter and not be in the way. The big bator I had was always in the way no matter where we had it while testing it. We ended up keeping that one on the dining room buffet with the last batch of eggs.
This one is pretty and won't look out of place on the countertop.
Nothing is wrong with functional and decorative!
I was trying to think outside of the box. I asked myself what can a chickenloving housewife use to make a small incubator out of inexpensively? How can she do it safely and without worrying about the electrical and know she did it right?
So, I built a new one.
I used an old breadbox with a plexiglass window insert that I found at the goodwill for $7. You probably have one or know someone with an old one they don't use any more. If I was back home in Georgia I know my sister has 2 I couldhave gotten!
I picked up one of the $11 thermometer/Hygrometer with probe combos by acurite (I have one but I wanted a second one incase I decided to use both bators at one time), a water wiggler $0.88, $5 a bottle lamp kit, and an $8 single pole hot water heater thermostat. I already had some little wood screws, electrical tape and a surge protector.
First I secured my thermostat to the upper top corner of the breadbox. I did so because I want the thermostat as far away from the heat source as possible. I want to be sure the eggs on that side don't get too cool.
Next I drilled a hole for the lamp kit making sure the lamp neck was placed so that when the lid closes the light bulb is not touching or extended out too far.

Using the bottle lamp kit I threaded the hollow metal tube through the hole and then threaded the electrical wire through the tube and screwed down both ends to make it tight.
Following the lamp instructions I wired the ribbed wire to the brass screw (see #1). I then cut a piece of the wiring and ran that from the silver screw through the side hole to the thermostat (see #3). I took the other wire coming into the box and threaded it through the side hole and wired it to the other screw on the thermostat (see #2).
It wasn't hard. You can do it. Take your time. If you wire it wrong when you plug it in your breaker will trip. You'll know then what to do. LOL
I then cut a piece of shelf liner and laid it in the bottom so the eggs would be coushioned and not roll.
The light works, the thermostat works.
I did caulk around the little window so that warm air wouldn't easily escape and cause the light to run more than it needed.
I did not drill any vent holes in mine for 2 reasons. The humidity in my house is at 52% and has beed holding that for the past week. The lid has a lillte gap along one side that I think will let the bator breath properly. If I need more venting it won't take 1 min to drill out a hole. We'll see.
If you build one you might need to drill holes and plug them with a cork as needed.
Now it is sitting and warming up. It will run from now until the Blue Orpington eggs Cynthia is sending me has their 21+ days in the incubator.
I am not one to count my cicks before they hatch so wish me luck. The eggs went in the mail this morning. I am on pins and needles hoping they make it to me intact.
** I will update this as needed if I have to change anything.
I also want to add that this little bator can sit on my kitchen counter and not be in the way. The big bator I had was always in the way no matter where we had it while testing it. We ended up keeping that one on the dining room buffet with the last batch of eggs.
This one is pretty and won't look out of place on the countertop.
Nothing is wrong with functional and decorative!

Last edited:


