Now I have silkies and no other breed...they do not roost and in my location there are no predators... (just saying this before hand so you understand the background) ...however you can perhaps get some ideas from what I have done in making my
summer coop ... the main thing I have found handy is building against an existing wall makes everything soooo much easier...
Ok... first a bit of background: I do have this fab brick bldg ;a small "shed" with concrete floor and electricity but it is wayyyyy to massive for the space my silkies need as they come and go at will (no preds here to really worry bout) and they only use the coop to sleep in (or on the rare occasion hang out ) ... they dont roost and insist on sleeping in a big ole pile together in one cardboard box (which is getting way too small) besides I need it to store my bike in.
Now this is the brooder hutch Miss Daisy uses at the moment for her and the chickies (still waiting on the basketmaker to duplicate Mhings basket which is falling apart and retired from duty) and this pic is of the brooder hutch on the chicken porch I recently "finished" (If you look carefully you will see Miss Daisy sitting in there at the left)
(by the way ...that is bandit my banty silkie peeking out underneath there!)
>So ...now to the new summer coop I built using only five screws and a can of that insulating expandable foam sealer: the new summer coop is bordering the left hand side of this raised paved "porch" (photo above) and is made exactly to measurement to hold three of the normal sized cardboard boxes side by side (free from the grocery store!)
... here is how I began :
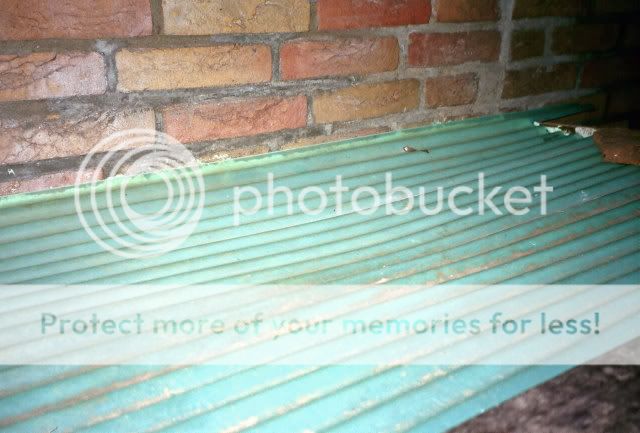
>(you can see the can of expandable spray insulation/sealer I used to "glue" everything together lol) the beam and fencing are resting on two concrete roll borders that I have cemented underneath (somewhat) in place (later sprayed in some foam at the back to make it super stable >you can see a wee bit of the foam at the bottom left against the wall) Then I took some old wood panels from a privacy fence that had fallen apart and sawed it to the size and shape I wanted and with the foam "glued" the plastic wall paneling (cut to same size and shape) to it:
>ok, sides are up in place (held to wall and base by the foam) and the back paneling is simply "glued"(the expandable foam sealer) to the wall (also by the foam sealer) >the side walls are an inch lower to hold an inner ceiling (second photo below)
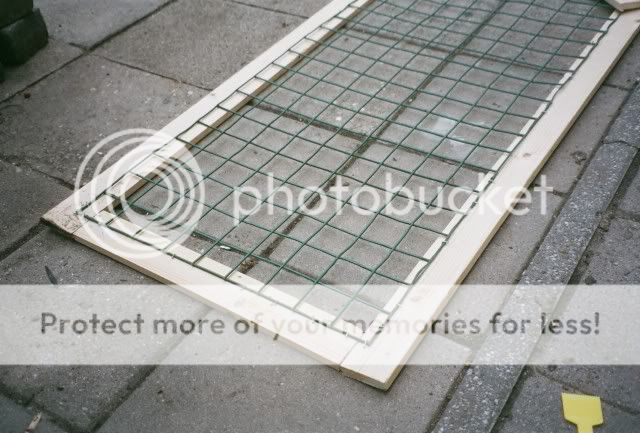
...at the back I put in a plastic bar thingy to catch the rain off the top roof (it rains alot here and can get chilly at nite so this is the reason for the double roofs)... I ran out of film before I could take a pic of the front panel in (first pic below) and painted but got a pic of the rest painted and pretty much finished (hadnt cleaned up from my bldg mess tho lol):


 Did the Geomagnetic storm impact chicken behavior for anyone else?

 Wind chill doesn’t count, right?
 BYC's 52-week Photography Challenge. Week 4: (Jan 26 - Feb 1, 2026). Theme: Books!
 BYC's 52-week Photography Challenge. Week 3: (Jan 19-25, 2026). Theme: Hot, Hot, Hot!