Chronicles of a New Coop

bwebster

Songster
Mar 3, 2020
97
130
136
Connecticut
First off, I really love the advice and existing threads on BYC. That is one reason I want to start a thread following our new coop build. The advice, questions, experience and criticisms are an incredible resource. I read a few old threads and was directed to some by members that were very helpful. One of which gave me idea to ditch the metal shed idea and build my own! And, perhaps down the road, my thread will be referenced by someone as well.

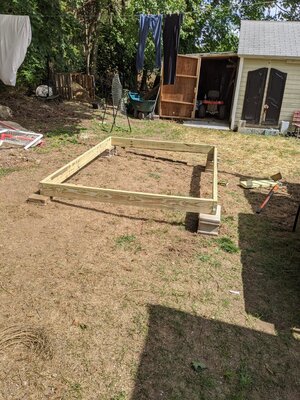
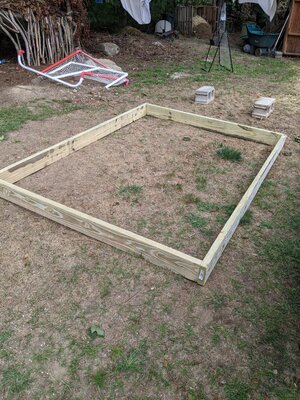
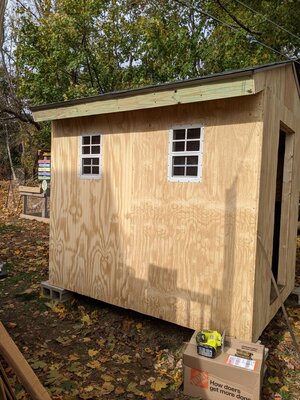
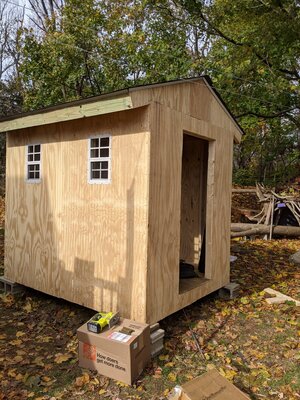
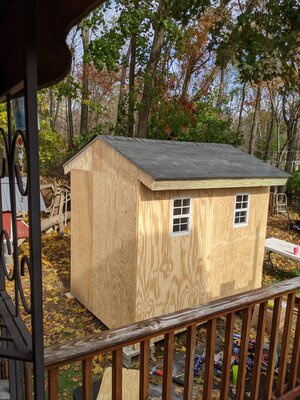
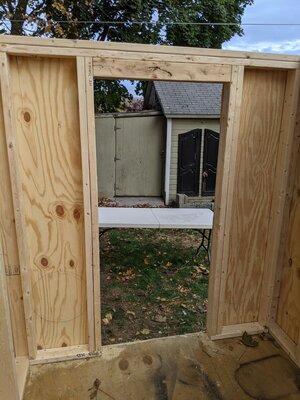
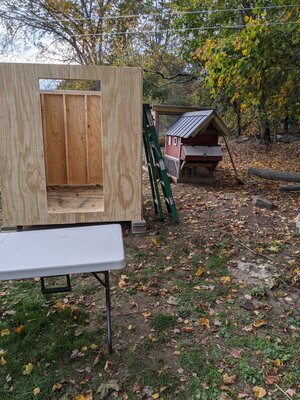
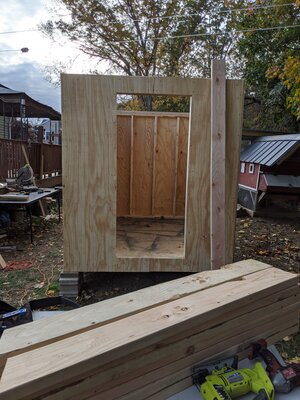
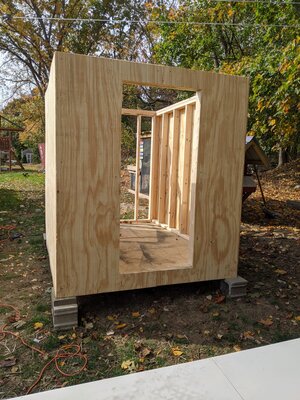
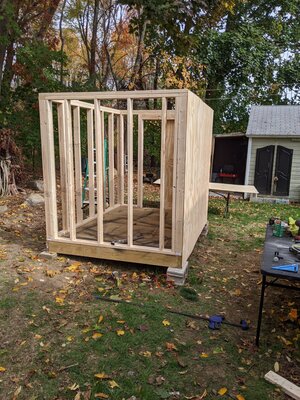
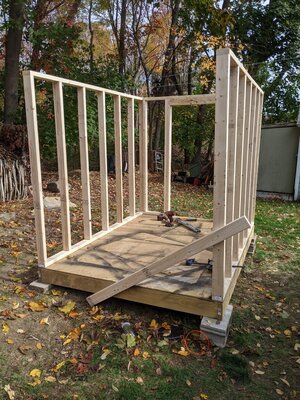
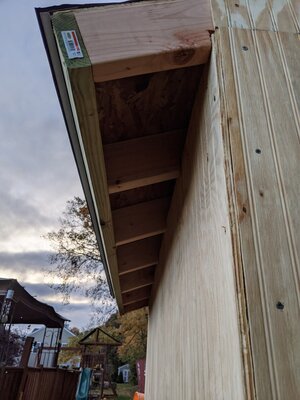
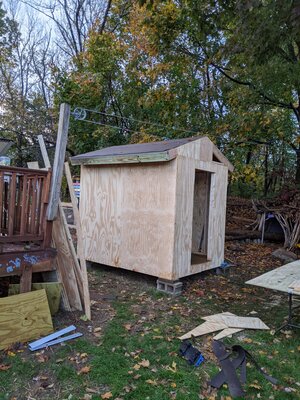
The coop will be 6x8, framed like a shed with a gable roof. I finished the floor and getting it up off the ground this weekend and started framing the walls. Well, one wall. It's in the garage until I frame the rest and get the lumber for the roof. Leveling on the uneven ground was a bit of a hassle but thankfully I had different sized pavers lying around.

Attached are a few photos so far, perhaps one even containing a rare glimpse of the creatures that inhabit my property. Otherwise known as my children.

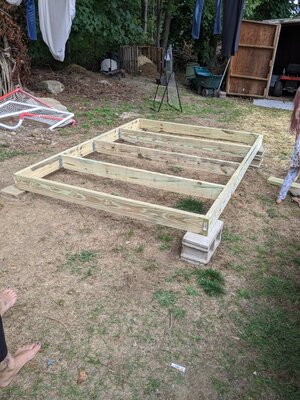
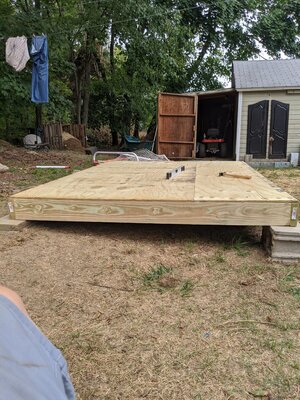
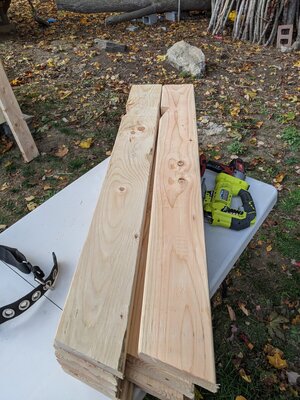
I framed the floor with PT 2x6s hung with joist hangers 24" on center. I decided 24" instead of 16" to save money, and that the load on the floor will be chickens and their accompaniments and not my tractor. Looking back, it would've only been like $15 more, but this should hopefully be OK. On top of that is PT plywood.

Excited to get back to work but I also have to work at real work. Drag. Updates when they come!
 

Attachments

  • IMG_20200913_121629.jpg
    IMG_20200913_121629.jpg
    1.2 MB · Views: 33
  • IMG_20200913_123628.jpg
    IMG_20200913_123628.jpg
    1.1 MB · Views: 27
  • MVIMG_20200913_115547.jpg
    MVIMG_20200913_115547.jpg
    1.2 MB · Views: 23
  • IMG_20200913_132914.jpg
    IMG_20200913_132914.jpg
    1 MB · Views: 27
Roof and windows all set. The door I built was from what wood I had left over, which was warped. That's sitting under wet towels and cinder blocks for a few days to see if it'll get back into shape. Back to regular house duties and work for the week. Hope to put vinyl floor down, install door and nesting boxes and roosts next weekend.

Now, leaf time.
 

Attachments

  • PXL_20201101_154110734.jpg
    PXL_20201101_154110734.jpg
    866.4 KB · Views: 23
  • PXL_20201101_154115837.jpg
    PXL_20201101_154115837.jpg
    942.8 KB · Views: 21
  • PXL_20201101_154132034.jpg
    PXL_20201101_154132034.jpg
    875.5 KB · Views: 24
Boy that took forever for supplies!! Joking. Finding the time was the real hurdle, but I was able to get quite a bit done today. One thing I've noticed since Covid is the price of lumber is way higher than it was last year. Bummer.

Anyway, today I framed the wall with the people door, put up the walls and sheathing. I had a ______ moment when doing this. (Fill in the blank with your preferred term). I should've only sheathed the side walls, put up the rafters, and then did other walls. Now there is nowhere to attach the pitch section of sheathing. Oh well. I plan to just add a third top plate on those walls lol.

I had a tough time attaching the rafters to the ridge board without metal hangers so I called it a day right there. I have all the rafters cut and ready to go once I get those. Toe nailing is not a strength of mine. Pitch of roof is 4/12.


So left to do is frame the roof, put up OSB sheathing, felt, and shingles. Build a door, frame the windows, install chicken door, add trim, move old run over and connect, then expand the run. And all the fun stuff inside like best boxes and roosts.

I plan to build a storage area with a poop tray above. And ideas or experience or pics of inside coop storage???

I attached a few pics of the progress. It's certainly a bit taller than it needs to be (6' walls) but we wanted plenty of head room and plan to put roost fairly high up.

Updates when they come!
 

Attachments

  • PXL_20201025_201455055.jpg
    PXL_20201025_201455055.jpg
    738 KB · Views: 23
  • PXL_20201025_210249057.jpg
    PXL_20201025_210249057.jpg
    619.3 KB · Views: 22
  • PXL_20201025_210229027.jpg
    PXL_20201025_210229027.jpg
    1 MB · Views: 20
  • PXL_20201025_201451592.jpg
    PXL_20201025_201451592.jpg
    696.8 KB · Views: 18
  • PXL_20201025_170600257.jpg
    PXL_20201025_170600257.jpg
    880.3 KB · Views: 18
  • PXL_20201025_161409537.jpg
    PXL_20201025_161409537.jpg
    1 MB · Views: 17
  • PXL_20201025_144712490.jpg
    PXL_20201025_144712490.jpg
    1 MB · Views: 24
Roof up, sans shingles. There's a rain storm heading this way (with snow at the tail end, apparently), so I wanted to have the roof up and at least the underlayment down. I was able to get that done today. A little tough by yourself, but I managed. I made wound up screwing some 2x4s to help me install fascia board alone. Worked out perfect. Tighten or loosen screws to raise/lower board to be flush with rafters.

After this storm passes I'll finish the siding/sheathing and get the rake drop edges up and shingle the roof. Then I have to build a door, install the windows, under roof deck insulation, put down vinyl floor, and all the inside accompaniments.

@aart I took your advice and will leave soffits open and cover with hardware cloth.

Pics attached. Feels like I'm rounding the corner here! I've made a mistake here or there, a bad cut or two, but it's coming together and it is very structurally sound. Thankfully trim exists to cover my mistakes!
 

Attachments

  • PXL_20201028_213225225.jpg
    PXL_20201028_213225225.jpg
    405.4 KB · Views: 20
  • PXL_20201028_213432094.jpg
    PXL_20201028_213432094.jpg
    947.3 KB · Views: 19
  • PXL_20201028_174622454.jpg
    PXL_20201028_174622454.jpg
    840.7 KB · Views: 17
Last edited:
WooHoo!! Congrats!
When they first went in they went up on the storage shelf and on top of the nesting boxes.
You could put a sharply angled board on top of nests.
Not sure about the shelf, that is going to be a very attractive place for them to roost,
might have to cover it with a mesh 'door' to keep them off of it.

How did putting HC on the soffits turn out?
 

New posts New threads Active threads

Back
Top Bottom