How to build a killing cone.

@ejerud We made killing cones like this, and they are great! I agree with one of the previous posters......it is good to have two cones.....keeps the process moving along a little better.

We used a ball-peen hammer to smooth the seams which worked very well......then the rivets. I used my Dremmel to make a keyhold to hang onto a nail without worrying about it falling off, so it could be taken in out of the weather.

Oh, one more thing.....we got our sheet metal at Lowe's.......LOL.
 
I participated in a processing this past summer where they had a whole line of these nifty flashing cones and they were the most inefficient things I've ever seen! The shoulders of the birds wouldn't fit into the narrow end of the cone and the bird kept tucking their head back up into the cone and the wide end was too wide, allowing access for their feet to fold into the cone, whereby they would just push with their legs and shrug their shoulders until they had flopped out of the cones. It was like watching popcorn!

It didn't get easy until I dug my old plastic bleach jug cone out and tacked it up on a fence post...fit even the biggest CX there and worked equally well on the smaller laying hens to be processed as well.

I was pretty embarrassed for the guy that had made all those expensive metal cones...they looked great, were of the correct dimensions..just not real practical when actually used.
I think a lot of it depends on the dimensions you use to make the cone and the kind of bird you are butchering. We made two of them, and have not had any problems. We have had instances where the bird tuck its head as it went into the cone, but I just reached up inside and eased it down through the end of it. With our CX, the shoulders were a little snug and the amount of neck sticking through the the bottom of the cone was less because of the shoulder size, but we had no problems with the bleedout. The ones we made have worked well, but I just process birds in pairs, from start to plucked and eviscerated carcass, then get another pair.....usually no more than 8 birds total in a day, which I then take inside to finish out for the freezer.
 
Any suggestions on what to use to roll the top and bottom edges so they do not pose a risk of cutting your hands either putting the birds in or reaching inside to get the head?
 
Funny note- if using a milk jug make sure it is still secure between birds. We've used the same jug at multiple butcher times but this time we were processing buff orpingtons. One side of the jug popped off the nail and the cockerel swung right out. By the time I turned around at the sound the chicken with no head had gotten his legs under him and almost ran away! Kids were laughing so hard at the sight of me having to catch a headless bird and yelling for it to get back here;-)
 
Has anyone tried one of these for Javas? They are rather stocky birds and I am concerned this design may be too narrow.

Thanks!

Indy
 
Funny note- if using a milk jug make sure it is still secure between birds. We've used the same jug at multiple butcher times but this time we were processing buff orpingtons. One side of the jug popped off the nail and the cockerel swung right out. By the time I turned around at the sound the chicken with no head had gotten his legs under him and almost ran away! Kids were laughing so hard at the sight of me having to catch a headless bird and yelling for it to get back here;-)

It helps to use roofing nails...nice, wide head on those and I've never had one pull through, no matter how many years or heavy birds I use on them. If not having roofing nails, a regular nail or screw with a washer would do well.
 
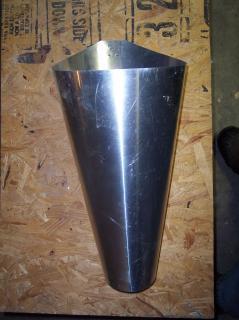
I decided that my first post should be informative. Here are instructions for building your own killing cones for broiler sized (4-8 lbs.) chickens. The final dimensions are 9" top opening, 4" bottom opening and a length corresponding to the width of flashing you use.
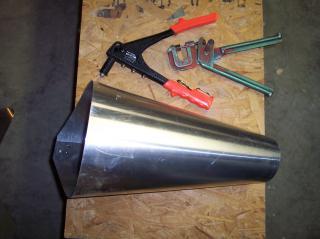
65688_100_3901.jpg


TOOLS:
Drill
Hand Riveter
Clamps
1/8" drill bit
Magic Marker or Grease Pencil
Framing Square

MATERIALS:
14"-16" wide roll of aluminum flashing or a 16"x30" rectangle of galvanized sheet metal.
Three 1/8"x1/4" aluminum rivets per cone

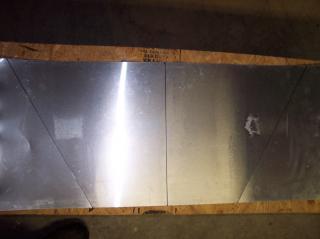
Step 1. Cut a piece of 14"-16" wide aluminum flashing to a length of just over 30".
Step 2. Find the center of both long sides and make a mark connecting them using a square.
Step 3. On 1 of the long sides measure 15" from the center mark each way.
Step 4. On the other long side measure 7" from the center mark each way.
Step 5. Connect the end of of one 15" mark to the corresponding 7" mark. Repeat for the other side.
You'll end up with a trapezoid that looks like this.
65688_100_3890.jpg

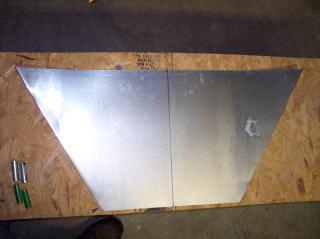
Step 6. Score the diagonal lines with a utility knife and fold gently away from the cut to tear the waste pieces off.
Here's what you'll end up with.
65688_100_3894.jpg

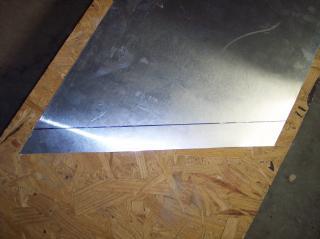
Step 7. Mark a line parallel to one cut edge 1 1/2" in.
It will look like this.
65688_100_3896.jpg

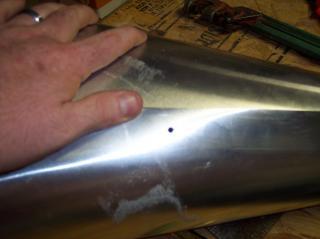
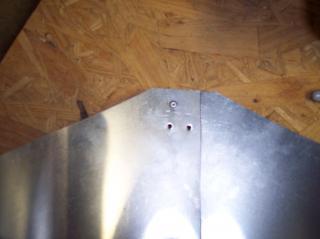
Step 8. Roll the metal up so that the marked side is overlapped to the line and clamp it. Drill a hole in the overlapping portion near the top, middle and bottom of the cone. Put a rivet in the hole from the INSIDE. The head of the rivet will be on the inside and is smooth. This way there is nothing for the bird to get snagged or cut on inside the cone.
65688_100_3898.jpg

Step 9. Drill one or two holes near the top of the cone to hang it by.
65688_100_3899.jpg

There you have it. One killing cone that can be cut out and assembled in less than 5 minutes.
65688_100_3900.jpg
Great instructions. I used your instructions but instead of useing sheet aluminum, I used old stove pipe I had laying around. I had to use a hammer to beat out the crinkles and had to use about 10 rivets but it turned out ok.
 

New posts New threads Active threads

Back
Top Bottom