- Apr 13, 2012
- 5
- 11
- 9
Hello all, 1st post! My wife and I are new to the chicken world and about a month ago we decided to build a coop and get a few pullets to raise for pets and eggs. We started with a dog bowl for water and seeing how dirty that was after a short day I decided to do some research on a cleaner cheaper system that would require minimal maintenance. So after searching on the web for products I didn't really find anything that interested me so I decided to build my own. I had already built a semi automatic food feeder which was just a 4" PVC hopper set up with an elbow that are seen on this forum quite a bit. I get away with filing it once a week and that works great for my wife and I. On to the waterer, I saw a lot of bucket style feeders with pvc pipe leading down to a nipple system and Iiked the design, but it still required you to fill it and clean it out once in a while. I built on that concept and turned it into a sealed system that should require no maintenance if it works as planned. I hooked it up yesterday and all of the birds have taken to it and seems as if it is going to do the job. Time will tell. This system can be expanded to accommodate for how many birds you may have, here are the details:
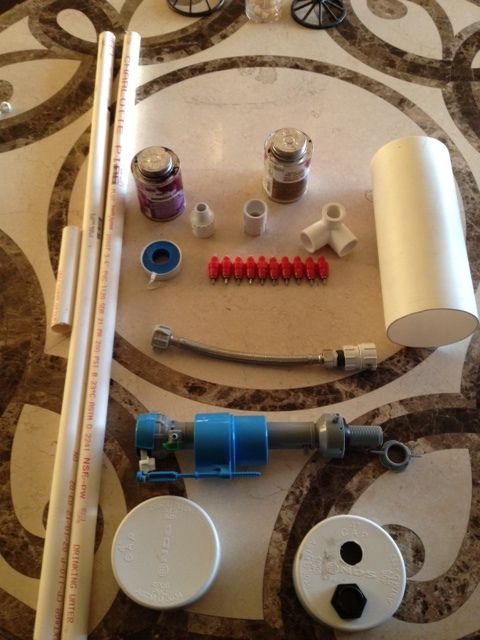
Here is the parts list:
4" PVC about 12"
4" PVC caps (2)
PVC primer and glue
screw in nipples (found on fleabay)
3/4" PVC sized to your needs
3/4" caps (2)
Toilet fill valve
11/32" drill bit for the nipple feeders
plastic bulkhead fitting for a swamp cooler
PVC Hose thread to 3/4" slip fitting
Teflon tape or silicon

I think that is it for parts, it came in under 30 dollars for everything listed above besides the pvc primer, glue, teflon tape and the drill bits as I had them at home already. On with the construction and design:
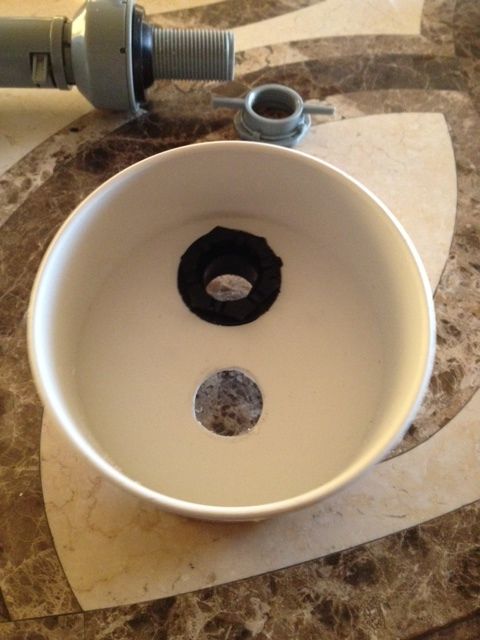
I started with the 4” cap and drilled the 7/8” hole to accommodate the toilet fill valve. Notice I off set the hole as the fill valve is not centered on its pipe, make sure and see how it will fit inside the 4” PVC Tube so that it operates freely and drill accordingly. I then drilled the 3/4” hole for the bulkhead fitting that will eventually feed the nipples below. Next I put together the bulkhead fitting and installed it on the cap.
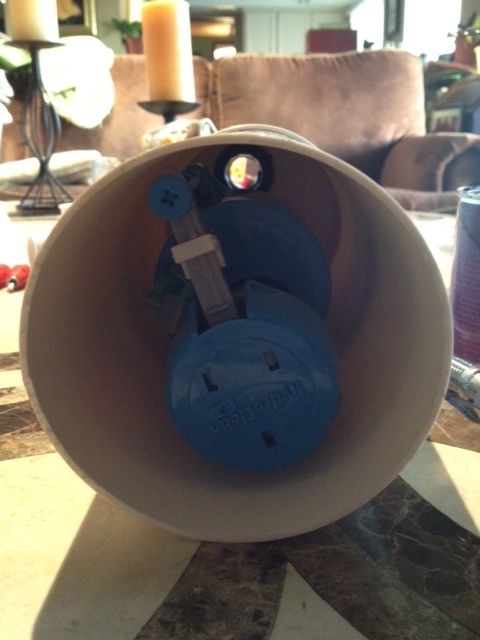
Using the remianing 7/8" hole I installed the toilet fill valve and installed the cap over the pipe and made sure that it operated freely inside the PVC pipe before securing the fittings.
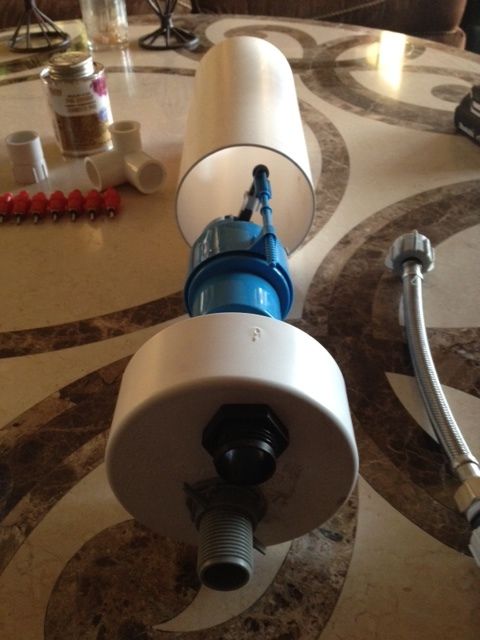
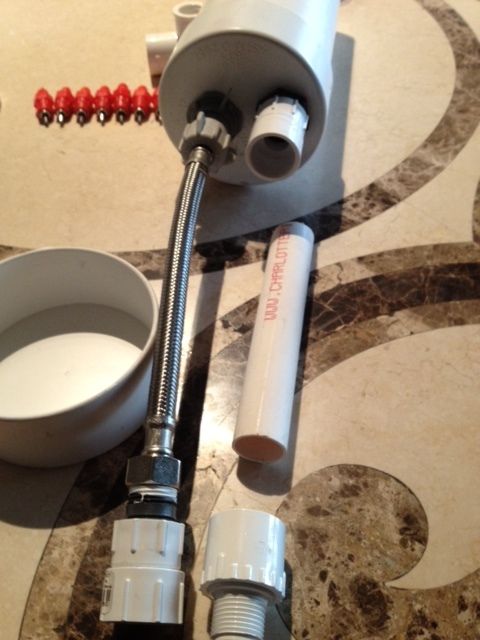
This is what it looks like from the outside before sliding it together.
I then attached the toilet supply line to the fill valve threads, and on the opposite side attached the 1/2" coupler to the 1/2" to garden hose fitting, this is where the garden hose will be attached. I also attached the garden hose to 3/4 slip connector to the bulkhead fitting that will feed the PVC to the nipples. The 3/4' PVC can be cut to size depending on how long you need it, mine was only 10" or so. The PVC T fitting gets glued to the bottom and then feeds the pipe to the nipples.
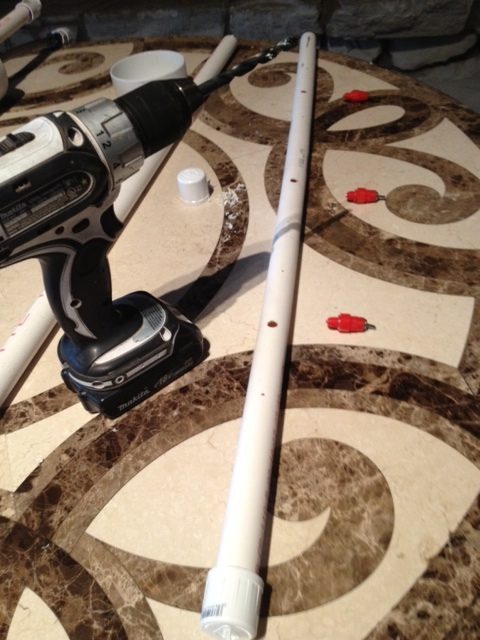
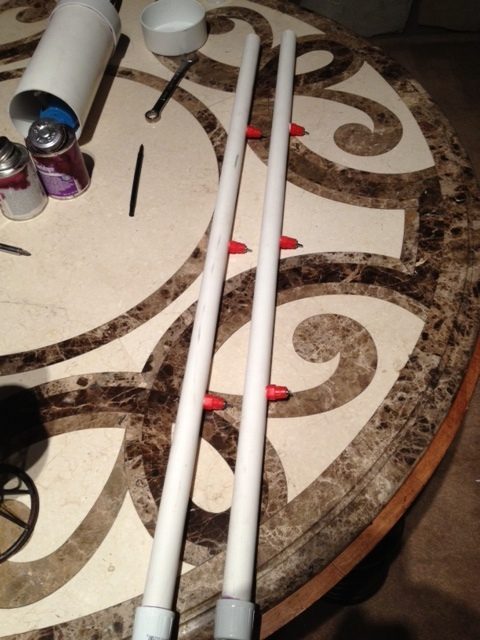
Nipples and final assembly. The last step was to drill the 11/32" recommended holes to fit the nipples. I have 11 hens so I decided 6 nipples should do the job. I wrapped up the nipple threads in teflon tape and screwed them right in. Capped up the ends of the 3/4" PVC and attached and glued the other end to the T fitting.
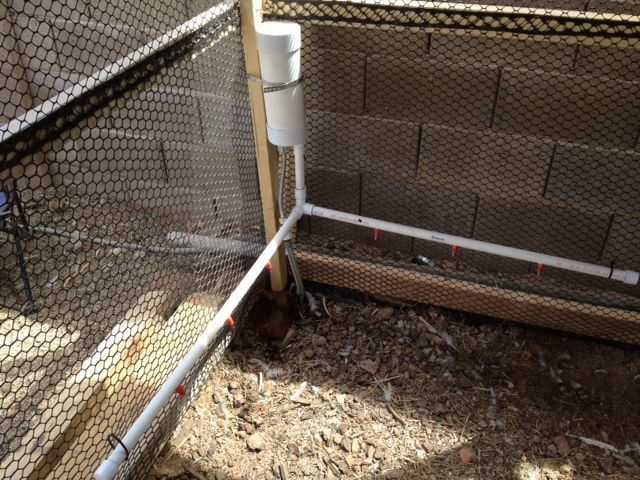
Fully assembled, I used the 90 degree T fitting so that I could install it in the corner of the run,
Installed and working beautifully, so far the pullets have figured it out quite quickly so it seems like its going to do the job. Hope you enjoyed the write up I have a lot of fun thinking of ways to make our very busy lives easier and doing it cheaper. Cheers.
Here is the parts list:
4" PVC about 12"
4" PVC caps (2)
PVC primer and glue
screw in nipples (found on fleabay)
3/4" PVC sized to your needs
3/4" caps (2)
Toilet fill valve
11/32" drill bit for the nipple feeders
plastic bulkhead fitting for a swamp cooler
PVC Hose thread to 3/4" slip fitting
Teflon tape or silicon
I think that is it for parts, it came in under 30 dollars for everything listed above besides the pvc primer, glue, teflon tape and the drill bits as I had them at home already. On with the construction and design:
I started with the 4” cap and drilled the 7/8” hole to accommodate the toilet fill valve. Notice I off set the hole as the fill valve is not centered on its pipe, make sure and see how it will fit inside the 4” PVC Tube so that it operates freely and drill accordingly. I then drilled the 3/4” hole for the bulkhead fitting that will eventually feed the nipples below. Next I put together the bulkhead fitting and installed it on the cap.
Using the remianing 7/8" hole I installed the toilet fill valve and installed the cap over the pipe and made sure that it operated freely inside the PVC pipe before securing the fittings.

This is what it looks like from the outside before sliding it together.
I then attached the toilet supply line to the fill valve threads, and on the opposite side attached the 1/2" coupler to the 1/2" to garden hose fitting, this is where the garden hose will be attached. I also attached the garden hose to 3/4 slip connector to the bulkhead fitting that will feed the PVC to the nipples. The 3/4' PVC can be cut to size depending on how long you need it, mine was only 10" or so. The PVC T fitting gets glued to the bottom and then feeds the pipe to the nipples.
Nipples and final assembly. The last step was to drill the 11/32" recommended holes to fit the nipples. I have 11 hens so I decided 6 nipples should do the job. I wrapped up the nipple threads in teflon tape and screwed them right in. Capped up the ends of the 3/4" PVC and attached and glued the other end to the T fitting.
Fully assembled, I used the 90 degree T fitting so that I could install it in the corner of the run,

Installed and working beautifully, so far the pullets have figured it out quite quickly so it seems like its going to do the job. Hope you enjoyed the write up I have a lot of fun thinking of ways to make our very busy lives easier and doing it cheaper. Cheers.
")

