New plan! (LOTS O PICS, adding them as I go)

Today's "find", pallet crates! I rushed to Spokane Valley because the gal I talked to on the phone said they only had 2 left. I get there and they have like 102 left! So, I was nice, went insode and once I finally found an employee that wanted to acknowledge I exsisted, was told the pallets are outside, help myself. When I ased if I could have help (a pallet I can do alone, a giant box with a pallet attached is a bit awkward), I got yelled at! If I wanted them, I had to load them by myself! Okay, I'm a big girl...I can do this... It took me a few minutes to drag the first one over to my truck (I couldn;t ull up to them because then I would be blocking the entrance to the store), got it tipped up and wiggled up onto the tailgate! Of course, I still have the sandbags and their frame (2x4 boards) in there, so up and over those...a nice fellow who was done shopping helped me get it over the sand bags. After he left, I wiggled it some more and got it turned so that I could maybe fit a second crate in my truck. The second had to go in the "skinny" direction, otherwise it looked like it was going to roll right off the tailgate! About this time I realize I left my tie-down at home and have been treated so poorly by the employees here there is NO WAY I'd ever spend money in the store! So, I called my SO's dad who lives in the Valley and asked to borrow (another) tie-down. I sat in the parking lot getting dirty looks from each and every employee that happened near the front of the store until he came and helped me secure my freebies for the 12 mile drive back home.

165677_183253931698126_100000405613287_481582_3868967_n1.jpg


I got bored while waiting and took this picture, not a great one, but my sell phone was dying, lol. The crates are each 4'x3'4"x3'10.5", two of them up ended are going to be my "stud walls".
smile.png
I'll remove the center boards as they would be in the middle of the coop, and the boards from one whole long side (roughly 6'8") so that it will be easy to get into and clean.

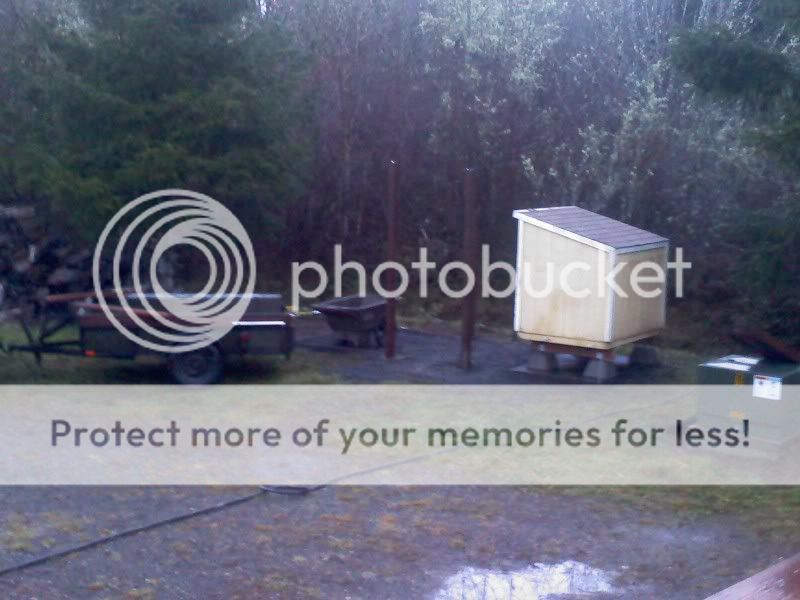
Between the OSB/particle board I have purchased and the 3 sheets of paneling we've removed from various places in the house, I think I'm set except for screws/nails/etc... and the Hardware cloth!
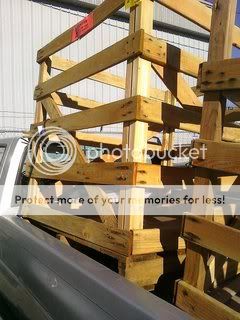
 
I like your idea of hitting the bargain bin. VERY resourceful.

On the subject of the OSB (oriented strand board, the board made of big chunks), it will be usable for your sidewalls and roof of your coop, but I would suggest covering it with paint at a minimum, or some sort of roofing material like comp or wood shingles. It will last for a while just painted (3 or 4 years), and less time unpainted. I know you are a dry-sider, (I'm a 206'er) but even so, you do have moisture to deal with over there in the winter and spring.

On the subject of the HDF and MDF (High and medium density fiber board), it is unusable anywhere outside, painted or not. It will disintegrate in a year or two and will have no sturctural integrity. It is made to be used inside as floor underlayment (mdf) and counter top to be covered with formica (HDF). I wouldn't use it for the floor. This is the least useful material that you have, but your cost is minimal, so that is good.

Those pallet crates are the score of all or your efforts. Great job! Wish I could find som of those.

I might suggest you buy two 4"x4"x8' pressure treated ground contact posts to use as the base for your coop. Buy 4 pier blocks with brackets, set the pier block where you want the coop, place the 4x4's horizontally to level them length and width wise. Once level and sent, put your crates on top and secure. This will help your coop last many more years, just getting it off the ground. See below.
1218101625.jpg


You could tear apart the pallets and use them for your roof supports and framing. They are the perfect size.
 
Weather getting onto the coop is notreally an issue except for the times it rains sideways, the coop and run will be under our deck (which is roofed) and the area is completely dry right now, even after all of the wet weather we've been having! Hence deciding to build there.
smile.png


All of the wood will be getting a minimum of 2-3 coats of paint, I know the pressboard isn't the best material to be using, but for the price, I'm willing to replace it in a year if it doesn't work how I want it to. This also gives me time to look for better pieces of siding in the cull bins.
smile.png


With the 2 pallets crates and the 10 pallets, I have plenty of wood to just fill in in sides with that if I absolutely have to as well. I thought I had mentioned the pt wood I found, but maybe not. I got pt 2x4's in the cull bin, all around 4' in length totally 15'10" of linear pt lumber, enough to set the 2 large pallets that will make up the floor of the coop on and keep it off the ground. As for the crates, I'll be turning them on the ends so that the attached pallet "floor" of the crate becomes the roof supports, the larger blue pallets I have will be the floor.

Tommorow I go hinge shopping at the Habitat Restore...I don't like the price at Home Depot or Lowe's, I may try Ace though, they were helpful when I set up my automated garden water system last spring. Also, going to get a big black bin thing (they stack if I need more than one, which I doubt) at Home Depot...it's about $7, making it way cheaper than a litter box for a nest box. It should fit nicely too...
 
Cool. Sounds like you have it well thought out. Keep posting pics!

Even though it is PTGT lumber, you may want to elevate it on pier blocks. Hint: look for the ones with the bent "ears", as you can get them for cheap. The 4x4 posts will go on sale every once in a while for about $4-5. I found 8 with blemishes in the cull pile, 8 and 10 footers, for $2 each.

Have fun.
 
Okay, I broke my promise that I made the other day...I went to Home Depot again tonight. I did, however find 2 nice pieces of OSB (I think) that are grooved to "lock together". I think it's supposed to be subflooring, but I could be wrong, lol. I'll get pictures of it tomorrow after "Grumpy" goes to work.
smile.png
We were in his SUV and the pieces were just an inch or soo too wide to go in it (they're just over 4' on the shortest side)! So, I went back in to buy a set of tie downs (what I got sent back in to get), I got the strappy kind that have a ratchet system. It's what we borrow constently from his Dad (I got grumbled at the other day when I forgot the one we had and had to borrow a second one), so I thought it would be nice to buy a couple of our own and return his Dad's. I was apparently mistaken. They don't work on his "fancy" SUV! So after much parking lot bickering, I made him go back in with me to buy a set of Bungee cords. Mind you, we have a 16-piece set of these at home already (actually a good number of them are currently behind the seat of my truck) as well as BOTH tie down straps we have borrowed! Anyway, we bought a 4-piece set of bungees, they worked and got us home. The new set of bungees are going to live out their days in his SUV, the new tie down straps will go in my truck, and I'm going to return the borrowed ones tommorow or this weekend at the latest.

I'm fighting off the "blahs" from getting a pneumonia vaccine the other day and didn't make it out of the house until late this evening, I'm hoping to get out tommorow after the gas guy comes to replace our meter. I want to get to the Habitat ReStore before the weekend so that I can get some building done! The wood is 95% gone from under the porch, there is still some big knots that got left and a sizeable pile of Sumac that the guy that bought the wood didn't want. That will end up in a "free" ad once I feel like dealing with it, lol. But, I can now start raking out the old leaves, gunk, and bedding left from the previous owners that raised rabbits there to feed to the giant snakes in what we call our "cat room" now. Hopefully the weather will cooperate, I don't really feel like playing outside when it's so bitterly cold!
 
Thank you
smile.png
I was thinking I'd use it on a wall, lol. But, I like your idea better.
wink.png
The chickens are gonna have nice 1970's paneling on the inside of the coop...we had to remove a panel from a wall in the garage room (eventually we're taking the whole room out to turn it back into a garage) when we moved the servers in there, so I'm going to use it on the interior walls. We also have some from the laundry room (pevious owners had encased the water heater and furnace in the stuff), so I have plaenty of it to go around, lol. If I run out, I can always go pull another panel off the wall of the garage room too, lol.

I'm hoping to get out tommorow to get screws and such so I can get going and quit planning. What do you think of these hinged things for the walls that will open for cleaning and such? I can go with "normal", heavier ones, I just saw these and thought I'd ask the experts.
wink.png
These are a bit spendier as well...but as long as I'm looking at the discount areas...
smile.png
 
Wow, you have been busy. Looks like you have about enough material for the whole thing. Have you ever been to Brown Building Supply? I ask cause it is right near the habitat store, if you can't find everything you need at habitat you could check them out. Brown Building Supply is a used and salvaged materials store also. Not sure if the weather is going to cooperate with you or not, think it's gonna snow some more. Good luck, waiting for updates.
 
Quote:
I keep glaring at the weather forecast, lol. Since I got the crates, most of the work is done for me already.
smile.png
Just need to pull some boards off of them and then put other boards n them, lol. With the new subflooring I picked up last night, I'll be able to whip the base/floor of the coop together as soon as I get the nails/screws.
smile.png
I need to order my hardware cloth this weekend too...so I can get my brooder finished! I want to get the coop made before the chicks get here simply to get the massive wood pile out of the garage so I have somewhere to put the brooder when the chicks get here! lol

I'm tired just reading all this. Piano hinges are good for chests, s/b ok for cleanout doors. Thats alot of screws though.
bow.gif
 

New posts New threads Active threads

Back
Top Bottom