New tool alert!
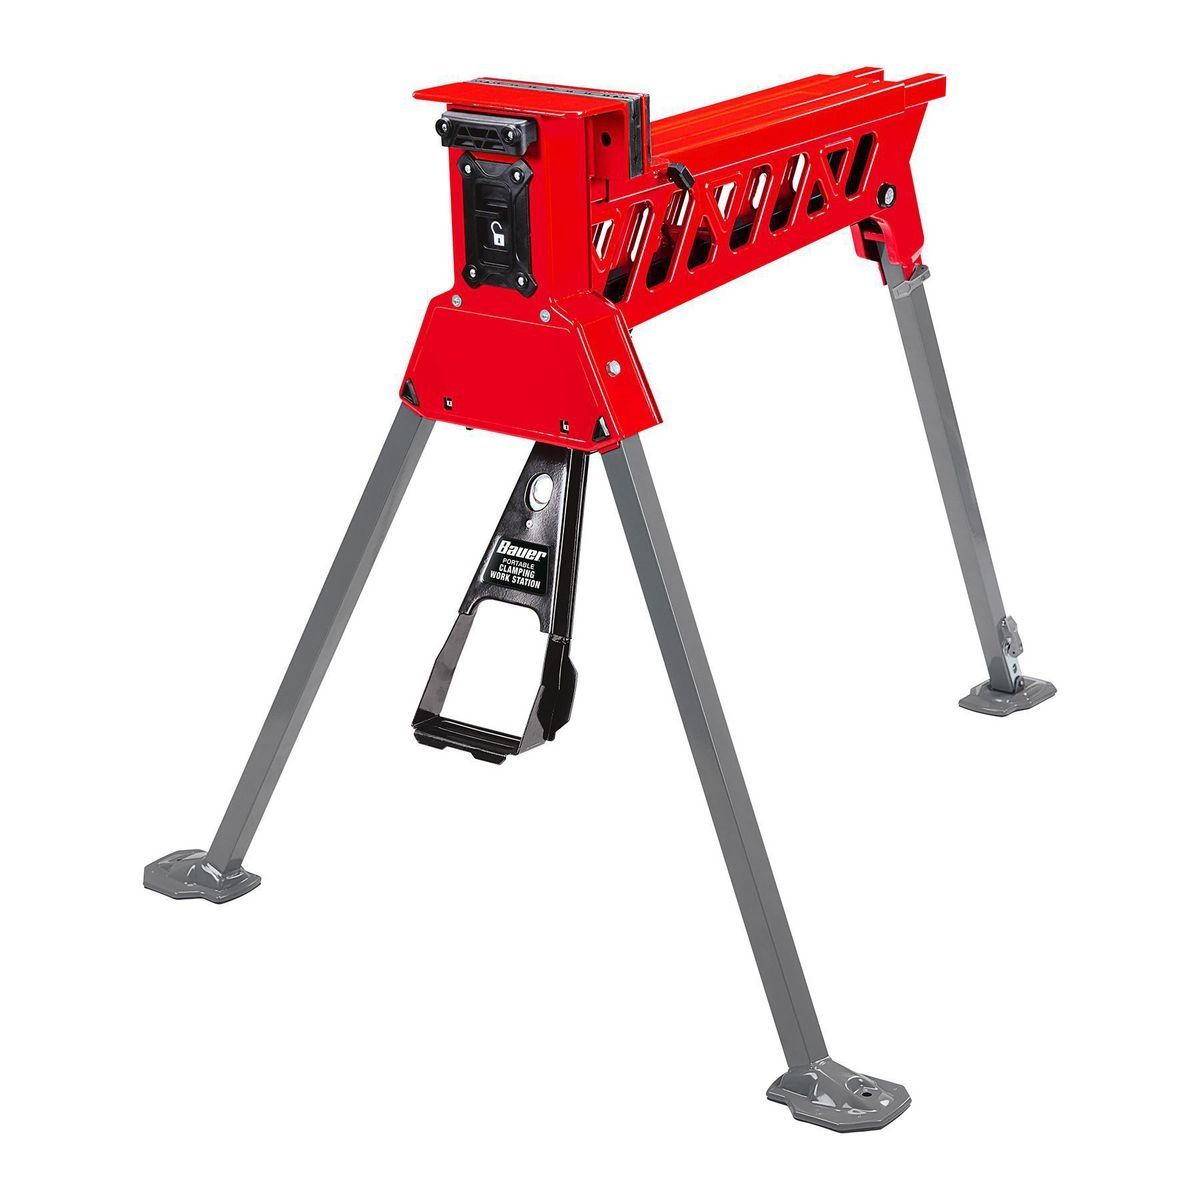
I bought a new tool today at Harbor Freight that I hope I will find useful for lots of things in the garage workshop, including my pallet projects. It is the $150.00
35 in. Hands-Free Portable Clamping Workstation, 600 lb. Capacity ...
which is a clone of the more expensive $250.00 Rockwell Jawhorse. (Current prices as of the date of this post).
The Harbor Freight Jawhorse is normally $150.00, like I said, but is currently on sale for $99.00. Plus, I had a coupon worth $5.00 in Harbor Freight money which I used on this purchase. I have a Harbor Freight store credit card that pays me back 5% in all purchases at Harbor Freight and gives me "Harbor Freight money" which I can only use at Harbor Freight on future purchases.

Maybe I had too much time on my hands and watched too many YouTube reviews of the Jawhorse, but it really looks like a tool I absolutely needed to have! What sold me on the Jawhorse was all the guys were saying, "If you work alone, this is the third hand you always wanted." I said, "Hey, that's me!"
Actually, I started off looking for a bench vise or clamp for some of the pallet wood workbenches I built last summer. But most of those bench vises and clamps cost around $100 just for the vise. So, I kept the vise/clamp idea in mind on my "someday to buy" wish list, but it never worked its way up to the top.
Then I saw a few videos of the Rockwell Jawhorse and thought that was a neat tool, but I did not want to spend $250.00 on it. Almost by accident, I watched a video on the Harbor Freight "Jawhorse" copy and saw that it was on sale for $99.00. That was more in line with my budget. So, I looked into the HF Jawhorse knockoff v. the original Rockwell Jawhorse and the video reviews were very postive on the HF Jawhorse. In fact, one guy had both models and he showed how you could take off the clamping pieces from one Jawhorse and use them on the other! Exact fit!
When I am working with pallet wood, I often need to clamp the wood in a strong vise so I can pull out the nails on those 2X4 stretchers. I have a small Work-Mate bench that I use, but it's not very strong and I don't dare to pound on it at all. It's also too light to provide much counterweight. I had one of those benches that I tried to hammer in a nail on some wood and just broke the benchtop wood in half. The clamps on those small workbenches work OK, but when start to pull nails, it usually pulls the wood out of the vise unless you have one hand on the wood and push it down.
I bought my small $20 folding workbench from Menards many years ago, and it's still working. They look like this...
The problem is that the folding workbench is really only good for very light duty work. The folding workbench itself is less than 10 pounds of weight - compared to the HF Jawhorse which weighs about 42 pounds. Also, notice that the workbench clamps are plastic and you cannot clamp anything with much force before you would break the plastic. On the other hand, the HF jawhorse uses a jack type system which has 1,000 lbs of locking force. That's a big difference!
Another feature I look forward to using on the HF Jawhorse is the anvil on top of the vise...
I watched one video where the guy said that anvil on the clamp head was great for pounding bent nails straight. Perfect! I have a couple of bins in my storage case full of bent pallet wood nails that need a little persuasion before I can reuse them. But I did not have anything to pound them out on. Now I do.
Obviously, I will be using this Jawhorse for lots of things in addition to my pallet projects. If you want a general idea of what the Jawhorse can do, here are a few videos for your enjoyment... (***Note: Prices in the videos are from years ago.)
As always, if anyone has any experience in using the Jawhorse for pallet work, please let me know how you use it. Thanks.
I finished my pallet wood seed starting shelf. Here is a picture of the frame all put together. Sorry for the bad angles on these photos, but the shelf is in our second bathroom and I could only back up so far to take the pictures...

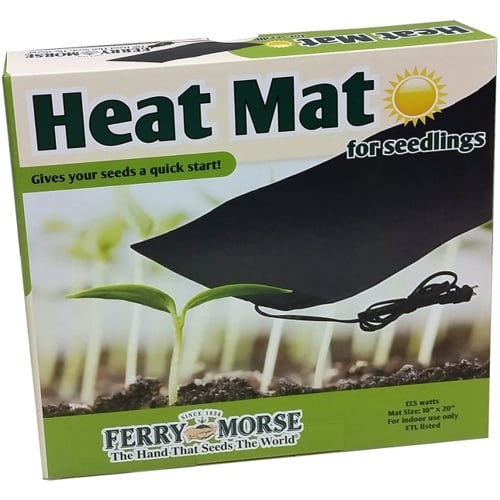
Since this is my first year attempting to start seeds in the house, I decided to get a heat mat because the temp in that bathroom is about 63F, which I read is on the cool side for seed germination. It was an additional expense I had not planned on, but I hope it is a good investment. I got it our local Fleet Store for $28.00 less a 15% discount on their "Bucket Days" sales. So, final cost was $23.80 plus tax for that mat. I checked out some less expensive seed starting mats on Amazon, but when I read more than one negative review that the cheap mats from Amazon almost burned down their house, I decided to go with the name brand Ferry Morse mat for the extra $10.00. And, I like to purchase locally when I can to support our brick and mortar stores.
Now it's time to pot up those 3-inch net cups and get some seeds germinating. If anyone has any suggestions for me on my first year attempt of seed starting, please post a comment. I'm open to any constructive ideas. Later...

")

 The last Tuesday of every month I attend a Senior Citizens Cooking Class. It's fun for me because I don't know much about cooking. I guess I'm at an age where I am doing lots of stuff I never did when I was younger. Anyway, it gives me something new to learn and Dear Wife, who still does most of the cooking in the house, now lets me take over supper once or twice a week.
 Sometimes I think Dear Wife enjoys me going to cooking class more than I do!