I took the old Explorer with the old utility trailer in tow into town on Tuesday. Was going to stop at a place that has long pallets for pickup. Talked to one of the employees and got permission to grab some of their pallets out back. From the road, I thought the pallets were 8 feet long, and I was all excited about that. Turns out, those pallets were 12 feet long and I could not move them because they were so heavy.


Well, not willing to give up on everything, I looked through the pile of pallets and found some treasure in there that I could load up. I found a couple 12-foot long 4X4 posts and loaded them up. Found 3 more 3X3 posts that were also 12 foot long, but they were made up of some kind of composite material. I took them too. I found about 5 1X6 boards that were 12 foot long and tossed them in the trailer. I loaded up about a dozen 2X2 foot plywood cutoff sheets that I think might be good for a utility shelf build.
The best find was a 12-foot-long beam made up of 2X6 boards. The wood was practically new and there were not too many nails in the beam. It was pretty heavy, but I managed to drag it over to the trailer and lift it in one end at a time. Pretty much a full load at that point despite not being able to get the long pallets like I had planned.
Here is a picture of the trailer full of the wood I managed to salvage on the trip...
View attachment 3483777
My little utility trailer is 8 feet long and you can see the 12-foot boards extending beyond the end.

I was all excited about that 12-foot-long beam made up of 2X6 wood. I took it apart this afternoon and discovered that it was not true 12 foot long. They took some 8-foot long 2X6 boards with 4-foot long 2X6 boards to make it 12 foot long. The middle section of the beam was a 7-foot long 2X6 matched up with 5-foot 2X6. You could not see the splice in the wood because there were some boards tacked over the seams for the pallet. Oh well, I still got lots of great 2X6 boards out of that beam - 36 feet worth of 2X6's.

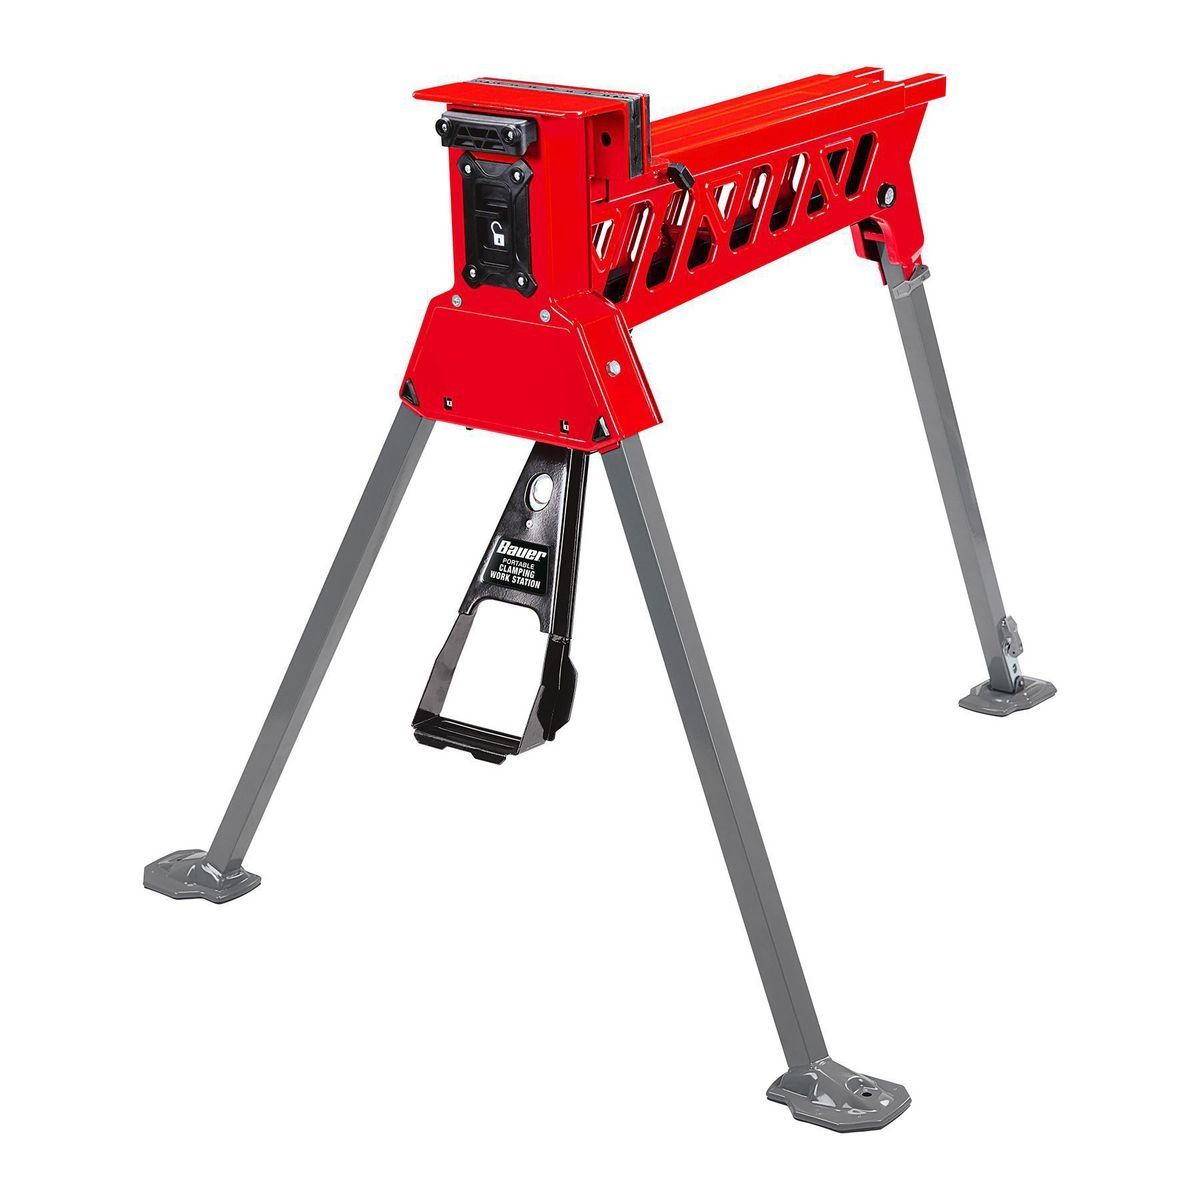
Update on my
Harbor Freight Bauer "Jawhorse" clamping workstation.
I find myself using this workstation almost all the time. It's really fast in clamping down the wood so I can hammer out the nails or use the crowbar to pull nails out. It really is a great third hand with that clamp. Today, I took it outside next to the trailer and set it up in about one minute and started working. I love the portability of the workstation to take it outside. When I don't need it, the legs fold up and I can store it upright, on end, in the garage in about 1X1 foot floor space. That's really good for me because my garage is mainly for our cars. Floor space is at a premium.
Normal price for the HF Bauer workstation runs $150.00, but I got mine on sale for $99.00 a number of weeks ago. For anybody thinking about getting new sawhorses, or such, check these out instead. The HF Bauer model is a copy of the original
Rockwell JawHorse, but the Rockwell model costs $230.00 on Amazon.
Believe it or not, the HF Bauer workstation took the design of the Rockwell JawHorse and improved it in a few ways, and, of course, sell it for less.

Anyways, I am using my Bauer workstation all the time for pallet work and disassembly as a third hand. It's a real time and labor savor for me. I'm all into labor savings at my age. I figure that the labor I save on some of these tools allows me to enjoy my hobbies just a few years longer. I'm good with that.
 Having said that, I don't know if a chicken water fount on a heater would be enough water for ducks.
")


 Not done with winter here. We are in the middle of a 2-day end-of-winter snowstorm. Got about 4 inches of new snow yesterday and maybe another 2 inches of snow today.