Last fall DW kicked around the idea of having our own chickens. We had been buying eggs since mid-summer from one of a couple providers and even driving to their farm ( Facebook / CockandBullFarms ) for a few dozen at a time. Everyone says it, the eggs really are better and we know that the chickens are being treated ethically.
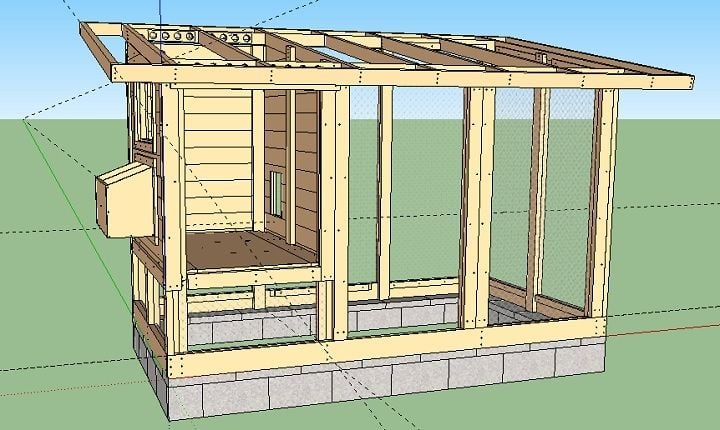
Long story short, we've got some baby chicks and I'm building a coop for them. We tossed around the idea of using a dog kennel, a 10x10 shed, the 'Purina Mills 4x4 coop' and the Wichita Cabin Coop (WCC). Finally we caved and decided to build the Taj WCC from the start. I modified the plans to make the run area 2ft longer and do a mirror image build.
If you want plans for this coop, just search BackyardChickens for 'Wichita Cabin Coop', it'll be in the first set of results. Well worth the $5 to support their plan making IMHO.
Coop Build Day 1: Materials
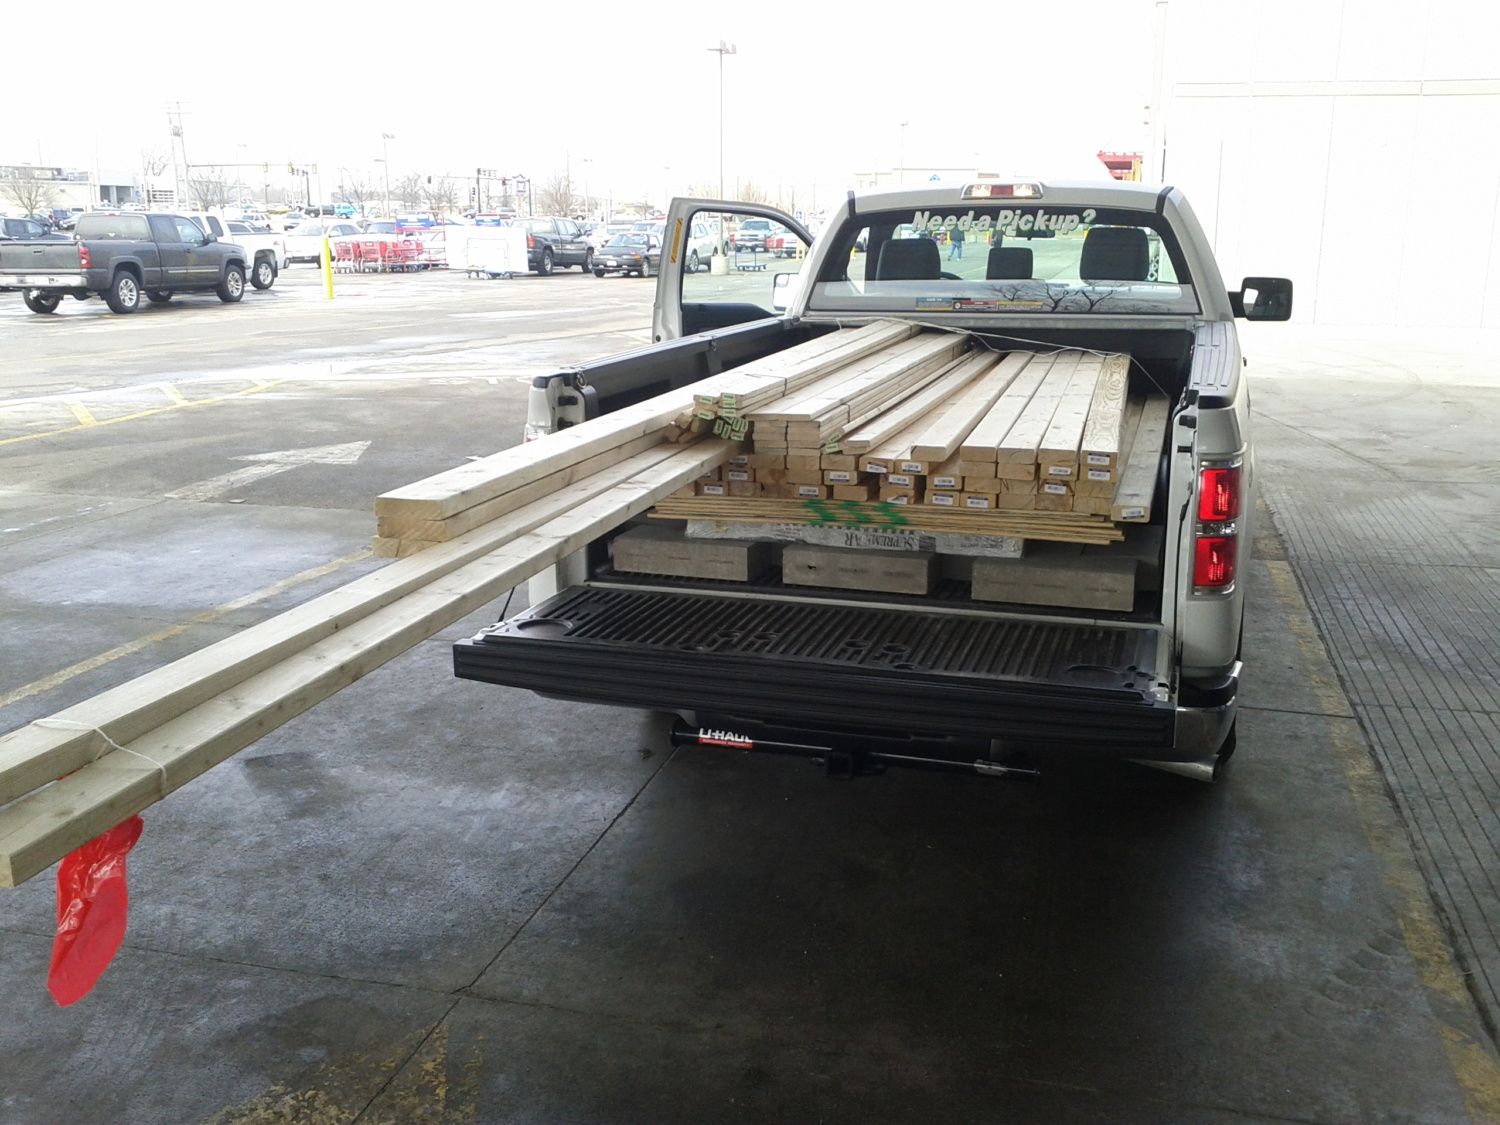
Got a rental pickup truck w/ only 115 miles on it (yes!) and picked everything out at Lowe's. Yes it all fit in one load!
Plan Estimate: $650.43
Final Total: $650.95
Clearance & 10% off saved $151!
Paid with discounted gift cards for another 10% off.
Factoring out the rental and some general tools I needed, building a WCC for less than $600?!
Coop Build Day 1: Foundation
I'm sure everyone is familiar with the 'Polar Vortex', so I'll skip to 2/18 and 2/19 where it was finally above 50 degrees in STL. Where I'm putting the coop is some uneven ground, so I dug down on the high side and set the two rows on concrete block. Since this is an elongated WCC, it's a 64"x144" foundation.
My half day of foundation work compressed down to 10 seconds.

----------------
More to come next week..
Long story short, we've got some baby chicks and I'm building a coop for them. We tossed around the idea of using a dog kennel, a 10x10 shed, the 'Purina Mills 4x4 coop' and the Wichita Cabin Coop (WCC). Finally we caved and decided to build the Taj WCC from the start. I modified the plans to make the run area 2ft longer and do a mirror image build.
If you want plans for this coop, just search BackyardChickens for 'Wichita Cabin Coop', it'll be in the first set of results. Well worth the $5 to support their plan making IMHO.
Coop Build Day 1: Materials
Got a rental pickup truck w/ only 115 miles on it (yes!) and picked everything out at Lowe's. Yes it all fit in one load!
Plan Estimate: $650.43
Final Total: $650.95
Clearance & 10% off saved $151!
Paid with discounted gift cards for another 10% off.
Factoring out the rental and some general tools I needed, building a WCC for less than $600?!
Coop Build Day 1: Foundation
I'm sure everyone is familiar with the 'Polar Vortex', so I'll skip to 2/18 and 2/19 where it was finally above 50 degrees in STL. Where I'm putting the coop is some uneven ground, so I dug down on the high side and set the two rows on concrete block. Since this is an elongated WCC, it's a 64"x144" foundation.
My half day of foundation work compressed down to 10 seconds.
----------------
More to come next week..
Last edited:


")
