So 4 months ago, a friend told me of Her friend, who is a coop builder and is very reasonable .

I was desperate for my coop to be built as I had babies living in a spare room in my house because I just could Not find a Pre-built coop that would be good enough for 3 ducks and 9 chickens, plus, I found $1200 - 2500 for a
coop, to be outrageous.
Problem with the " friend of a friend " deal , was that he lives in Duluth, MN., and I live in Upper Peninsula , MI., 4 hours away!
He and I spoke often, and he had promised a 12x20 walk in coop, ( just what I need as I am a female veteran , disabled during the 1984 plus, Gulf War and this coop would be roomy enough for me to get around in ).
The coop was going to have all kinds of bells and whistles, from dust bath boxes to storage area, to a heated pond for my ducks , all for $375 !
Well, I know about the " you get what you pay for" phrase, so I was VERY cautious.
DH drove all the way to Duluth, picked him up, brought him home and he went right to work.
He was a great worker but needed some help, so my 15 yr old son, chipped in.
He was done in 2 days
It was sitting on unlevel ground ..( I was not present when the frame went up so I could tell them ) .
I about passed out when I saw the roof !!:
OMG, what did I just get myself into ?
Now, Im no builder, I cant even build a box, but I DO know that for a 12x20 roof, you need MORE than 4 , 2x4x12's spaced 4 ft apart , ALOT MORE than a 10 degree pitch, AND the 2x4.s should be screwed in with the 2 inch
side facing up, since it gives the board more strength!
He also used 1/8 inch UNTREATED PLYWOOD , 4x8 size..
The frame and doors were fine.
Ok, fast forward thru ALOT of rain, leaking all in the duck and babies area, and ALOT of research, BYC's help and Panic Not only because of the rain, but the snow that we will be getting...its not unusual to get 2ft over night
and I just knew that a plywood only roof, that is now causing such strain on the few rafters , that I placed emergency supports to hold up the roof, WAS NOT going to hold up and will collapse.
I had enough, so after many drawings, sketches on napkins and MORE PANIC so.....
4 days ago, a "lightbulb " went on, and I drew up a sketch that made me very happy.
I bought the materials , got my son and DH geared up and with me "supervising" , we went to work.
I am SO pleased with the results.
I still need to paint the new areas and put up 1 more piece of OSB on the front, but we are good to go..
Now, bare in mind as you look at the pics and read my plans, that I am a female, who could NOT even build a simple box...SO...if I can do it, ANYONE CAN...
All in all, the cost of materials to do this right, came to about $400 .
Alot of the credit goes to BYC members, who's plans and coops, helped me , more than anything..THANK YOU.
I hope MY plans, pics, help others who were in the same boat as I was, and if there are ANY questions, please feel free to ask.
Below is my "narrative , and pics of the New roof ALONG with some of the " inhabitants " , are attached..
Enjoy..
Plans :
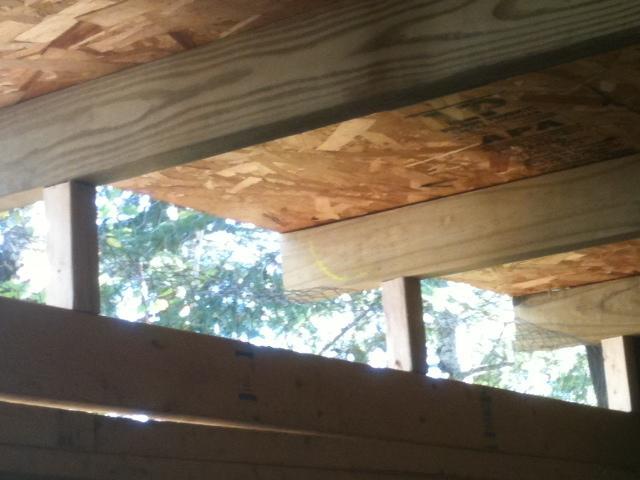
For a 20 ft length, I placed a total of 10 , 2x4's spaced 2 ft apart.
I then put 2 more 2x4x20 on top of the 1x2's the " friend of a friend " Nailed down in an attempt to create height for rafters .
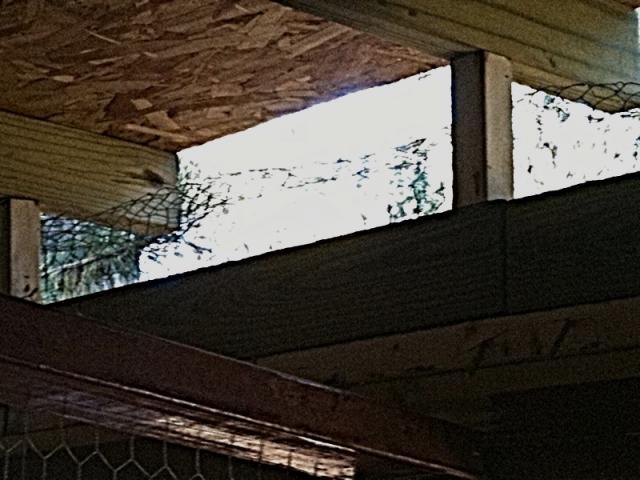
I then wanted to add MORE height , so I used scrap pieces of 6 in , 1x2's , screwed them down with 4 in wood screws.
He had placed a total of only 4, 2x4's as Support rafters AND Nailed them down , with the WIDE side up making the rafters STRAIN AND BOW down under the weight of the roof!!!
So I placed them NARROW OR 2 inch side, Upward which gives each board strength to hold the weight of the new roof!
Anyway, once I added 6 More inches in height, the roof angle went from a 10 degree slope, to a 35 ( approx ) , degree slope so water and snow can slide off
All ventilation openings are covered with Hardware cloth which might not be seen in the pics.
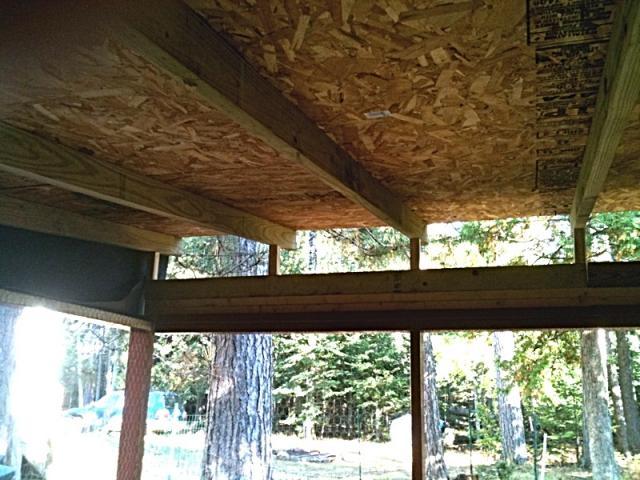
Completed coop.
From inside . Note the scrap pieces of 1x2s that are 6 inches high, used as extra height for roof slope.
Pic of farthest end from inside showing the rafters with the 2 inch side facing up.
More of inside. The plywood is 7/16 OSB.
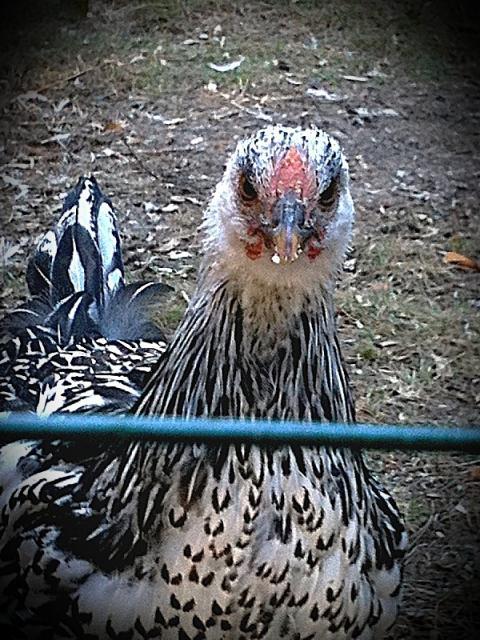
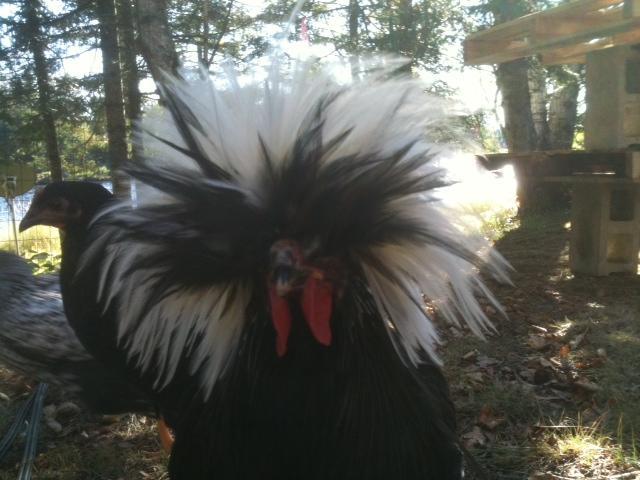
Felipe , 5 months old.
Felipe and HIS GIRLS.
Robert, a 5 month old Salmon Favorelle
Winnie, my 5 month old Silver Laced Wyandotte

I was desperate for my coop to be built as I had babies living in a spare room in my house because I just could Not find a Pre-built coop that would be good enough for 3 ducks and 9 chickens, plus, I found $1200 - 2500 for a
coop, to be outrageous.

Problem with the " friend of a friend " deal , was that he lives in Duluth, MN., and I live in Upper Peninsula , MI., 4 hours away!

He and I spoke often, and he had promised a 12x20 walk in coop, ( just what I need as I am a female veteran , disabled during the 1984 plus, Gulf War and this coop would be roomy enough for me to get around in ).
The coop was going to have all kinds of bells and whistles, from dust bath boxes to storage area, to a heated pond for my ducks , all for $375 !

Well, I know about the " you get what you pay for" phrase, so I was VERY cautious.
DH drove all the way to Duluth, picked him up, brought him home and he went right to work.
He was a great worker but needed some help, so my 15 yr old son, chipped in.
He was done in 2 days
It was sitting on unlevel ground ..( I was not present when the frame went up so I could tell them ) .
I about passed out when I saw the roof !!:
OMG, what did I just get myself into ?

Now, Im no builder, I cant even build a box, but I DO know that for a 12x20 roof, you need MORE than 4 , 2x4x12's spaced 4 ft apart , ALOT MORE than a 10 degree pitch, AND the 2x4.s should be screwed in with the 2 inch
side facing up, since it gives the board more strength!
He also used 1/8 inch UNTREATED PLYWOOD , 4x8 size..

The frame and doors were fine.
Ok, fast forward thru ALOT of rain, leaking all in the duck and babies area, and ALOT of research, BYC's help and Panic Not only because of the rain, but the snow that we will be getting...its not unusual to get 2ft over night
and I just knew that a plywood only roof, that is now causing such strain on the few rafters , that I placed emergency supports to hold up the roof, WAS NOT going to hold up and will collapse.
I had enough, so after many drawings, sketches on napkins and MORE PANIC so.....
4 days ago, a "lightbulb " went on, and I drew up a sketch that made me very happy.
I bought the materials , got my son and DH geared up and with me "supervising" , we went to work.
I am SO pleased with the results.

I still need to paint the new areas and put up 1 more piece of OSB on the front, but we are good to go..
Now, bare in mind as you look at the pics and read my plans, that I am a female, who could NOT even build a simple box...SO...if I can do it, ANYONE CAN...

All in all, the cost of materials to do this right, came to about $400 .
Alot of the credit goes to BYC members, who's plans and coops, helped me , more than anything..THANK YOU.
I hope MY plans, pics, help others who were in the same boat as I was, and if there are ANY questions, please feel free to ask.
Below is my "narrative , and pics of the New roof ALONG with some of the " inhabitants " , are attached..

Enjoy..
Plans :
For a 20 ft length, I placed a total of 10 , 2x4's spaced 2 ft apart.
I then put 2 more 2x4x20 on top of the 1x2's the " friend of a friend " Nailed down in an attempt to create height for rafters .
I then wanted to add MORE height , so I used scrap pieces of 6 in , 1x2's , screwed them down with 4 in wood screws.
He had placed a total of only 4, 2x4's as Support rafters AND Nailed them down , with the WIDE side up making the rafters STRAIN AND BOW down under the weight of the roof!!!
So I placed them NARROW OR 2 inch side, Upward which gives each board strength to hold the weight of the new roof!
Anyway, once I added 6 More inches in height, the roof angle went from a 10 degree slope, to a 35 ( approx ) , degree slope so water and snow can slide off
All ventilation openings are covered with Hardware cloth which might not be seen in the pics.
Completed coop.

From inside . Note the scrap pieces of 1x2s that are 6 inches high, used as extra height for roof slope.
Pic of farthest end from inside showing the rafters with the 2 inch side facing up.
More of inside. The plywood is 7/16 OSB.
Felipe , 5 months old.
Felipe and HIS GIRLS.

Robert, a 5 month old Salmon Favorelle
Winnie, my 5 month old Silver Laced Wyandotte