Articles by bibliophile birds
Step 1: The framing
We started with an old hay wagon that we couldn't use because the axel wasn't street legal. We cut holes in the bed of it for the 4 corner posts, 4x4s that we salvaged from an old dog yard on the property. After adding a few 2x4s (left over from building the riding arena) for...
Step 4: Finishing the exterior
We put cap pieces on the corners to cover the gaps where the panels meet. This will help keep more cold air out and gives it a nice finishing touch. In the first picture, you can see the yard gate attached to the corner. The gate slides up and down so it can be...
Natural is Better
Most chicken keepers realize the value of non-commercial poultry operations. Large numbers of birds kept in isolation or, conversely, packed by the hundreds into sheds, just doesn't make sense. Chickens need space and a few other chickens to call friend. We know, a natural...
Step 3: The inside
The inside of the coop is divide into 2 sections. These sections are seperated by the inner screen door and a wall of wire to allow ventilation. When the windows are open fresh air will blow through the entire coop. (We are waiting till Spring to cut panels into the bottom of...
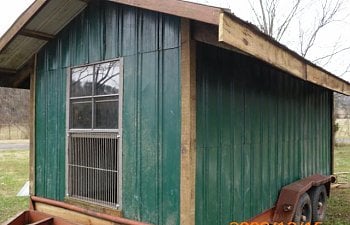
Step 2: Putting up the tin
We happened across a stash of 25 20ft tin roofing panels that were left over from when we reroofed the barn about 15 years ago. This allowed us to avoid needing to purchase plywood for the sides. We were so excited with this find that we didn't stop to think that we...
Welcome to the Coop Library!
We decided early on that chickens, especially Literary Ladies and Bookish Boys, deserve adventures and grass- two things they just can’t get stuck in a stationary coop. To that end, we designed a traveling home for these oh-so-special birds. So now, when the chickies...