Cluckingcottage
Chirping
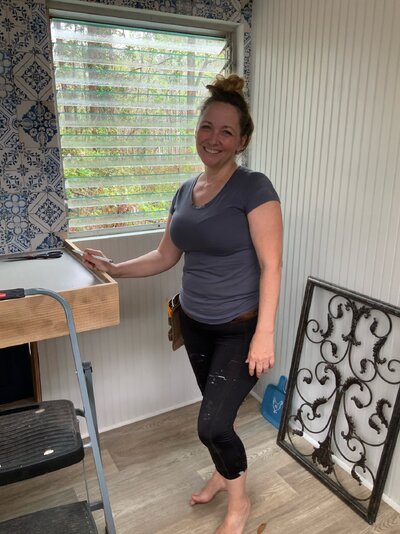
I have been building our coop and run since the beginning of February. During my build I have searched on here for so much info and ideas and have learned so much from you all!!! Thank you all so much for your knowledge and sharing it and making it searchable! I had several goals in mind but the biggest one was to build everything to be easier to keep clean. Our coop is 20 feet from our patio. So I can’t have that coop smell. the second was to keep it affordable. And third was to make it cute. Cause it’s really part of my garden. And I just can’t help myself. And then make it as secure as possible.
I honestly didn’t realize how building this was going to take over my entire life for so long! But I am really happy with it all. And really proud of it all.
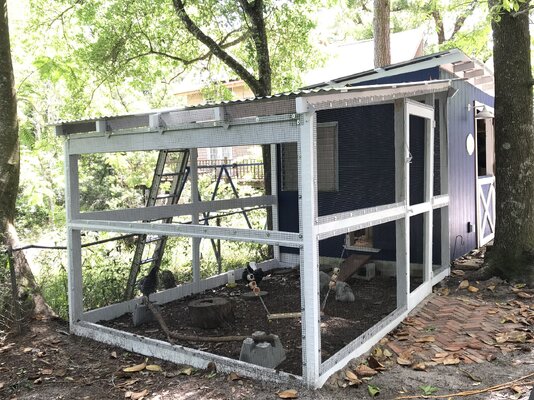
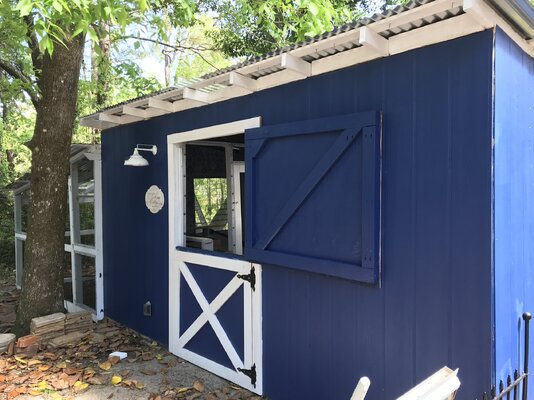
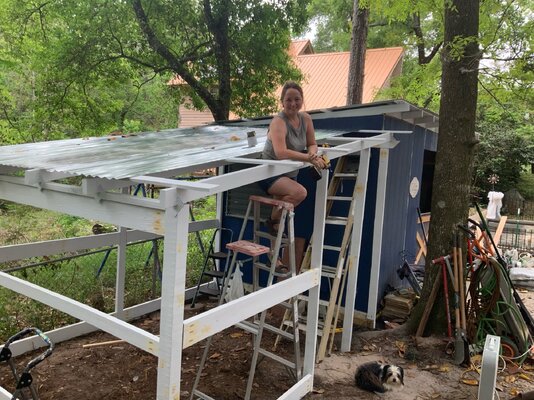
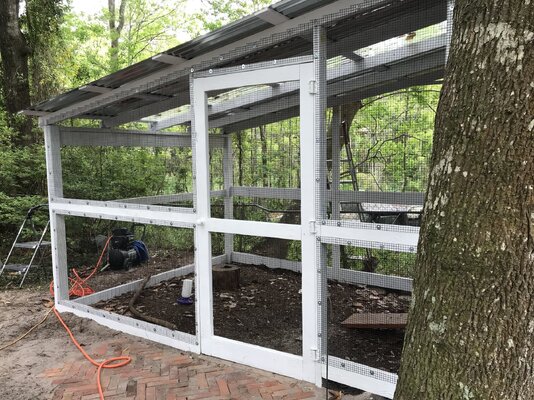
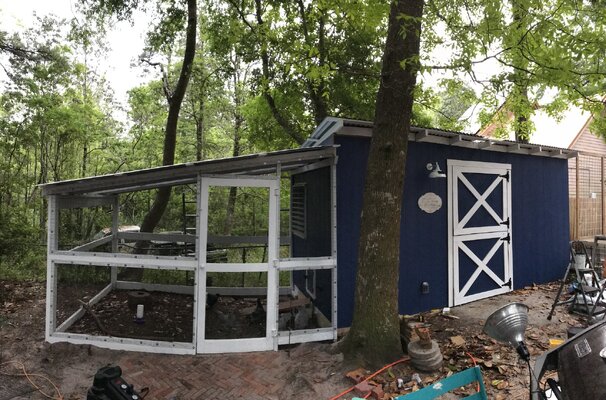
our coop started out as a very run down shed. Which I really wish I had a picture of. When we moved in the shed was a disaster. The roof had rusted and collapsed. Which made the floor rot and collapse. And the siding was also rotting off. Last year we replaced the roof and siding. And put a layer of gravel to use it as a shed. Then we decided to turn part of it into a coop and shoveled the gravel over to the shed side of the shed. And framed out a floor and put down a plywood floor. I also had to fix some of the structure. the coop area is 8x6 with a enclosed covered run of 8.5x 11.5
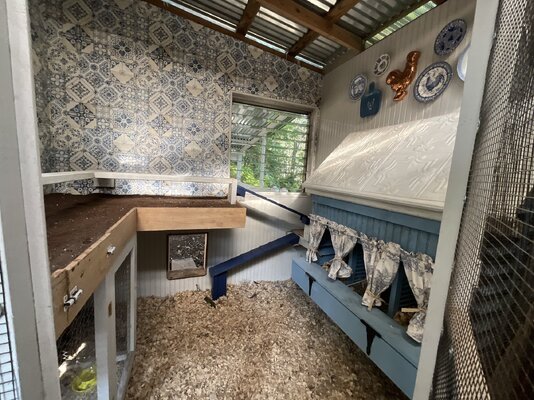
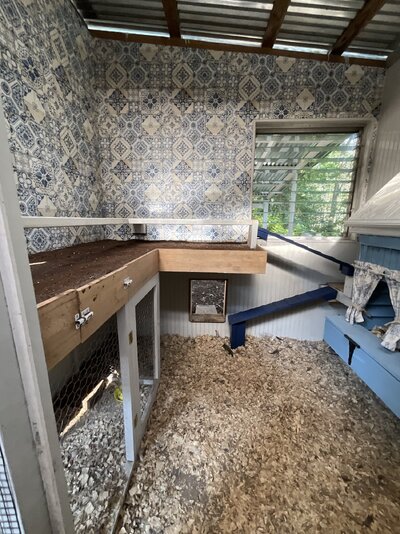
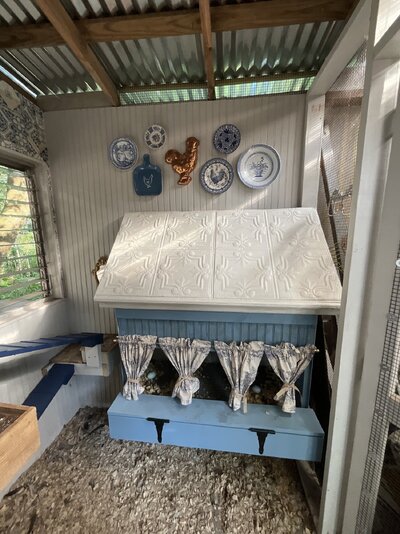
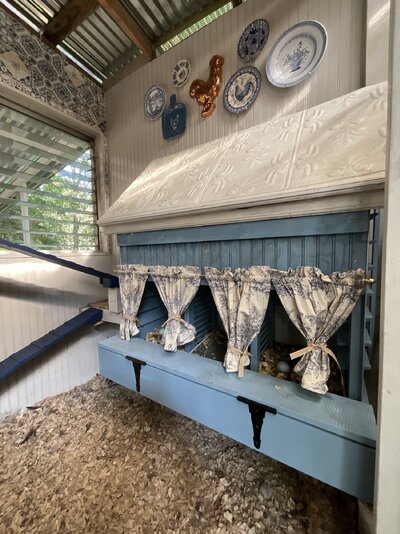
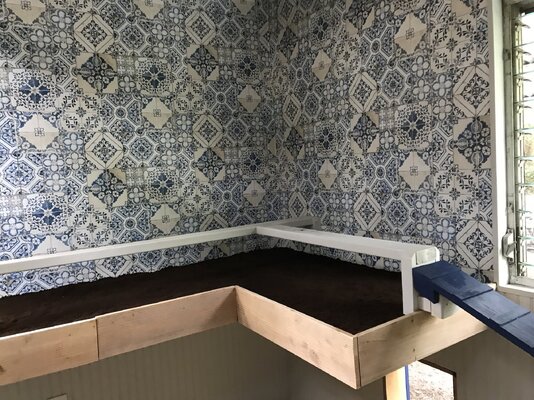
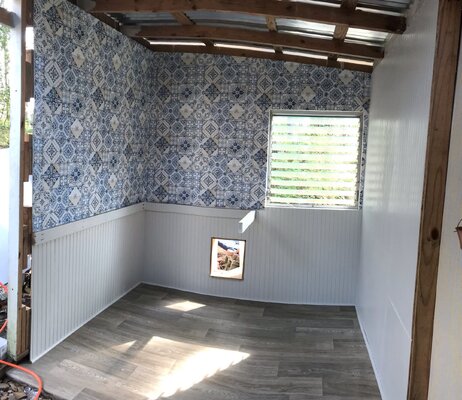
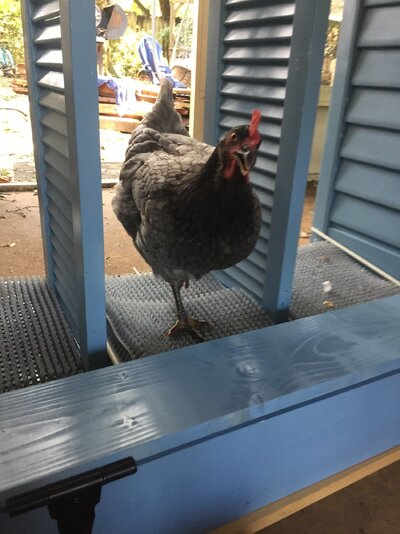
I added a jealousies window that I got for free. It opens into the run that is enclosed in hc and predator proof. So it does not have another layer of hc on it. It is a big window that opens the whole window and adds a lot of ventilation. i built a poop deck with roost bars. I have used coffee grounds on the poop deck and have loved having them and the ease of scooping And the smell in the coop is really nice. There is a vinyl wall paper behind the roost bars. I wanted it easy to wipe down. But have not had any issues with anything on it. The wall paper goes with the french/English cottage vibe too.
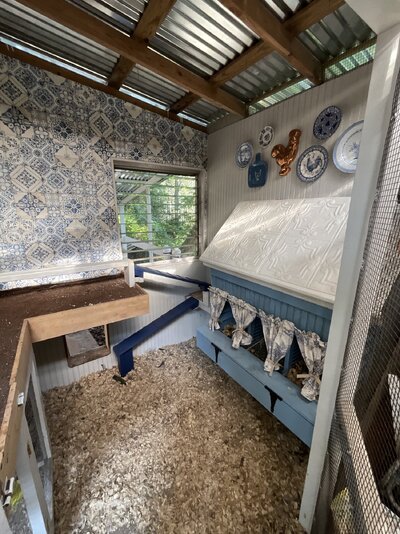
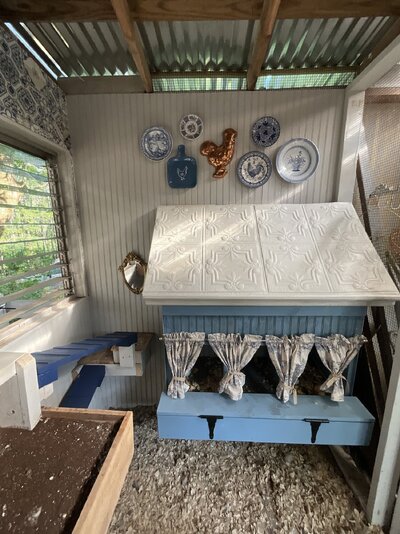
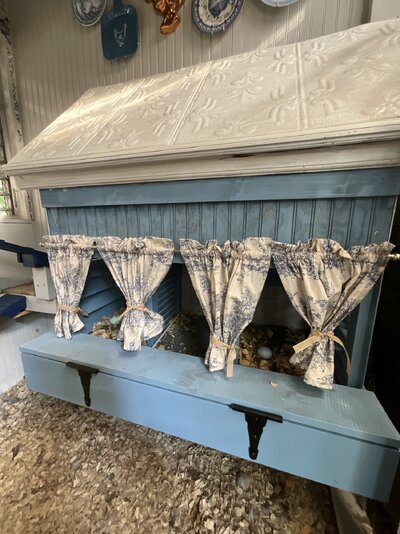
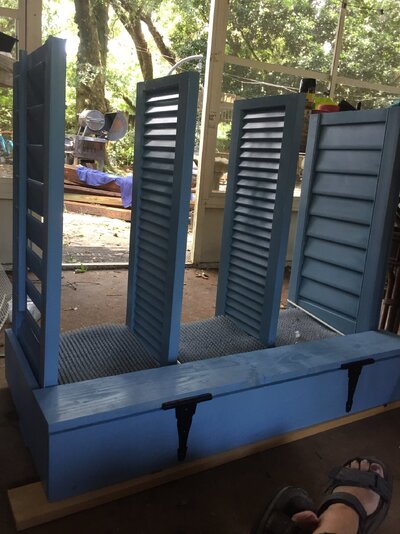
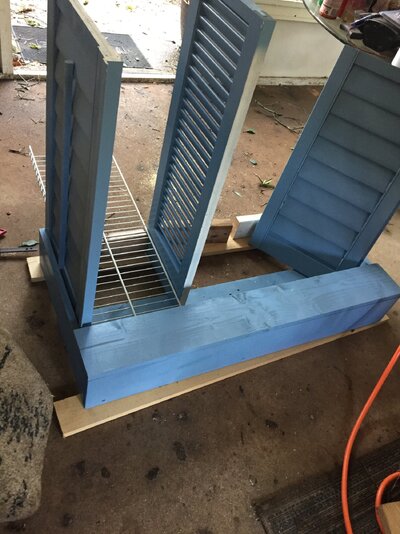
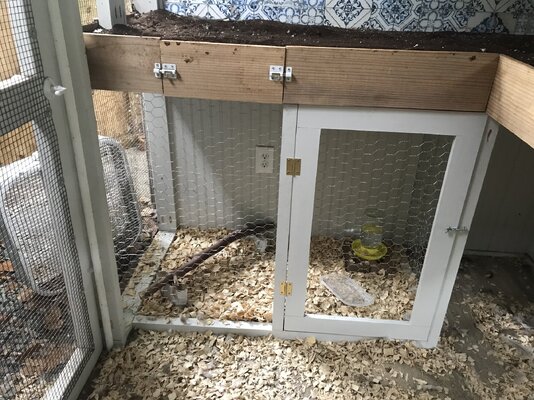
I built the roost bars to lift out so I can take them out and power wash them for deep cleans. The ramps also were built to lift out. i just got the nest box built. And one of my biggest concerns for it was ventilation. It had to be dark and private. But not an oven. We are in nw Florida. I wanted it to be a roll out nest. I built it with plantation shutter on the ends. So it can be opened up more or closed For ventilation. Then the dividers are a shutter closet door. I used metal shelving for the floor to roll down to the front. And put nesting pads on that. I put a slanted roof on it which is 2 tin ceiling tile panels. To keep them from roosting up there. The girls had started laying June 16 out in the run and the corners of the coop before I got the nest box built. So I had to bribe them to explore the nest box with putting wood chips in it,herbs and then I resorted to oats. And that did it. They explored it and started laying in them!!! The roll down part isn’t currently working with all the wood chips in there. But I want them to really build that habit before I take out the wood chips to get the roll out feature working. The shutters I got at habitat for humanity and I spent less than I would have for plywood. I used 2x4’s in the back as cross bars between the shutters and 2x2 in the front cross bars. Then built the catch box out of 1x6 I build French cleats on the back that it hangs from with some scrap 1x8. And then I ordered some toile fabric napkins to make the curtains. Ran a couple passes on the sewing machine and ordered a brass cafe rod. Cause no cottage is complete without toile! Lol.
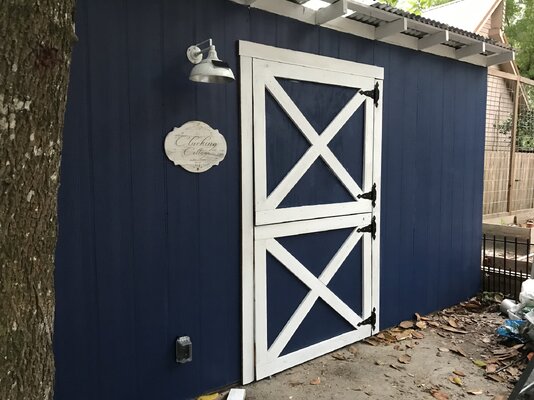
My daughter and I found the blue chicken platter this spring and it birthed the idea of thrifting blue chicken plates. and also feels so cottage to me. And I thought funny. I have some fabric that looks like a French grain sack to make a Roman shade for above the window. Then when we get freezing nights we can pull it down to help insulate the window. But that is a project for later.
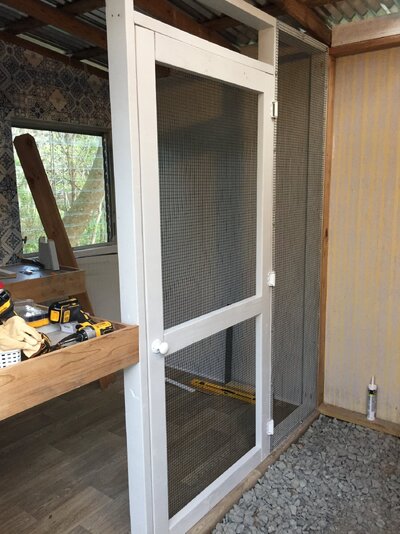
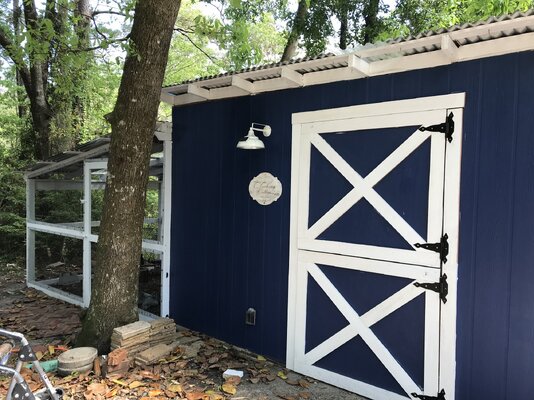
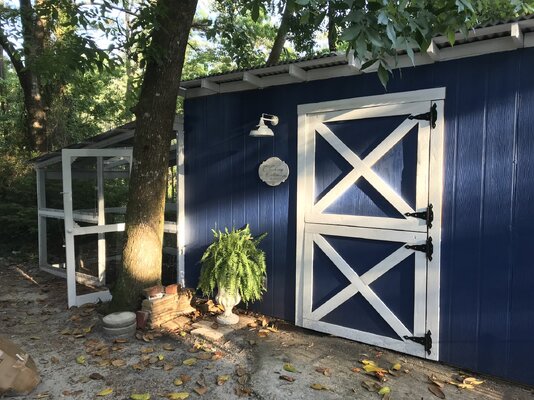
the run has hc around and skirted. Attached with my air stapler then washers and screws for security. I found hc that was vinyl dipped black, so I’m hoping that helps it last longer in our humidity. Everything rusts here so quick. The entire run and coop is under trees and pretty heavy shaded. I am working on knocking out all the soffits and replacing them with hc for more ventilation. We have been leaving the main shed door open when it warmed up. As the wall inside is also hc and I feel pretty secure.
pics at the beginning are now and then some are in the building process. I still have the watering system I want to work on. and Some more swings and roosts out in the run. And then continue the brick path back up to the garden and replace the concrete in front of the main door with a brick path.
thanks for looking! And thanks for all the info I have learned from here!
I honestly didn’t realize how building this was going to take over my entire life for so long! But I am really happy with it all. And really proud of it all.
our coop started out as a very run down shed. Which I really wish I had a picture of. When we moved in the shed was a disaster. The roof had rusted and collapsed. Which made the floor rot and collapse. And the siding was also rotting off. Last year we replaced the roof and siding. And put a layer of gravel to use it as a shed. Then we decided to turn part of it into a coop and shoveled the gravel over to the shed side of the shed. And framed out a floor and put down a plywood floor. I also had to fix some of the structure. the coop area is 8x6 with a enclosed covered run of 8.5x 11.5
I added a jealousies window that I got for free. It opens into the run that is enclosed in hc and predator proof. So it does not have another layer of hc on it. It is a big window that opens the whole window and adds a lot of ventilation. i built a poop deck with roost bars. I have used coffee grounds on the poop deck and have loved having them and the ease of scooping And the smell in the coop is really nice. There is a vinyl wall paper behind the roost bars. I wanted it easy to wipe down. But have not had any issues with anything on it. The wall paper goes with the french/English cottage vibe too.
I built the roost bars to lift out so I can take them out and power wash them for deep cleans. The ramps also were built to lift out. i just got the nest box built. And one of my biggest concerns for it was ventilation. It had to be dark and private. But not an oven. We are in nw Florida. I wanted it to be a roll out nest. I built it with plantation shutter on the ends. So it can be opened up more or closed For ventilation. Then the dividers are a shutter closet door. I used metal shelving for the floor to roll down to the front. And put nesting pads on that. I put a slanted roof on it which is 2 tin ceiling tile panels. To keep them from roosting up there. The girls had started laying June 16 out in the run and the corners of the coop before I got the nest box built. So I had to bribe them to explore the nest box with putting wood chips in it,herbs and then I resorted to oats. And that did it. They explored it and started laying in them!!! The roll down part isn’t currently working with all the wood chips in there. But I want them to really build that habit before I take out the wood chips to get the roll out feature working. The shutters I got at habitat for humanity and I spent less than I would have for plywood. I used 2x4’s in the back as cross bars between the shutters and 2x2 in the front cross bars. Then built the catch box out of 1x6 I build French cleats on the back that it hangs from with some scrap 1x8. And then I ordered some toile fabric napkins to make the curtains. Ran a couple passes on the sewing machine and ordered a brass cafe rod. Cause no cottage is complete without toile! Lol.
My daughter and I found the blue chicken platter this spring and it birthed the idea of thrifting blue chicken plates. and also feels so cottage to me. And I thought funny. I have some fabric that looks like a French grain sack to make a Roman shade for above the window. Then when we get freezing nights we can pull it down to help insulate the window. But that is a project for later.
the run has hc around and skirted. Attached with my air stapler then washers and screws for security. I found hc that was vinyl dipped black, so I’m hoping that helps it last longer in our humidity. Everything rusts here so quick. The entire run and coop is under trees and pretty heavy shaded. I am working on knocking out all the soffits and replacing them with hc for more ventilation. We have been leaving the main shed door open when it warmed up. As the wall inside is also hc and I feel pretty secure.
pics at the beginning are now and then some are in the building process. I still have the watering system I want to work on. and Some more swings and roosts out in the run. And then continue the brick path back up to the garden and replace the concrete in front of the main door with a brick path.
thanks for looking! And thanks for all the info I have learned from here!
Attachments
-
 EF997F18-3B77-4EF7-A01D-4E01524E5EEA.jpeg722 KB · Views: 217
 -
 0EF66FBE-8473-49BC-B896-B9B048BCE7CA.jpeg737.1 KB · Views: 93
 -
 13BD232C-E64A-469F-84FD-E49CE3CE4B00.jpeg741.9 KB · Views: 86
 -
 EBA627B6-A458-4770-9E5C-3276479878CB.jpeg639.4 KB · Views: 82
 -
 68533902-3108-4043-8491-9865686A5204.jpeg621 KB · Views: 80
 -
 EADF0C78-E61D-4363-9EE5-BEE5DACF3B12.jpeg513.5 KB · Views: 74
 -
 996D3D8B-3274-49D8-80A3-49231278EAD2.jpeg589.9 KB · Views: 76
 -
 F948F9CA-8DCD-4E9B-A9B5-82B2BAD22848.jpeg1,013 KB · Views: 72
 -
 4240DFD2-6038-4826-8C92-44AA3F783369.jpeg1 MB · Views: 73
 -
 8180A5DF-0A5A-4052-A14B-BB912A16C08A.jpeg375 KB · Views: 69
 -
 24576FD8-89FD-4589-967E-508C2F9B114F.jpeg532.1 KB · Views: 67
 -
 EE1B533D-9028-4F6F-A5B9-B0DE0AD032A9.jpeg644.1 KB · Views: 66
 -
 BDE030F1-907B-4BA6-8F31-82EDF080ABE7.jpeg797.5 KB · Views: 67
 -
 159954DD-50DE-4ACE-9567-F474725FCD0D.jpeg724 KB · Views: 81
 -
 A44D5A97-81ED-4FA3-80E7-8DBCA6CE856E.jpeg538.2 KB · Views: 79
 -
 0E87C548-3B6E-4CCE-9385-37F3FB9A9925.jpeg605.7 KB · Views: 79
 -
 A5DAA98F-DAF7-4778-8E64-5F3EBD08AB21.jpeg759.4 KB · Views: 66
 -
 655DCCA6-53AF-4BEB-8B72-4EA5B5C24D53.jpeg488.2 KB · Views: 65
 -
 C493406F-9ED0-41FD-B48D-BE6C2F800B02.jpeg1 MB · Views: 63
 -
 47612D3F-9D01-4F19-9785-12447E082C8F.jpeg772 KB · Views: 56
 -
 B23C9477-E1C5-4DE9-91C7-089451C1FB5D.jpeg705.6 KB · Views: 58
 -
 11301594-311F-47D8-AA6F-BC83DCCA9B88.jpeg493.8 KB · Views: 55
 -
 3DE742E8-4414-4D8B-8E33-4C9DB277930D.jpeg508.9 KB · Views: 59
 -
 192E39AD-BB9E-4F21-BE24-BF37736CE35B.jpeg426.2 KB · Views: 58
 -
 835123B9-586E-4397-9783-B5272D8EB5FF.jpeg752.2 KB · Views: 59
 -
 37FA6766-38C8-4C68-AC56-294625EC029F.jpeg720.3 KB · Views: 56
 -
 E1FD5B24-685C-4C1E-AD2C-C5B99AAB14FC.jpeg583.3 KB · Views: 92


")


