• giveaway ENDS SOON! Cutest Baby Fowl Photo Contest: Win a Brinsea Maxi 24 EX Connect CLICK HERE!

BROODER thread! Post pics of your brooders!

Here's mine. It's just a rubbermaid container with newspaper and then paper towels on top.

46347_img_0739.jpg


Inside with all of them before my friend took his. I only have 7 now and 1 sick one in her own box.

46347_img_0742.jpg
 
The baby brooder
brooders2.jpg

The 'big boy' brooder
brooders5.jpg

brooders4.jpg

It's actually a whelping pen my step dad built 30 years ago! All the sides fold in to store it. It has wheels. The front top portion folds down or the whole front. Its so easy to clean.
 
Last edited:
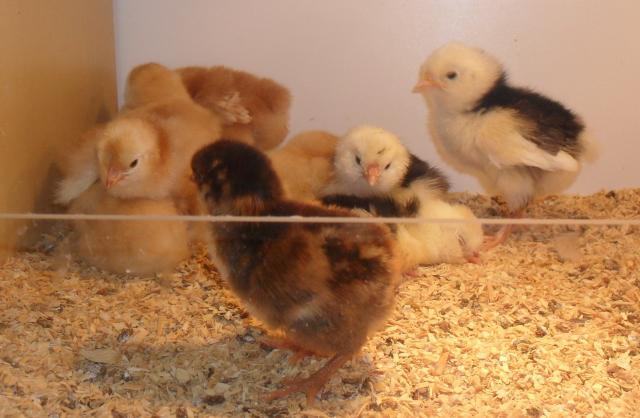
I just heard from my chick source, and I am meeting her up the road a piece tomorrow afternoon to pick up 5 chicks. She has had some fertility issues with her RIR layers, so we have been waiting a little longer than any of us figured, but that is just fine.

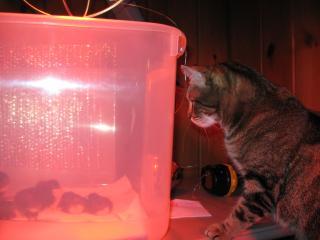
Here is my brooder, and I am looking comments on any problems that anyone sees with this setup.

brooder001.jpg


brooder002.jpg


brooder004.jpg


brooder003.jpg


I took a rubbermaid tub and drilled 1/4" holes along both sides, about three inches off of the bottom to allow for pine chip bedding. I hope that will be sufficient to turn the air over by natural convection from the heat lamp, but if I need more holes the drill is handy. When I tested this, once the bedding warms up, you can feel a distinct current of warm air coming up around the lamp that smells like fresh pine. In my view that means it is drawing air in through those side holes and should be enough constant fresh air to keep things under control.

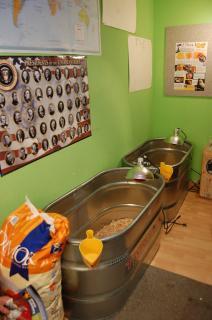
I even have a second tub exactly like this one that I can switch the chickies into while I clean out their house, give it a good scrub and set it back up clean for them again. The compost pile needs a shot of chicken poop to keep it hot...

I have a 60 watt incandescent lightbulb (NOT a heatlamp) in the brooder hood. With it right down near the wire like this, the temperature is just at 98 degrees as measured by that small thermometer. I experimented and the temperature is very controllable simply by raising and lowering the hood. The other end is warm but much cooler than the lighted end so the chicks should be able to spread out and stay warm without overheating.

I've seen here at BYC how people put marbles in their water dishes to prevent drownings. The rim on this waterer seemed pretty deep, and my wife had a bag of clean pebbles (never been used and washed anyway...) she uses for houseplants; they fit well and the water depth will be shallow all around. The feeder can be raised up as the chooks grow.

My intention is to keep the brooder in the house for a while where the temperature at night is more stable, and so I can keep a close watch on everyone. Eventually when they start growing feathers we will see about where they go next, perhaps into the garage, perhaps I can turn the coop into a brooder house with a lamp inside...we will see.

If anyone sees anything wrong with this setup, please let me know, otherwise I'm full speed ahead with what we have here...

Thanks!

wink.png
 
Quote:
Usually you should start your temperature at 95 and reduce it 5 degrees each week until birds are fully feathered and outdoor temperature is close to brooder temp.
 
Quote:
Usually you should start your temperature at 95 and reduce it 5 degrees each week until birds are fully feathered and outdoor temperature is close to brooder temp.

OK That's what I thought, haven't had chicks in the house before. And catching flak for it
ya.gif
but I don't care. Got my first bator and can't help myself.
 
45090_007.jpg


Here is the what we have set up for when our babies come. We did something similar last year but are getting alot more this year so had to do it larger scale. We keep ours in a room in the house for the first 6 weeks. We are going to build lids for both of these soon.
 
Steelersfan, that looks awesome! DW and I wanted to do something like that but alas our monetary shortcomings have stunted us so we put ours in the closet. Actually it is the closet. I taped up the walls and floor with one large piece of 8mm black plastic and layed down a 2 ft sheet of osb. Covered that with shavings and added the rest of the pieces and here we are.

42828_dscn1706.jpg


42828_dscn1745.jpg


We picked up the chicks at 3 weeks old. They were from McMurray Hatchery and were raised in a battery the first 3 weeks until we brought them home. We got more than we had brooder space for so I had to get creative. I wanted to get a stock tank or turn half the back room into the brooder/growout pen but ended up with the closet. It has been good so far but needed to add an escape deterant. DW crocheted a net to keep them in and so far so good.

42828_dscn1746.jpg
 
Last edited:
I LOVE the idea of the brooder in the closet as it's better for space and keeps dust down! What is the can on its side to the right of the roost? Also, aren't you worried about the chicks pecking the wire to the thermometer? I showed my wife this thread and she likes the closet idea too:cool:
 
I have a couple barn brooders which are functional, but not too pretty !
After getting a look at a hamster cage on the ikea hack site, I built something very similar using an expedit ikea [used] bookshelf.I had to upgrade the lighting/heating as hamsters don't need it quite as warm as baby chicks. I have built in levels, and still have 1 more to go. Still to be added are side vents [yes, I have been lazy] and the last [third brooder] shelf section. The light are on a dimming system to adjust to the temperature needs of each group of chicks. The link to the original hamster cage hack is here:
http://ikeahacker.blogspot.com/search/label/pet furniture


3795_sdc10165.jpg


3795_sdc10178_edited-1.jpg


3795_sdc10180_edited-1.jpg
 

New posts New threads Active threads

Back
Top Bottom