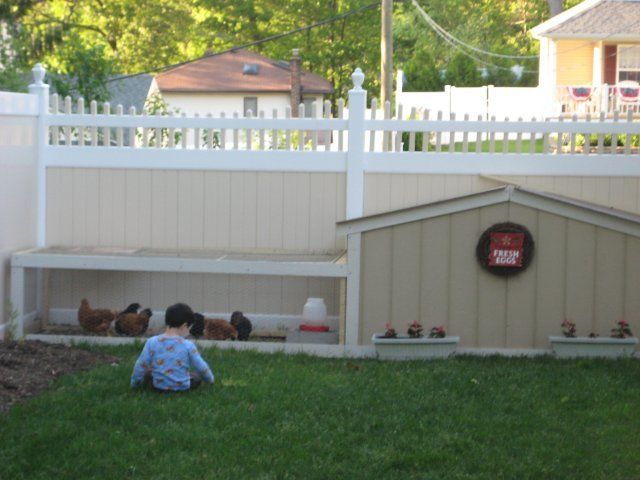
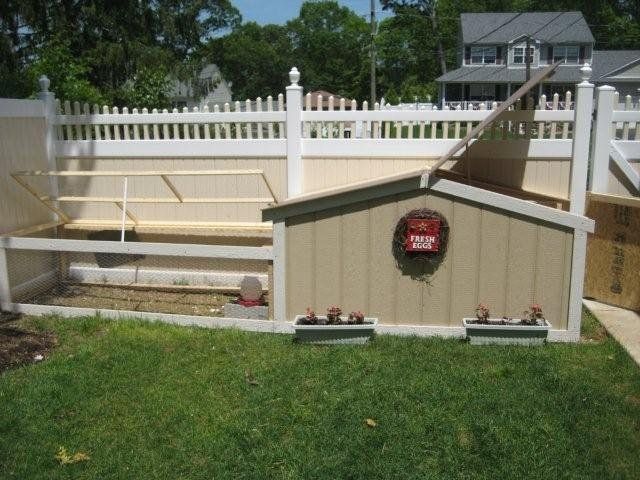
So, my kids got baby chicks for Easter... and I realized what a commitment this would be - but I didn't realize how long it would take me to build a chicken coop! I've been surfing this site for months while the chickens were growing up in my basement and I'm proud to say, I finally built the coop last weekend! I took lots of ideas from you all and I THANK YOU for posting your images and ideas for everyone to look at. I even took the "automatic" feeder idea from another post (the one with the PVC) what a GREAT idea! There's been chicken feed all over my basement with a ton of waste for weeks - and now with the new chicken feeder, there is virtually NO WASTE at all! So, here's pics of my coop. It's 4' wide by 16' long including the chicken run. The roof lifts up and the side comes off so I can walk right in to clean it. It's raccoon proof and fits nicely along a fence in my backyard. So, I hope these pics help someone else out there like previous posts have helped me.
I'll be improving the interior of the coop a bit over the summer with nesting boxes (milk crates (thanks for another great idea!))
Can't wait to get fresh eggs!
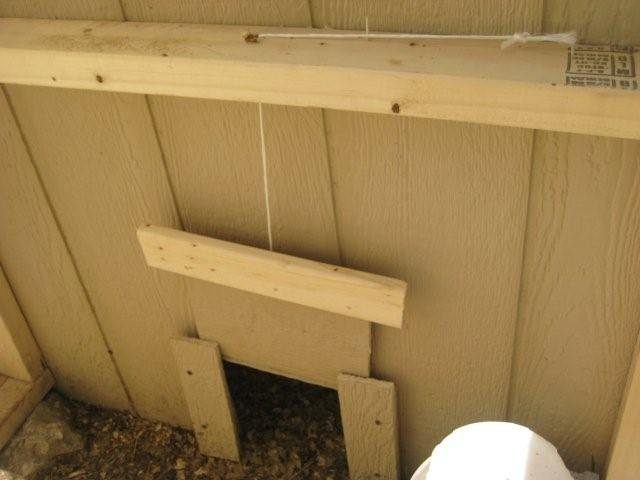
This is the door I made to keep my chickens in the house at night. Its on a string to be lowered at night to keep them ultra safe.
Door
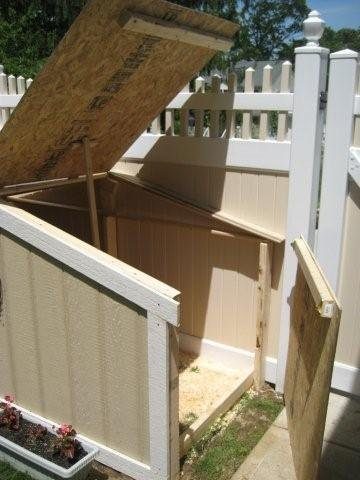
I built the entire coop and run to be easy to open and clean. I remember as a boy, my grandfather always had chickens and it stunk so bad I was never interested in helping out! I want my coop clean and fresh so my kids arent turned off by the stink! The kids are very interested now and I want to keep their attention a clean coop will do it! The roof and run opens on hinges, and the right side lifts off entirely so you can walk right in this side is attached with window latches and 2x4s to keep it secure.
Open
Heres an interior look of the latches on the right side of the coop.
Latches
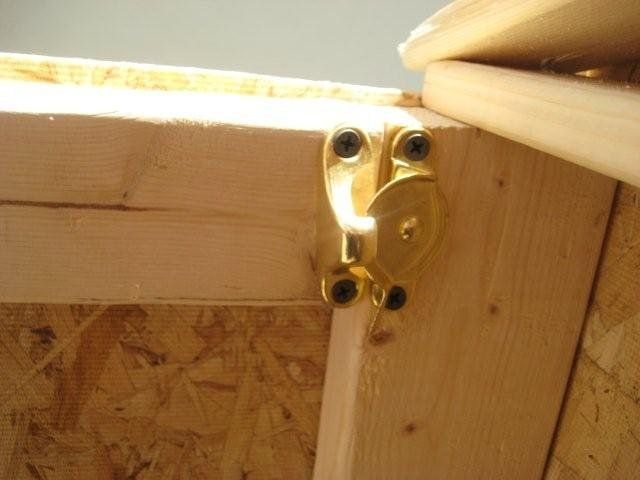
And heres a close-up of the latches. Theres one on each side. Theyre brass so they wont rust.
Latch Close-up
Heres what it look like with the roof and side open so I can walk in to clean the coop. I chose a dirt floor with pine shavings since its easier to rake or shovel to keep it clean.
Walk-in
When my chickens are ready to lay eggs, this is how I plan to collect eggs. The nesting boxes will be built right under the roof so my kids can just lift the roof to get the eggs this will also prevent me from stooping over to get eggs myself!
Egg Collecting
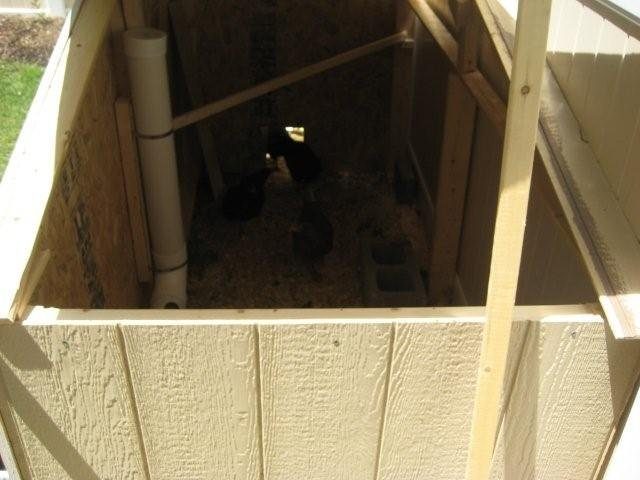
I put a 1x2 in the coop for a perch the cinder block is just there for them to stand on and hang out I know its not fancy, but its stable for them to jump on and use it as a stepping stone to get on the high perch. The nesting boxes will be just below the high perch (thanks for the tip on this message board!)
Inside Perch
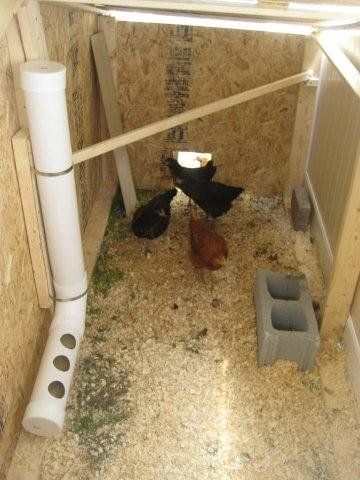
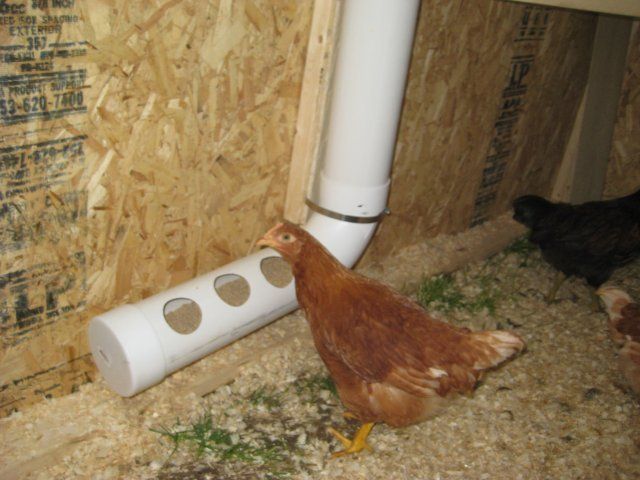
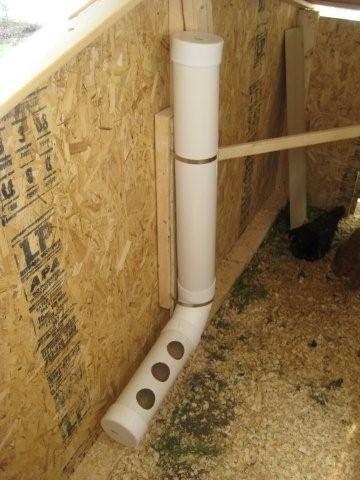
Heres a close-up of the entire feeder. Its almost 4 tall and I used 4 PVC pipe. It holds a lot of food and theres very little waste. I used a door knob drill bit to cut 2 holes on the bottom run of the PVC (its about 14 long). Its slightly pitched to ensure the feed flows smoothly. Its also not attached on the long side of the L so when the chickens sit on it, it moves and they dont like that at all! So they get off the feeder!
Feeder
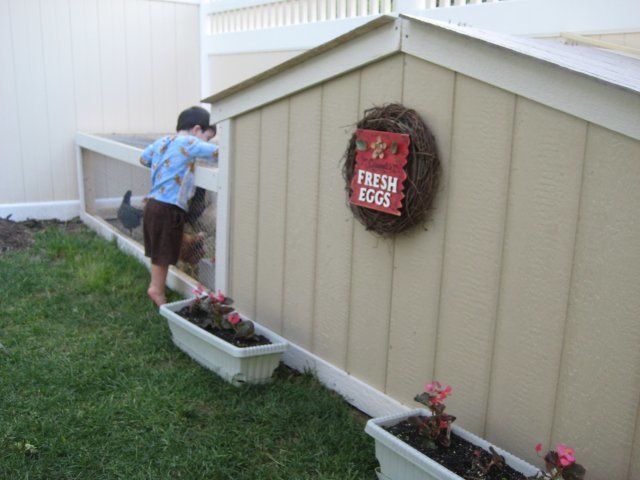
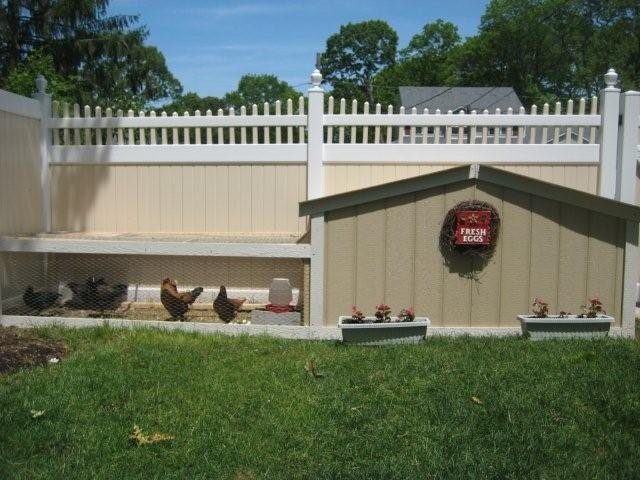
Heres one more pic of the Exterior of the coop and the run. The whole project costs me about $260 in materials, 2 days of work with my 8-year old daughter, and over month of planning the details. For the wood and trim, I used Smart wood available at Lowes and Home Depot. Its some sort of compressed board thats already primed and weather resistant! The paneling (4x8 @ $16 per sheet, I used 3 sheets) comes in beige and the trim (1x 4x8 @ $4 each) comes pre-primed in white! Very easy to use and perfect for a coop!
Exterior
Let me know if anyone has any questions or would like more details!
I'll be improving the interior of the coop a bit over the summer with nesting boxes (milk crates (thanks for another great idea!))
Can't wait to get fresh eggs!
This is the door I made to keep my chickens in the house at night. Its on a string to be lowered at night to keep them ultra safe.
Door
I built the entire coop and run to be easy to open and clean. I remember as a boy, my grandfather always had chickens and it stunk so bad I was never interested in helping out! I want my coop clean and fresh so my kids arent turned off by the stink! The kids are very interested now and I want to keep their attention a clean coop will do it! The roof and run opens on hinges, and the right side lifts off entirely so you can walk right in this side is attached with window latches and 2x4s to keep it secure.
Open
Heres an interior look of the latches on the right side of the coop.
Latches
And heres a close-up of the latches. Theres one on each side. Theyre brass so they wont rust.
Latch Close-up
Heres what it look like with the roof and side open so I can walk in to clean the coop. I chose a dirt floor with pine shavings since its easier to rake or shovel to keep it clean.
Walk-in
When my chickens are ready to lay eggs, this is how I plan to collect eggs. The nesting boxes will be built right under the roof so my kids can just lift the roof to get the eggs this will also prevent me from stooping over to get eggs myself!
Egg Collecting
I put a 1x2 in the coop for a perch the cinder block is just there for them to stand on and hang out I know its not fancy, but its stable for them to jump on and use it as a stepping stone to get on the high perch. The nesting boxes will be just below the high perch (thanks for the tip on this message board!)
Inside Perch
Heres a close-up of the entire feeder. Its almost 4 tall and I used 4 PVC pipe. It holds a lot of food and theres very little waste. I used a door knob drill bit to cut 2 holes on the bottom run of the PVC (its about 14 long). Its slightly pitched to ensure the feed flows smoothly. Its also not attached on the long side of the L so when the chickens sit on it, it moves and they dont like that at all! So they get off the feeder!
Feeder
Heres one more pic of the Exterior of the coop and the run. The whole project costs me about $260 in materials, 2 days of work with my 8-year old daughter, and over month of planning the details. For the wood and trim, I used Smart wood available at Lowes and Home Depot. Its some sort of compressed board thats already primed and weather resistant! The paneling (4x8 @ $16 per sheet, I used 3 sheets) comes in beige and the trim (1x 4x8 @ $4 each) comes pre-primed in white! Very easy to use and perfect for a coop!
Exterior
Let me know if anyone has any questions or would like more details!
Last edited:


