Informative Post Hunt!

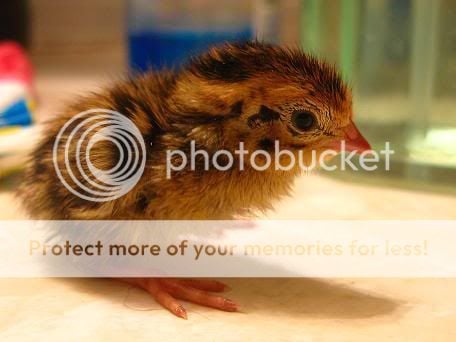
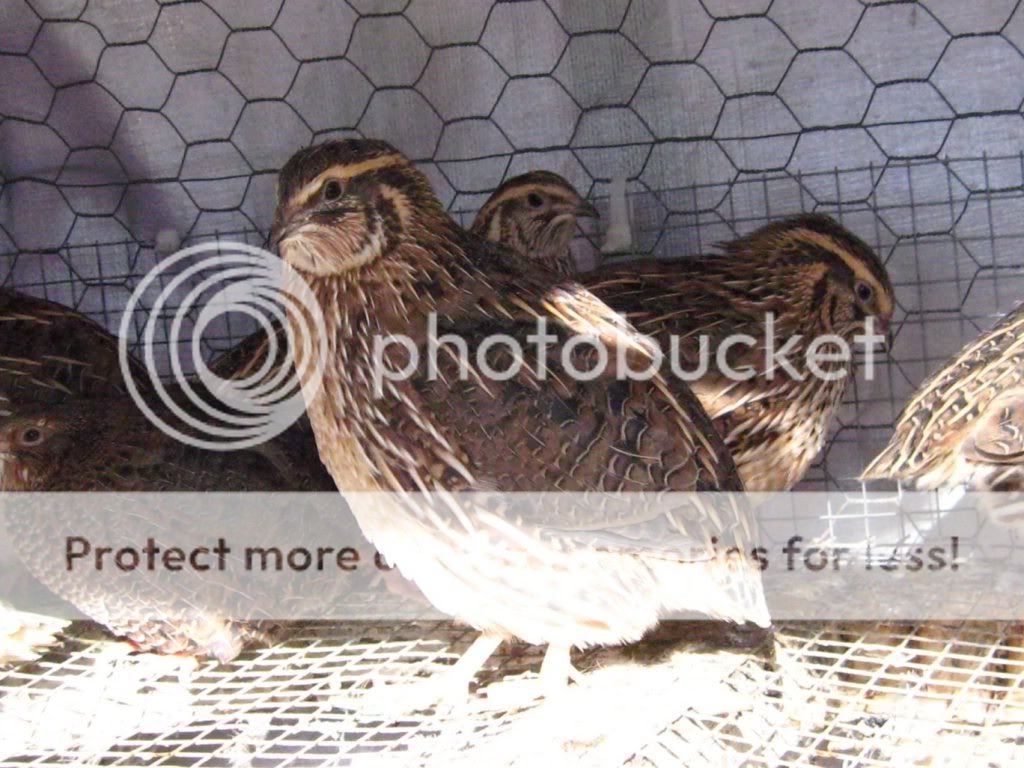
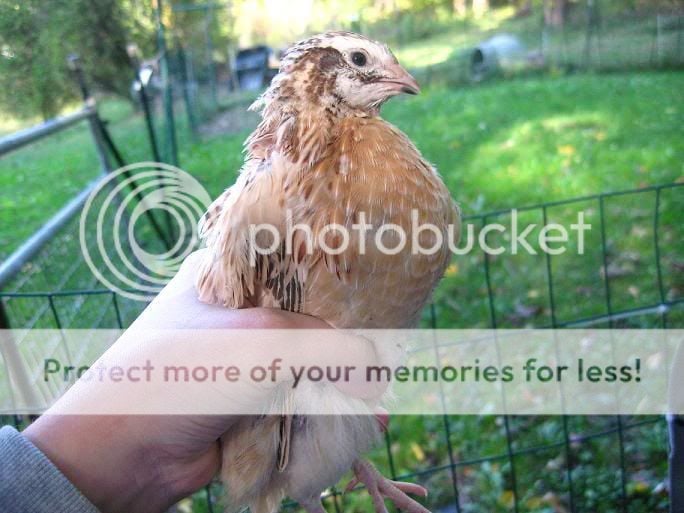
https://www.backyardchickens.com/th...hotos-of-your-chickens.1414631/#post-23229686
There’s a whole SLEW of exciting contests coming up on BYC, both with the Halloween Hatch A Long and many others from the official BYC contest page. Every year there’s a BYC Calendar Contest, and, there’s a weekly Picture of the Week column too! Because there are so many opportunities to share your birds through your photos, I thought I would start a thread where I would share tips for taking better photos, other people can share their tips, and folks can also share their work and get advice or commentary. I think I went a little heavy with my list of tips, and maybe this would be better served as an article, but I thought a thread was better for others to join in on.

Feel free to join either with your own tips for others, things you have learned about photography or photographing chickens, or ask questions that have been bothering you about your own photos. We will cover all types of photography, traditional SLR and DSLR photos, camera phones, and point and shoot.

I thought I would start this thread with my personal top 5 tips for taking photos. I’ve personally been a photographer for more than 20 years, and, because I am a glutton for punishment I guess, a majority of my photography experience is in taking photos of animals for commercial and advertising clients. I have several “high powered” digital SLR cameras, but nearly everything I take these days for personal use, and all of the photos I’ll use for sample here are taken from my phone.

I invite EVERYONE to participate in this thread, experts and amateurs alike. The only requirement is to be kind. It takes a lot of confidence to put something out there for any level of critique, so if you are going to be critical of someones work, make sure you are actually being insightful and helpful.
Here are my top tips….

1. Clean Your Lens and use your focus

Okay, this may seem obvious, but, I promise you more than half of you reading this photo could do this RIGHT NOW to make all of your photos better. I see this as the most problematic in photos that are taken on a camera phone. Today’s camera phones are incredible and the photos from them really shouldn’t have noticeable faults. If there is fogginess, halos in lights or reflections, blurred focus or a lack of vibrancy in your photos, clean your lens! EVERY time I take my phone out of my pocket to take a photo, I rub the lens with my t-shirt. Every. Single. Time. You will be AMAZED at the difference in clarity it will cause. Go right now and check your camera phone. There’s a pretty good chance you’re going to see your finger print or something else directly over the lens. Clean it off!
Once your lens is clean, make sure you actually use your focus. if you tap with your finger on the area you want to be focused, your camera will re-focus there.


2. Composition - Subject

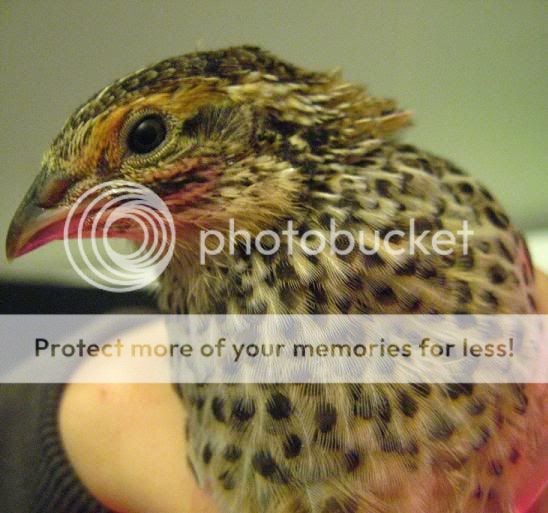
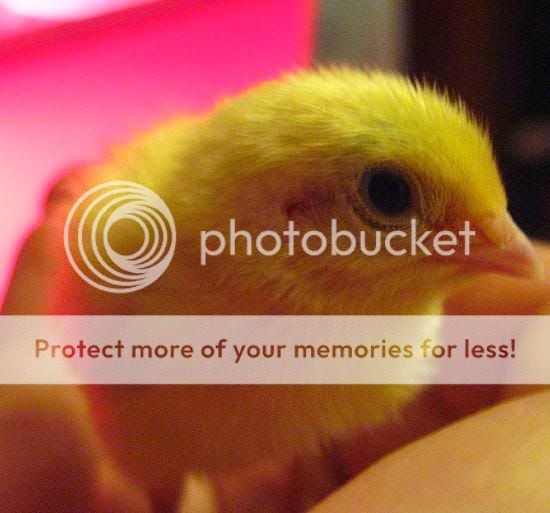
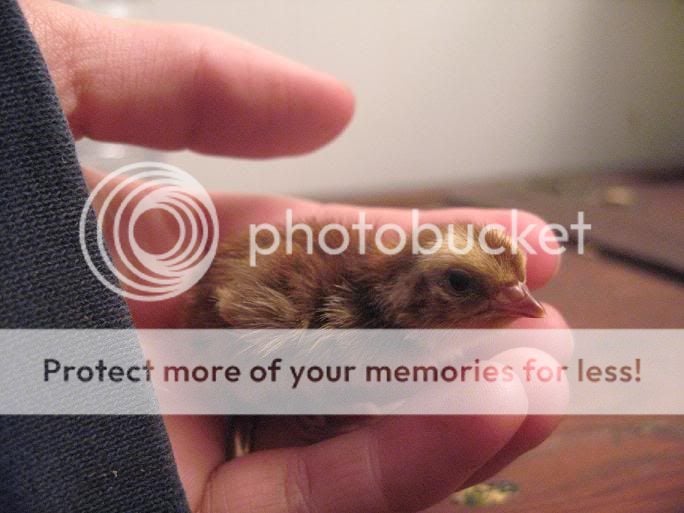
One of the best things you can do for your photos is in the composition. You can think about composition while you are taking the photo, but you also can crop the photo after the fact into a more interesting composition. The first area of composition we are going to talk about is placement of your subject. Most people will take a photo with the subject in the center of the frame and call it a day. Sometimes, this is a great thing. Many times, however, you could really add interest to your photo by moving the subject into one of the segments created by the RULE OF THIRDS. The rule of thirds is simple… divide the frame of the photo into thirds both horizontally and vertically. The places where those lines intersect (SEE PHOTOS BELOW) are the most visually intriguing spots to place your subject. Placing your subject at those points or along the lines of thirds is your best choice for composition. (Note: iPhone and other apps superimpose the grid of thirds onto the photo when you crop it. You can also get it to permanently display within your camera app as you are taking photos.)
63CF3C8A-019C-4CC2-A66A-AE185DB72B44.jpeg


The Rule of Thirds is not some made up thing… this is literally science. The human eye is DRAWN to those areas of a photo FIRST. Place your subject here, and it will seem to JUMP out at the viewer. See these photos below with the grid superimposed on them.

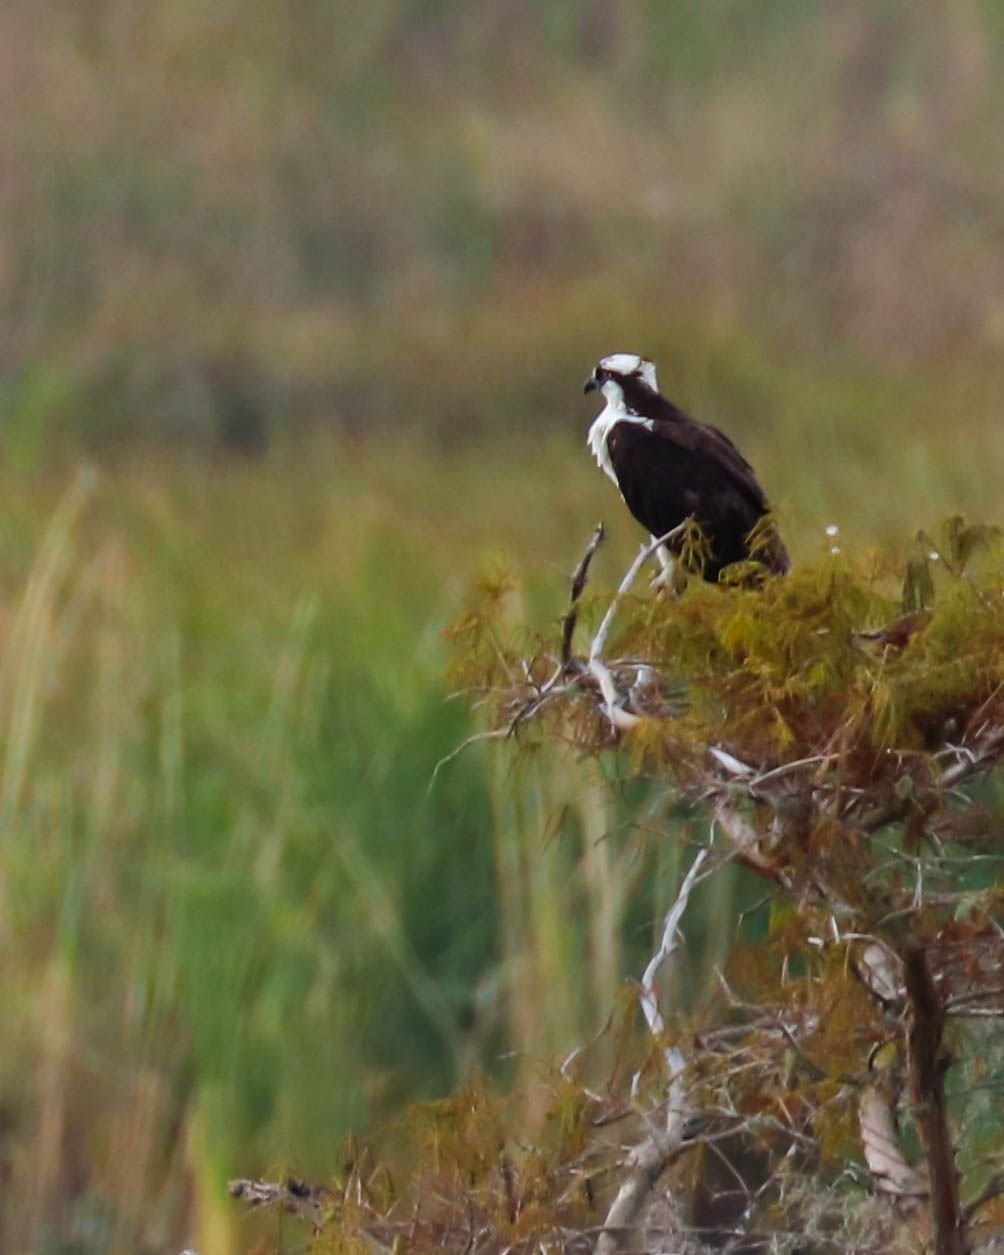
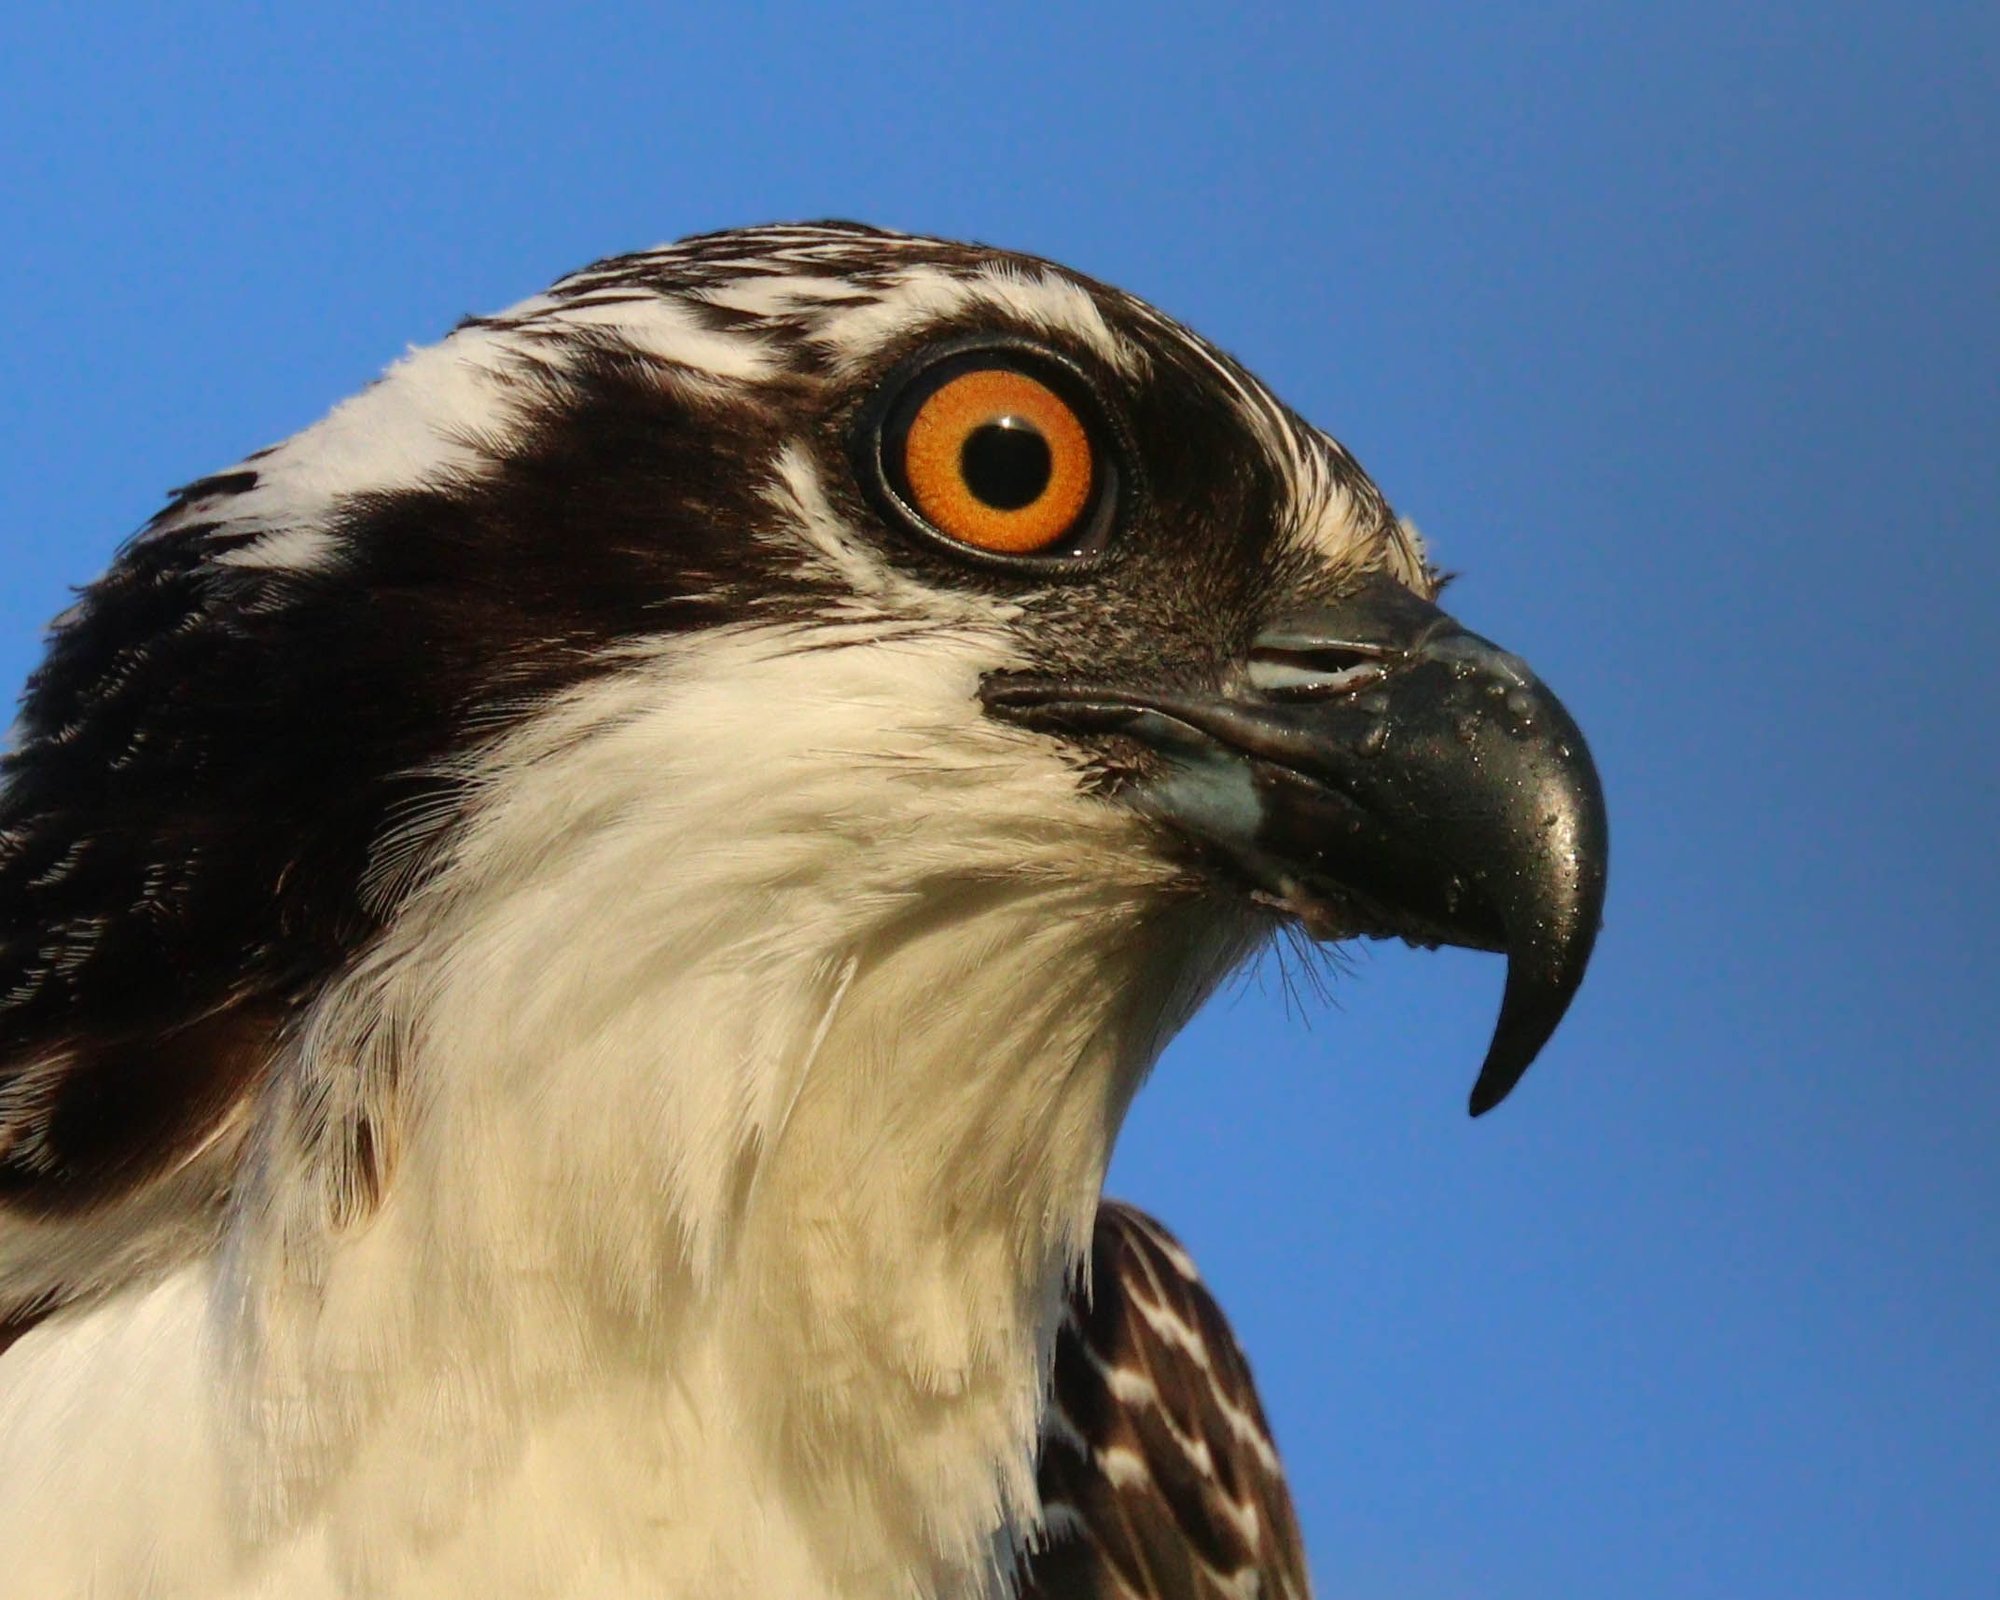
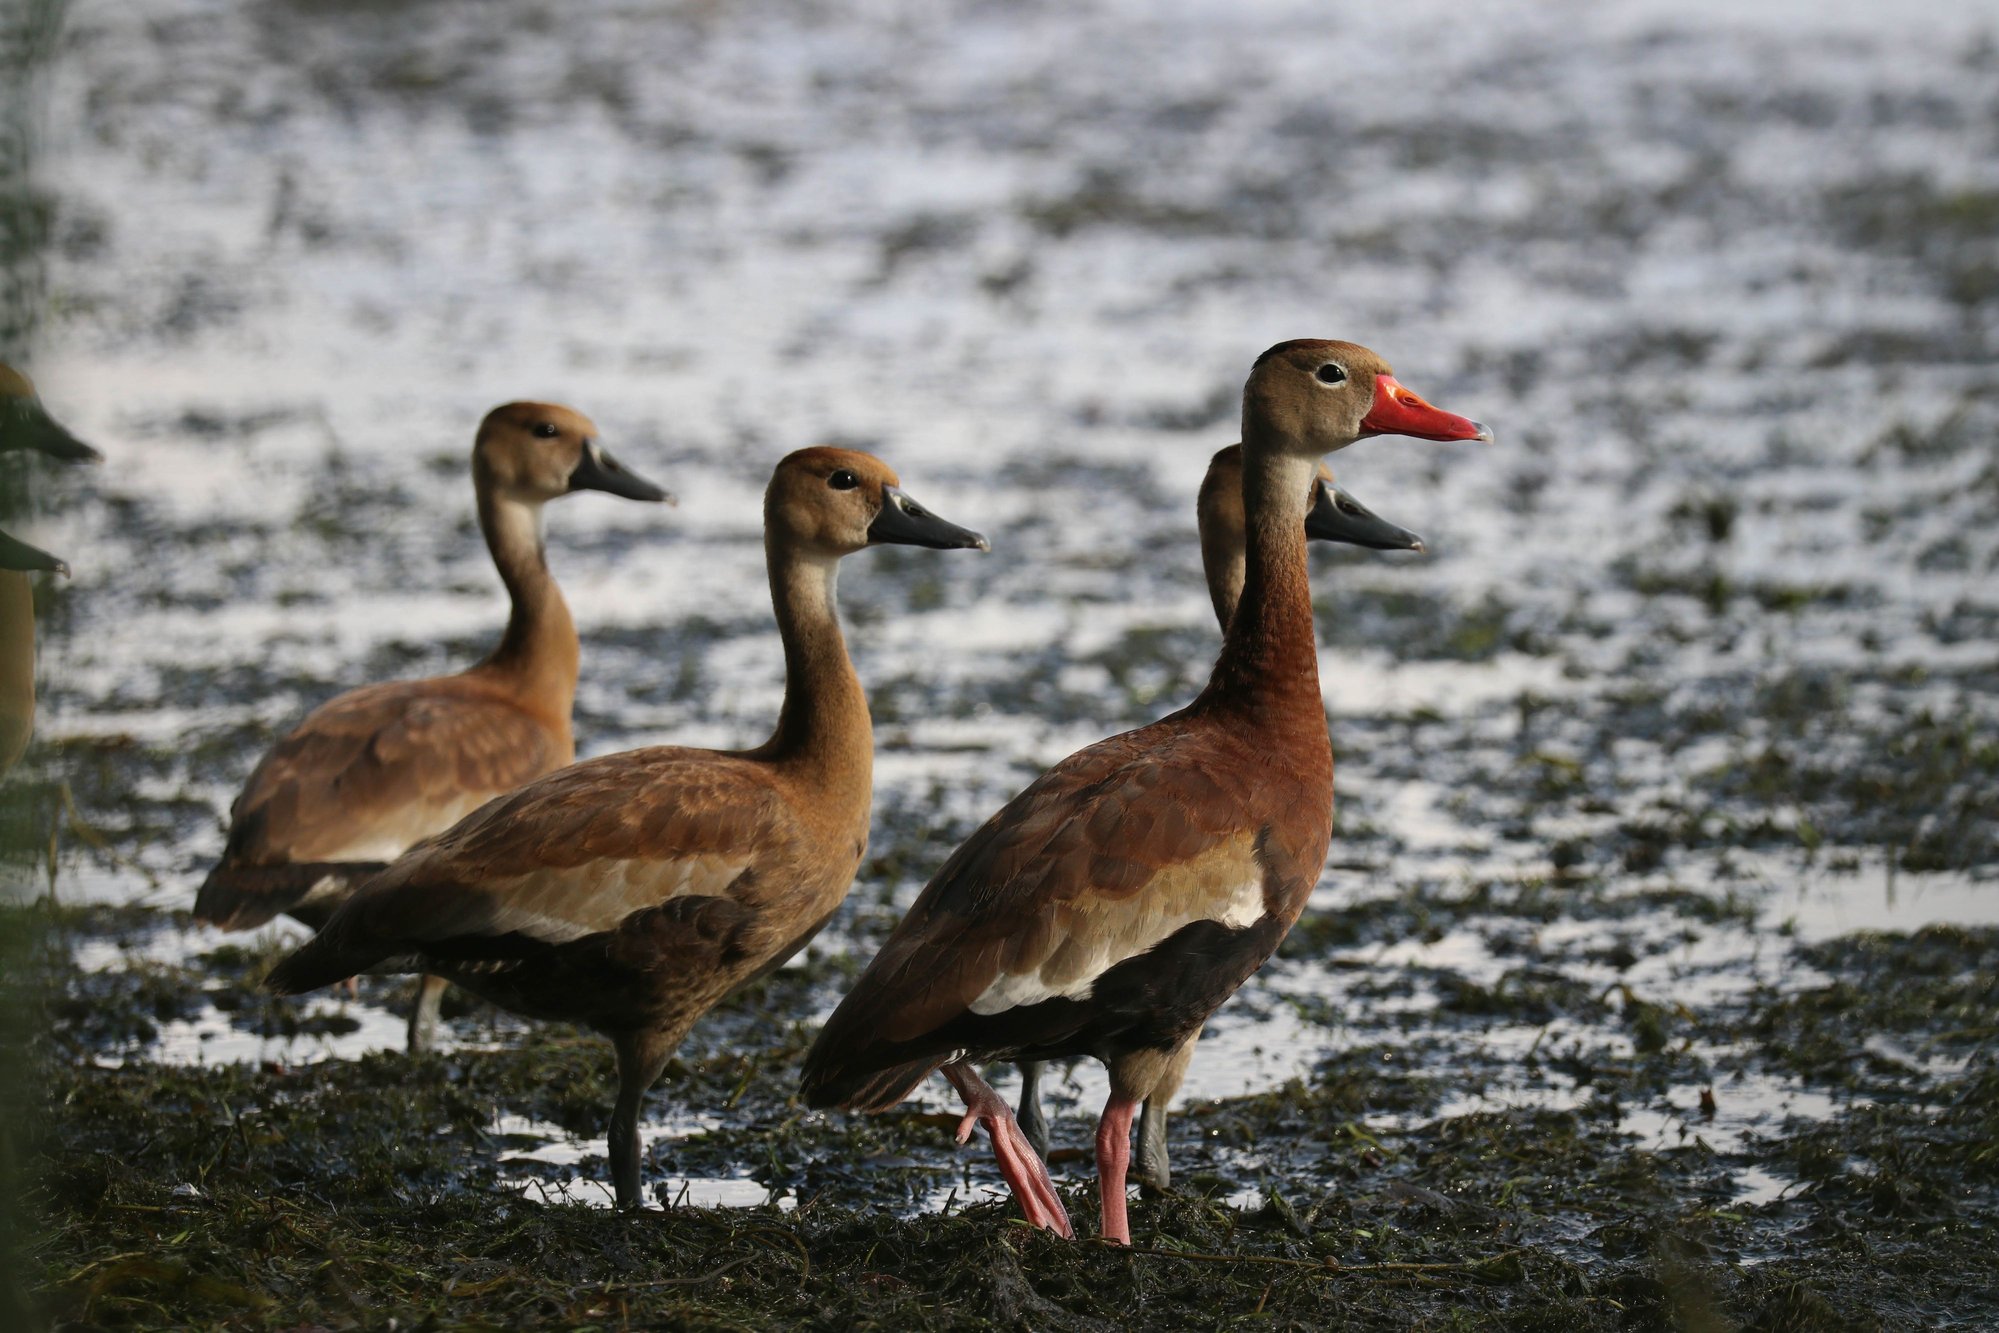
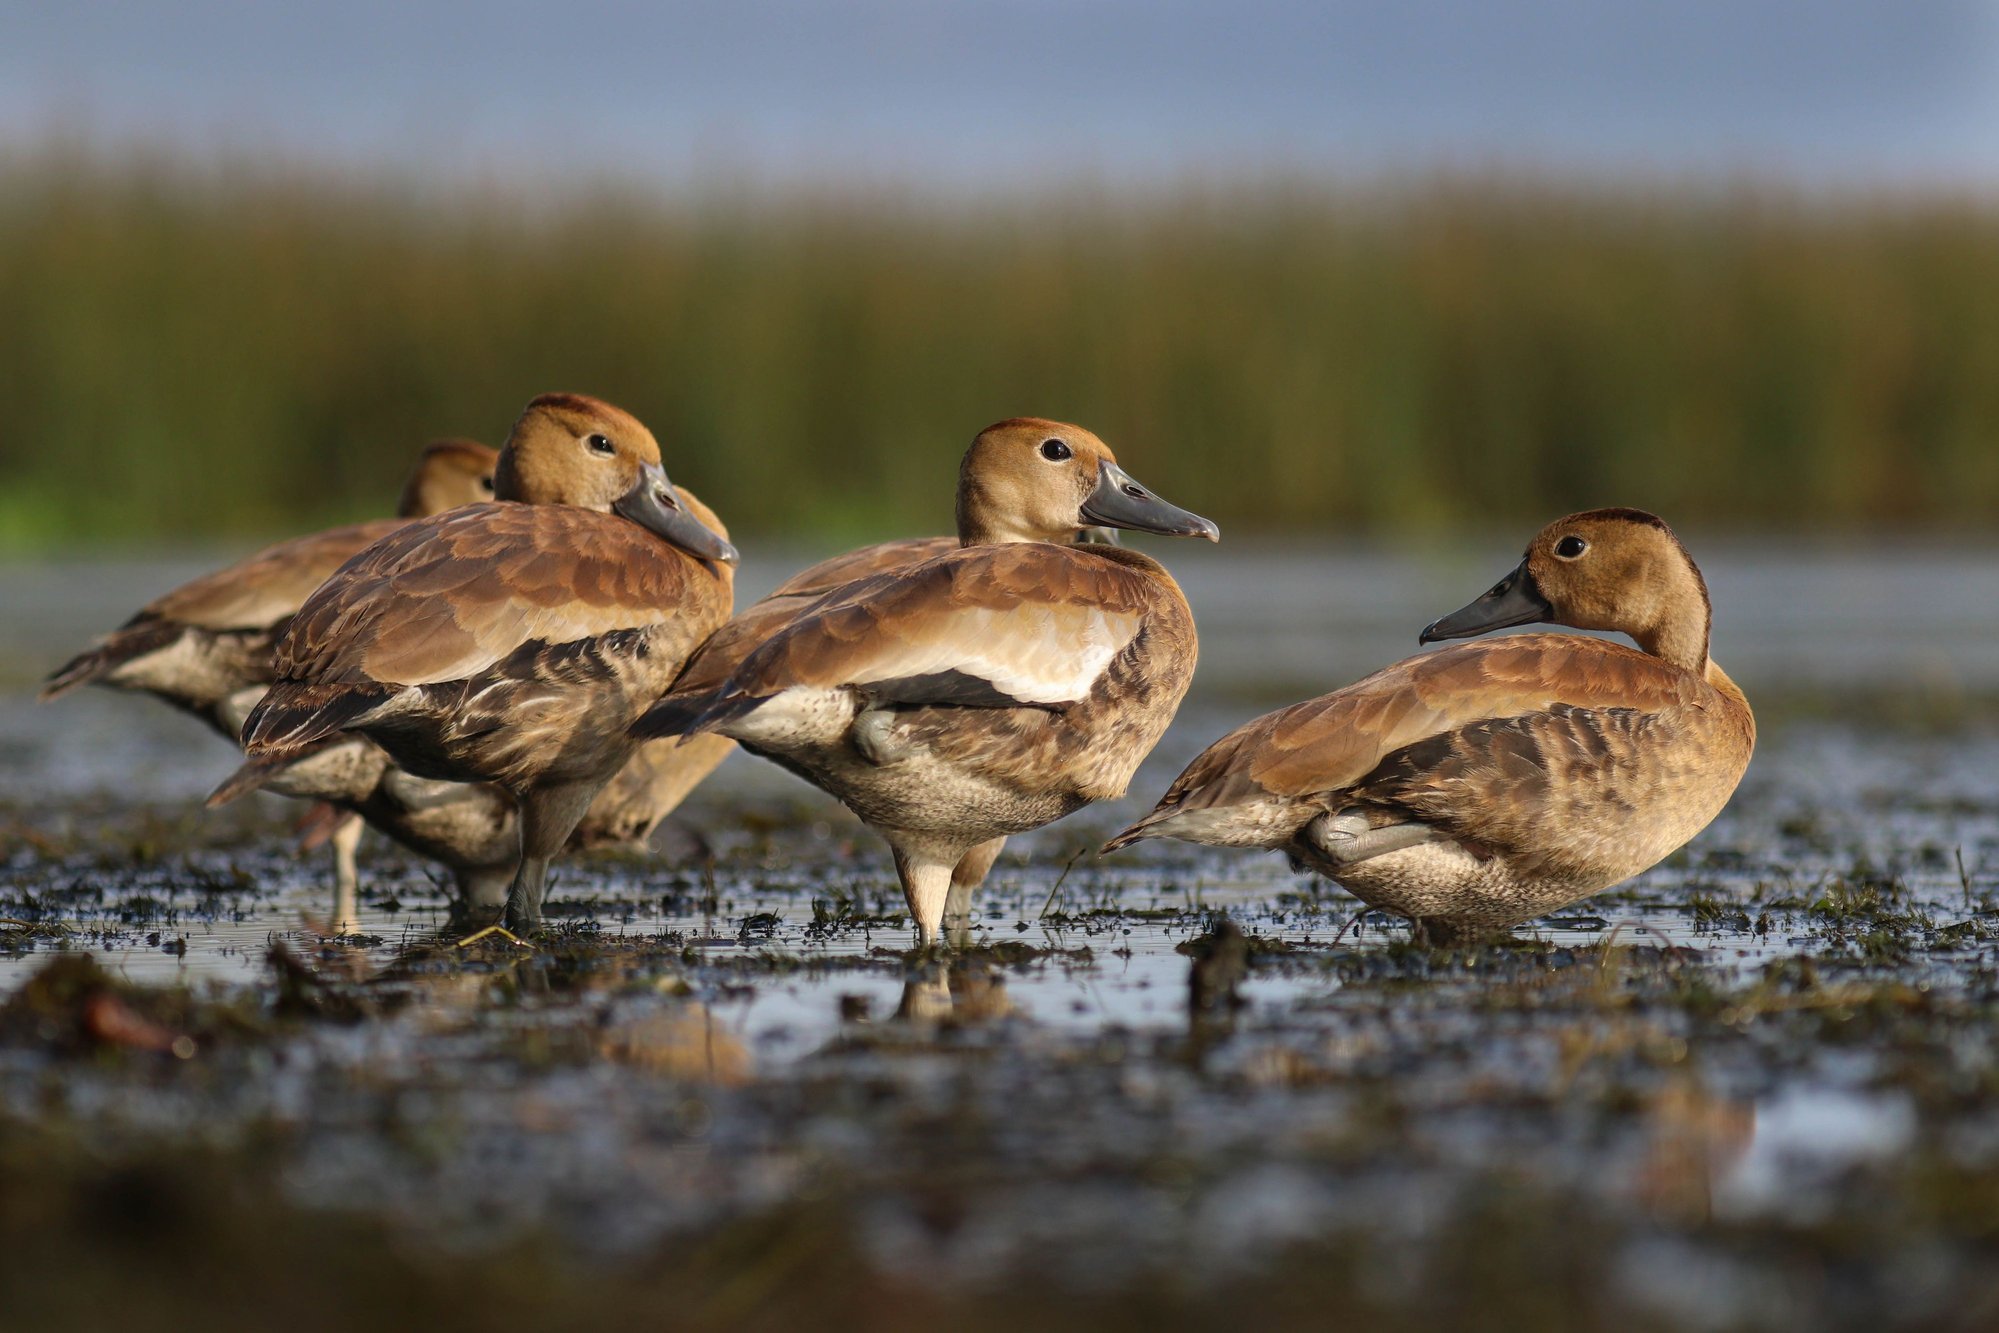
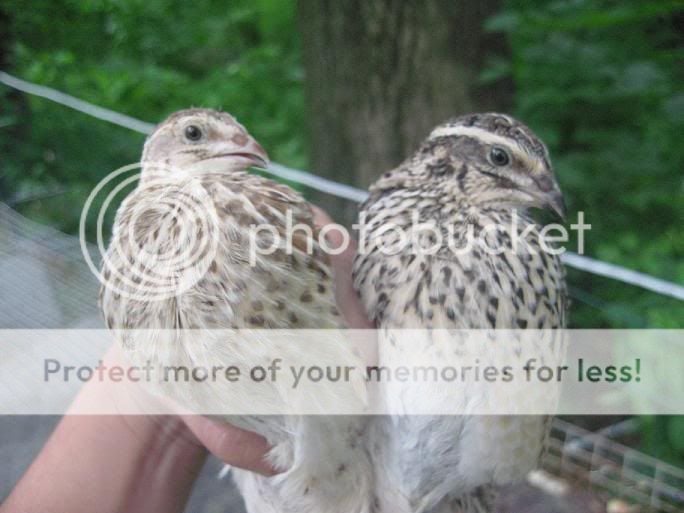
Here are three photos utilizing the rule of thirds for interest. Following is a composite of the three with the rule of thirds grid superimposed.

440A7875-01E1-4DBB-8BC1-C031C3CAF70F.jpeg


357A4834-9DEE-45EF-8A86-73F21768568A.jpeg


2B49C313-9D7C-4B44-9FAD-1DFDD9BFA474.jpeg


1E2327C8-16DD-45F9-ADEC-53B9FC1B720E.jpeg


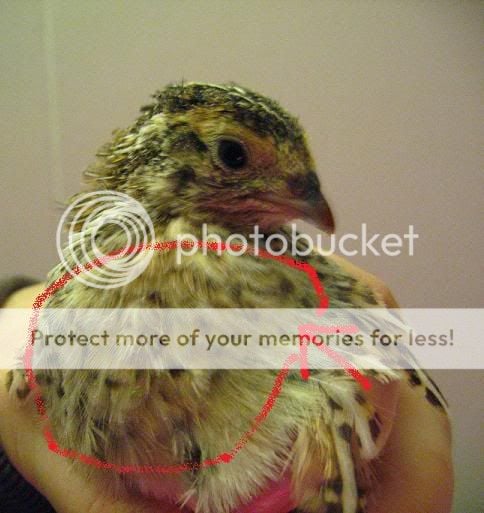
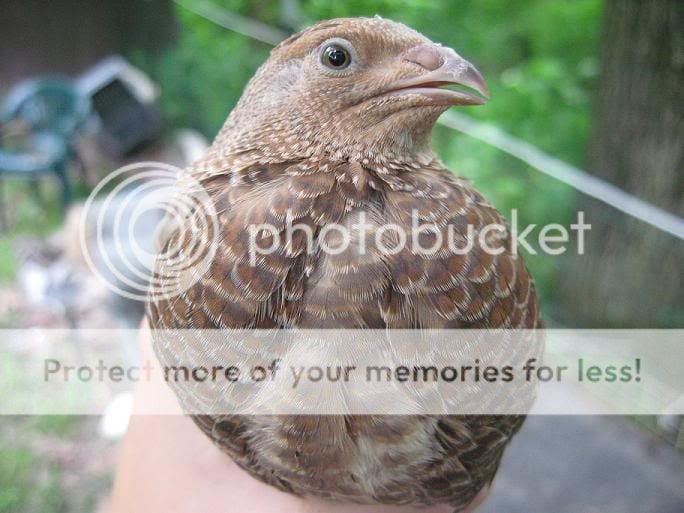
3. Composition - Positive and Negative Space

Positive and negative space deals with the subject and placement of your photo. Positive space is simply the subject and other areas of the photo that jump out of the photo. It’s the actual elements of the items in the photo. Negative space is the space between the frame and the subject. Manipulating positive and negative space in a photo is a compelling way to tell a story through your image. Use the rule of thirds to immediately interject an interesting positive/negative space dynamic. Play around with the what can change with positive and negative space in your photos. Too much of either can literally make or break your photos, or tell a completely different story from a different perspective. Remember there should be a balance. In many photos, there are too many additional elements in the photo, creating almost an image of entirely too much cluttered positive space.


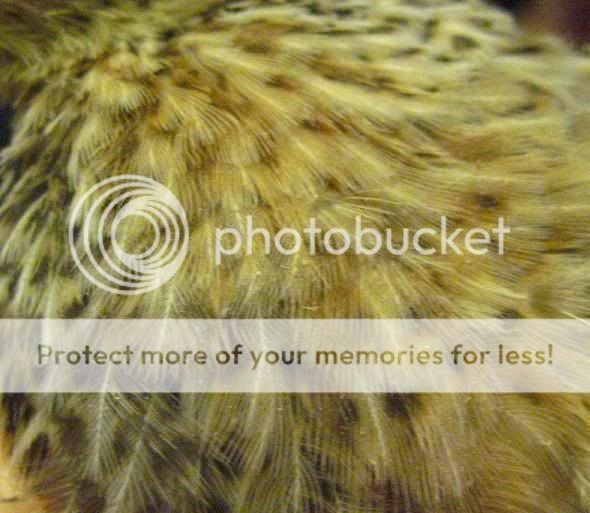
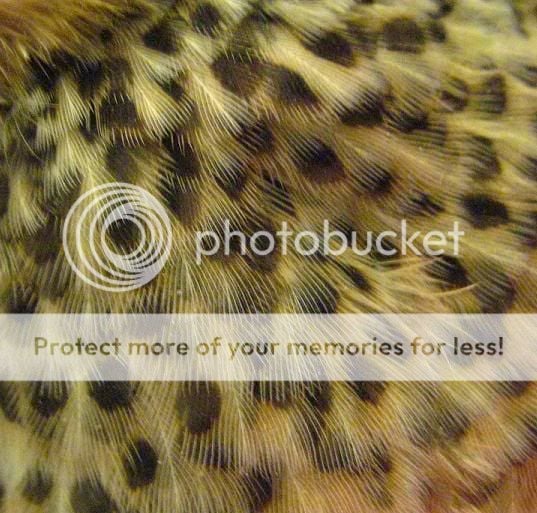
Playing around with negative space in an image is an excellent way to give much more depth to your photos. Creative use of negative space is imperative to those of us in advertising and marketing, and if you start to get a handle on using negative space in your own photos, your work will take a gigantic leap forward. Play around with fabric and textures to create negative space in your image.


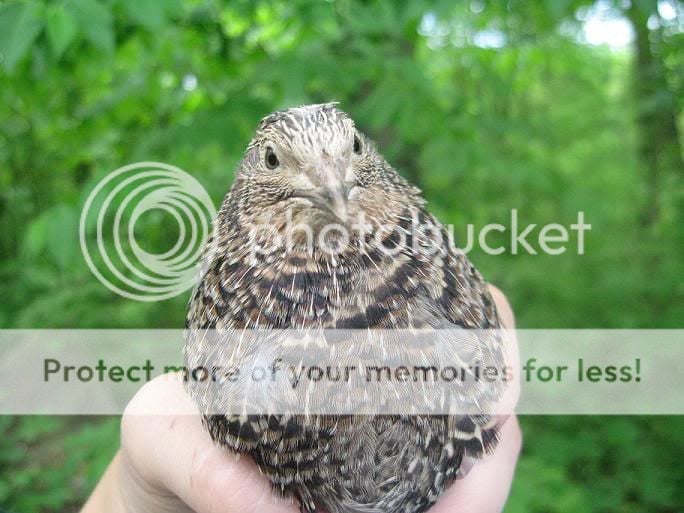
This image shows the rule of thirds and a play on texture and negative space together.
0236AFB6-09B6-41A5-8242-72138C1973D3.jpeg


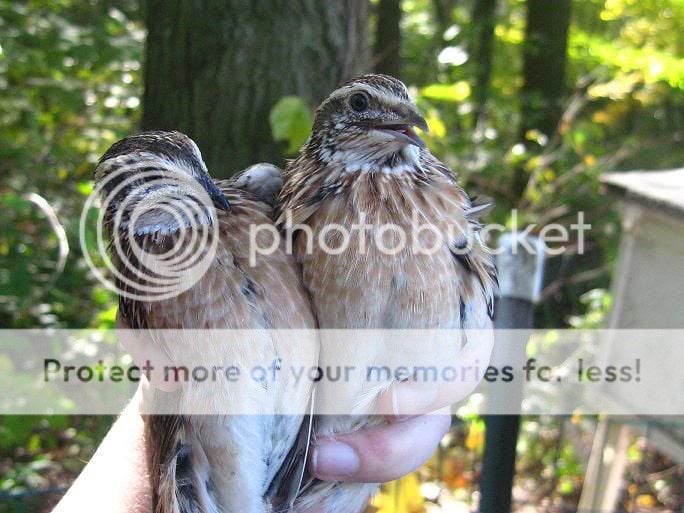
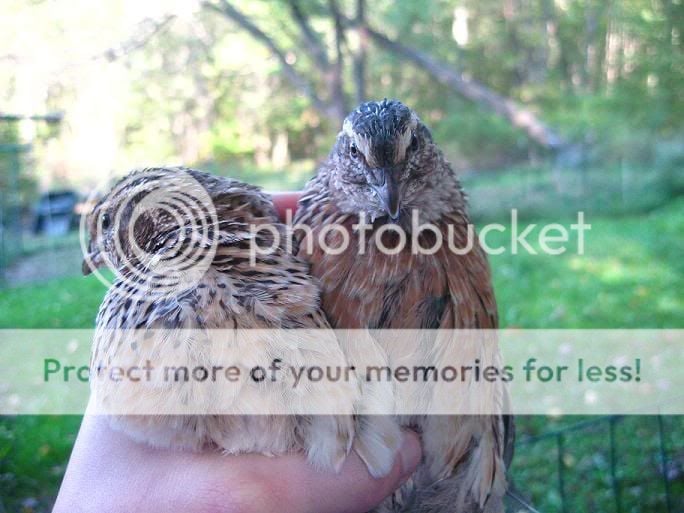
4. Working with Animals

Be PREPARED.

Working with animals, even your own, is one of the most stressful situations for photography. It’s high-pressure because you are not in control. Animals are pesky little free-thinkers when you don’t want them to be and they’re going to act unpredictably in any situation that is not normal. So, what do you do? You make it normal. Do NOT expect to walk outside with an idea in your head and get it perfect on your first attempt. I always suggest practice before even bringing the camera into the situation. Sometimes it takes me longer in a session to get the subject comfortable than it does to actually take the photos.

For example, one of the best ways to get better photos of anything is to get on the same level as the subject. Of course, you could just squat down. (my thighs say… no thank you.) I found over time that the better solution is to RAISE the animal up. This does a lot of things. It puts you and the subject on the same plane of focus, and makes for more visually interesting perspectives. (Getting UNDER or lower than an animal gives a distorted photo that makes them larger and is very interesting with this method, too.) In certain instances, this can also help to isolate the animal and keep them in one spot. I’ve literally built platforms for horses to stand on to be able to get the right shot. You CANNOT expect to do this and immediately pickup your camera. How do I know this? I’ve been bit, lunged at, spit on, everything trying to order an animal somewhere for a photo. It just won’t work. Take the time, and put in the work to make them comfortable. Awkward tension reads through pictures, and the viewer can feelit.

I see many people, especially with chickens, say they can’t get photos of their chickens because they are running around. Put the camera down. Spend time teaching the chicken to be comfortable where you want to take the photo. Time, treats, love, whatever it takes. THEN get your camera out ONCE YOUR SUBJECT IS COMFORTABLE in the space. Your nerve-activated sweat pores and your temper will thank me. ;-) Remember, this might take days with a chicken. Start with a fence. See if WITHOUT a camera, you can use treats and time to get a chicken comfortable on a fence or something off the ground. Get them to the point where they will stay and await your treat delivery or whatever the reward is. Then, get your camera out.


5. Editing

Digital photography puts ALL the tools at your fingertips to really create compelling and vibrant photos. Use them! (But, don’t overuse them!)

My personal favorite phone application for photos is SNAPSEED. You can use preset adjustments or individually adjust aspects of your photo. You can even adjust individual AREAS of your photo.

It is very important to understand the limits of post production such as this. As a general rule of thumb, I advise you not to use more than 20% of an adjustment on your photo, especially in certain categories. Manipulating a photo past 20% yields some interesting and sometimes intriguing effects, however, they are rarely if ever natural looking to the viewer.

When I used to guide human clients through the retouching process as it was first coming out, I would always say “You should look like yourself. It should be yourself on your absolute BEST day, but you should always look like yourself.” This is true with all of your photography. Bringing this back to chickens…. We have all seen grass, we all know how it can look prettier in certain lighting, but we also know the limits of what grass looks like. If you want such a vibrant color on your chicken that the grass is electric green, you have lost the allure.

In order, these are the adjustment areas that you can do as little to versus those that can take much more….these are most of the standard categories for adjustments in most apps, including the photo editing apps built into your photos in iPhones and Android.


Exposure

There is simply not enough information in digital photos to manipulate this slider too much, unless dealing with a RAW image from a DSLR. Keep this closer to 10% either way. It will adjust the entire photo but will cause your brightest areas of the photo to “blow out” with heavier adjustments and often your darker areas to be muddy/bleed.

Highlights/Shadows

Individually adjust the highlights or shadows of a picture. This is nice sometimes on animals to use the shadows slider to remove shadows from the animal when the photos is taken in full sun.

Contrast

You can adjust the contrast for more of a pop or to soften the image, but be careful here, it’s easy to use too much.

Saturation

Do not use more than 20% here, and sometimes that is a lot. I rarely use it because this is a universal tool that applies an adjustment to the entire image. Colors already saturated in your photo will be over-saturated quickly! (The quickest way to make a black and white photo is to remove all the saturation. You’ll have a grey image, and then adjust the contrast a bit to your liking.)

Brilliance/Vibrance

These are smart tools that adjust highlights/shadows/luminance and saturation without over adjusting parts of the image that don’t need the adjustments. These have more room to use, but be aware of creating an over-processed look. Max 30-40%, sometimes less.

Sharpness

Sharpens the photo and can bring areas into better focus. Over-sharpened photos will have “artifacts” in them and it’s very obvious to the end-viewer. Keep it under 50% for sure. If the photo needs more sharpening that that, you probably need a new photo.

Vignette

I, personally, don’t mind heavy vignettes, up to 50-70% on most programs, because a vignette is a common and traditional method of bringing attention to an area of the photo you want people to focus on that we have always used in the darkroom when processing fine art photos. However, most simple editing tools will only apply a vignette uniformly to the center of the image. IF you are using the rule of thirds, you’re out of luck here. (hint: Snapseed lets you adjust WHERE the vignette should be on the photo.)

Brightness

Uniformly adjusts the lightness/darkness of the photo, with an equal effect. I prefer to use the brightness slider (up to 30-40% if absolutely necessary).

Tint/Warmth

These are color balancers, and can be used as much as necessary. Digital photography can give the entire photo on off-tone, such as green or blue or orange applied to the entire photo. Use these sliders, or a color balance slider, to correct it.

I took tips 4&5 together in this photo. Showed a bit of the raised perspective from 4 and then made adjustments within the ranges I discussed above to “rescue” this dark, flat photo.


Before:
5AD3745A-BE12-4C3D-BA1A-F24B5700828F.jpeg


After:
5B934E13-B59C-4909-A534-BA6E010EB63B.jpeg


I hope that reading through this long-winded post gave you some confidence and knowledge to try something new with your photos and encouragement to take your personal photos to the next level. Please join the thread and let everyone know what your tips are for taking better photos, and I as well as many others I am sure, would be happy to answer any questions you have before making your selections to enter the next rounds of contests here on BYC!
 
https://www.backyardchickens.com/th...f-your-chickens.1414631/page-12#post-23368501
Okay, thanks. You touched on some of this already but there are a few things that haven't been mentioned yet. This was based more on wildlife photography but 90% of it can be applied to pet photography too. I just copied and pasted it. Here it is....


Alright so I got into photography about 4ish years ago and I started out with some pretty good camera gear but my pictures really were not that great. I thought they were pretty good at first, but after looking at what some other people were posting I could tell they weren't. Their pics looked like national geographic quality and I didn't know what I was doing wrong. So I started watching tons of youtube videos and finally got a decent understanding of what makes a great picture great. Here are some of the tips I learned from all of the videos. Disclaimer: I'm not a professional photography and some of the terms I use may not be exactly correct but I have pretty good grasp of the overall "picture"... lol


1) Get as close as possible to the subject.
The closer you get, the more detail you get. It's as simple as that. I couldn't figure out how people were getting such great detail in their pics then I realized that a lot of them were 5, 10 and 20ft from the subject. Of course using a high quality zoom lens helps too.

Here's pics from 200yds away, 20yds away, and 20ft away...…


img_6966_eb00e253066c6374d1c59570c867f62d8e1367f8.jpg


img_6313_549b0f9a6596fea0084303462354edf118990d89.jpg


img_3173_dc2dc287ce9fba644a411ff1fb8b3c265adb84e3.jpg


2) Get eye level with your subject (sometimes means laying flat on the ground).

You do this for 2 main reasons.:

#1
when you are above the animal looking down the animal appears subordinate to you. I know it seems weird but its true. When you get eyelevel it's like you are a part of their environment/habitat and it comes across more natural. I know it's weird but you will be able to see what I mean in the following pics.

#2 You want to get low to the ground so that the background is a long, long ways away from you. The further away the background is, the blurrier it is. This helps to create completely blurred out backgrounds which makes the subject "pop out" in the picture. You'll be able to see what I mean in the following pics.

So these two pics are of the same ducks, in the same place, at the same time, with the same camera/lens, and the difference between them is pretty astonishing. In the first pic I'm taking a knee, looking down at the ducks. This is what a "normal" pic looks like. I've taken thousands of them like this, but they're really nothing special. In the second pic I'm laying flat in the mud, lol. By laying down you have more foreground and background in the pic, this allows the foreground and background to blur out and really makes the subject "pop" instead of having the background in focus, distracting you.


img_4652_4eeb9d458e334842139c4a7d9f7111fe5bd68c20.jpg


img_4902_bc0cd46ab0785168e46b5699b2ff855025541080.jpg


To better explain... in the first pic, the top of the image is around 10ft past the ducks and the bottom of the image is around 6" in front of the ducks. This means the bottom of the image is in focus (distracting) and the top of the image is slightly out of focus (only slightly distracting). In the second pic, the top of the image is now around 40 yards past the ducks and the bottom of the image is around 15ft in front of them. So both the foreground and background are completely blurred out, this makes the ducks really stand out or "pop".

There's another thing I did to improve the second photo. In the first pic, the ducks are looking towards the sun (you can tell by the shadows on the back of their necks). For the second pic, I moved to my right about 15ft and positioned myself between the ducks and the sun, this gets rid of the shadows, and is also going to be one of the next tips...


In the next pic, instead of walking up to the frog and taking a picture looking down at it (or taking a knee and angling down at it), I laid in the grass and got as close to eyelevel as I could. It gives a very different perspective, kind of like you are part of the environment.


img_1852_68ae947961434b51bbe493544f0fba1a6b49794d.jpg


Look at this goose pic. I was standing or maybe kneeling in this pic. I can only imagine how good this pic could have been if I would have laid down and got an eyelevel pic instead.... (and got closer to him so I wouldn't have to crop in as much, and positioned myself further to left so the light would come from behind me and not cast a shadow on his back half, and so the goose is facing me instead of angling away, these are the next tips...)


img_9212_195aa5bfbae6aa791a028b888ff1aa1d93615e46.jpg


Here's another goose and this time I got as low as I could, not quite eyelevel, but close. Notice the rather blurry background, it's a better perspective.


IMG_4589.jpg


And here's some geese with that low perspective and blurry backgrounds. My camera is about 6" off the water in this pic. These geese were a long ways away which is why the background is not completely blurred out.


img_6516_c5e1f475a6081d076eb474e1ee671e7890ec91f3.jpg


3) Position yourself so the sun is at your back, fully lighting up the subject

Here's a couple old ones, lol. Both these pics are where the sun is high in the sky and bright (called harsh light). See how the bright sun is hitting the birds back, creating a shadow down the side. This is not ideal...


img_9210_d1511714071480260426efb89644f01f81dbd43b.jpg


The sun is slightly behind the bird in this pic. It's very hard to expose this picture properly because if you brighten the bird up the background gets super bright....


img_9218_a251ee5aff5737e44e029e68c093ef8582eecafc.jpg


4) Take pictures during "golden hour". This is right after sunrise and right before sunset. It's a very soft light. If you take pictures at 12 noon with a bright sun (no clouds) you have a bunch of shadows which are very hard to work with.
So the previous pics were in bright harsh light, this is what golden hour looks like..... soft, warm light with a nice golden glow. Remember you want to position yourself so the sun it as your back, lighting up the subject.


1590866465150.png


1590866504823.png


IMG_7331.jpg


5) Make sure the animal is facing you or at minimum perpendicular to you. You don't want to take a pic of an animal that has his back to you or is angling/looking away from you.
Here's one of the first dragonfly pics I ever took. I though it was the coolest pic ever. But he's facing away from me.


1590866799855.png


Here's what it's supposed to look like....


1590866731795.png


1590866579958.png


6) PROPERLY COMPOSING YOUR PICTURE. This is probably the most beneficial tip that anyone can use and there are a couple parts to it.

What I used to do and most people do is center compose the picture. This means you point your camera at the subject, you put it right in the center of the screen and you take the picture. You end up with a picture like this...

IMG_5881-3.jpg


That is not ideal. You want to use the rule of thirds when framing the picture. You don't want the animal in the dead center of the picture, generally speaking. Basically you draw two evenly spaced vertical lines and two evenly spaced horizontal lines on the picture, then you want to place the subject as close as you can to where the lines intersect. So look at this pic with the lines drawn on it....


IMG_5881-31.jpg


So there's 4 intersecting points where you want to try and place the subject, which one do you use?

Well you always want more open space in front of the animal, not behind it. So if he's looking to the right you place him on the left side of the picture. If he's looking up you place him on the bottom of the picture, etc. So you pick the intersecting point that works best...

Check this next pic out, it is not framed correctly. He's looking to the right so there should be more space in front of him in the pic, not behind him.


IMG_5881-21.jpg


IMG_5881-2.jpg


This pic is framed properly. He's not in the center of the pic, he's looking right so I placed him on the left side of the picture and his eye is very close to the upper left intersection.


IMG_5881-1.jpg


IMG_5881.jpg


This next one is also framed correctly. He is looking down and to the left so I placed him in the upper right intersection.


IMG_7481-1.jpg


IMG_7481.jpg


Here's another one that's framed correctly. The head is in the lower left intersection and I'm also eye level with him...… The only thing I wish I had done differently with this one is zoom out just a hair so I didn't cut off the edges of his body.


IMG_8636-1.jpg


IMG_8636.jpg


Here's one more done properly. He's looking left so I placed him in the upper right intersection. Since he is looking up I probably could've put him in the bottom right intersection also. Remember the "rule" of thirds is not necessarily a rule, it's just a good guideline to go by but it does not always apply.


IMG_8614-1.jpg


IMG_8614.jpg


So here's the question of the day. How do you get him positioned on one of the intersections? There's two different ways. The easiest way is to take a pic of him in the center of the picture then crop the picture after you take it and move him where you want him. This is what I do most often but the problem is when you crop in you lose detail so you need a lot of megapixels to be able to crop in a lot.

The proper way to do it is use a single autofocus point on the camera and move it to one of the intersections before you take the picture. This is more difficult especially with animals that can change position. It's actually more simple on a phone. You just frame the picture where the animal is on one of the intersections then you touch the eye of the animal and the phone camera will focus where you touch and take the pic.

So ideally you want the animal to be as close to where you want him framed as possible but it's okay to crop in a little bit to move him around. The more megapixels you have, the more you can crop.


Here's one more pic that is framed pretty good. His head is in the upper right third, he's looking left and has more space in front of him than behind him. But I could have made this pic even better if I had moved to where that big tree limb wasn't intersecting his beak. It is distracting, which is the next tip...…


IMG_6061.jpg


7) Pay attention to your background and move yourself to make it better
These two pics were taken of ospreys sitting on the exact same pole. (If you notice, one was taken during golden hour and one was not, pretty easy till which is which.)

The difference between the two pics (besides golden hour) is the background. In the first pic the background is very bland. There's nothing in it, just a featureless sky. In the second pic I was 30ft to the left to put some trees in the background. I think the blurred out leaves make for a better photo. BUT.... sometimes the background can be too distracting and take away from the animal. So it's different with every shot.


1590867098674.png


IMG_6313.jpg


If the background isn't adding to the photo, its actually taking away from the photo. Now when I see an animal I want to take a pic of I look at what's behind it and I position myself where I like what is behind him. Usually you want a nice even background that is pretty far away from the subject. If it's real close to the subject it will not be blurry and can distract from the subject.


8) Focus on the eye. Our eyes are always drawn to the animals eyes and their eye should always be in focus. Look at the previous Osprey pic. It may be hard to tell but if you zoom in and look the camera actually focused on his body and his eye is a little out of focus. You need to use a single autofocus point and place it directly on their eye. Or if using a phone click directly on his eye to take the pic.

In this next whistling duck pic the camera focused on the body and I didn't realize it because this was a fast action shot, but if you zoom in you'll notice his eye is also slightly out of focus because his head slightly further away than the body.


1590867280143.png


In this next pic, I paid special attention to getting the focus on his eye since the camera would typically try and focus on his body because its bigger. I used a singe autofocus point and placed it right on his head. (If you notice I'm also eyelevel with him laying flat on the ground, which gives the nice blurred background, I'm also close to him, probably 30ft and the sun is behind me a little off to the right, and this is golden hour right before sunset, and he's composed near the upper right intersection, not center composed) See how I used several of the tips to take this one picture.


IMG_5113-2.jpg


One more thing to mention about the eyes is the catch light.
This is the reflection of the sun in the eye of the animal. This is something you want to try and capture if possible. It adds a little bit of life to the animal. If you scroll back and look at pretty much all of the pics I have posted you will see a shimmer of the sun in each of their eyes. Sometimes you have to wait for the sun to come out from behind a cloud or you may need to move yourself a couple feet side to side to make it work, But you really want to get that catch light in their eye if you can.
 
https://www.backyardchickens.com/threads/turkey-talk-for-2014.838701/page-320#post-13650948
Whew, you really scared me for a minute!! I would never want to recommend something like that if it wasn't safe, so I went and looked it up. (I had received that recommendation from a veterinarian, and because of that hadn't verified it before I passed it on.)

I found multiple references for using both lidocaine (a short acting local anesthetic, commonly used as an injection nerve block or as a topical gel, the brand name is Zylocaine) and bupivacaine (a long acting local anesthetic, used as an injection nerve block, and sometimes more creatively) and benzocaine (a medium-length acting local anesthesia, used as a topical gel, the active ingredient in Orogel) in chickens, ducks, raptors, and "most species" of birds. These products have been used for traditional nerve blocks, injected into joints for arthritis, injected around wounds to provide a "ring block," applied as a gel to small wounds before suturing, and I even found a reference to mixing bupivacaine 50:50 with DMSO and applying it topically to chicks after debeaking (must have been a research project, because I don't see the factory farm industry doing that). There were no references specific for turkeys, but there almost never are, for any drugs. I have been told personally by Dr. Bruce Singbeil that any drugs that are established safe in chickens can be used at the same mg/kg dosage in turkeys safely (as long as the low end of the dose range is used because turkeys are larger than chickens, which is a basic principle of any dosing decision). Dr. Singbeil is someone I trust and is the only veterinarian in the country that is board certified as a specialist in Poultry Medicine (as opposed to a specialist in Avian Medicine, or a regular veterinarian who is licensed to practice on all species, but isn't a board certified specialist in anything) that actually has a hospital and treats individual pets, as opposed to all other poultry specialists who work for industry, universities, or public health.

So bottom line, it is safe to use "cain" medications in poultry, as long as it is done carefully. You're not going to get into trouble with topical medications on a prolapse unless you squeeze the whole tube into the oviduct after you've replaced it back inside, then hold the vent closed long enough for too much of the drug to absorb into the bloodstream (it would probably take a very long time). Just applying a smear to what's hanging out, waiting 5 minutes, then working the oviduct back in will give very minimal absorption into the bloodstream immediately, as most will absorb into the tissues. It will take hours for the drug to slowly work its way out of the tissues, giving the body plenty of time to metabolize it. If you were to use injectable local anesthetics, then poultry are somewhat sensitive to them by comparison to other species, on a mg/kg basis, so total injected dose has to be monitored carefully to avoid complications. But that's true for all small animals and humans. The only time it's not an issue is with cattle and horses, which are so large that it's almost impossible to overdose with those drugs. So I can see how many people would believe that "cain" products are dangerous in poultry. Most vets that come to farms are large animal vets. If a farmer were to ask a large animal vet to treat a 5-10 lb chicken, when he's used to treating a 1,000 lb animal without concern for total injected dosage, I could easily see an overdose occurring. That happens a few times and all of a sudden the medication is labelled as dangerous.
 
https://www.backyardchickens.com/th...aine-and-poultry.1130757/page-3#post-17706003
Wow, I haven't seen that writeup in a while -- it was posted years ago.

Since I posted that, I have used both lidocaine and bupivicaine in my birds. I had a turkey hen have her entire side skinned when a tom's toenail penetrated skin, then slid. All 4 nails on the left foot caught, and full thickness skin was peeled down her entire left side, like husking an ear of corn, from backbone to keel, leaving an 8 X 10" skinless area, and a huge amount of attached loose skin shriveled up at the bottomline. Unfortunately, she was on the roost by the time I got home and didn't realize that anything had happened until the next morning. At that point, the skin flap could not be reattached, and was catching debris, which would increase infection. It needed to be cut off, but it still had full nerve sensation. I was able to infuse a combination of lidocaine and bupivicaine, then remove it without causing pain. The wound fully healed with appropriate care, and the hen is still with me, without any obvious evidence of her old injury.

Another time a friend had a chicken with bailing twine wrapped around its foot. It wasn't discovered for 1-2 days, and the foot was severely swollen. The twine had cut deeply into the flesh, around and around the leg, right above where the toes attach. I started unwrapping the twine, but eventually it became too painful. I poured some lidocaine into a cup and soaked the wound in it for 10 minutes. She didn't feel a thing after that, and I was able to dig deep into tissue to remove every strand of twine. It took a while, as the foot was essentially paralyzed, but she fully recovered.

"Caine" products, WHEN USED PROPERLY, are not poisonous to birds. Just remember that these are small animals, not cows or horses, so you have to avoid overdosage.
 
https://www.backyardchickens.com/threads/flat-lay-photography-for-beginners.1430975/
Flat Lay photography is exactly what is sounds like, you may have even taken a flat lay photograph before and didn’t realize that’s what you were doing!
A flat lay photo is simply a photo of objects arranged on a flat surface, captured from directly above.
We thought it would be nice to break down the basic steps for those who are new to the idea of flat lay photography!

photo-1585333602841-e8ac7265d869.jpg
Composition

Composition is key! The core of a flay lay photograph will be how you lay out your items. Even if you’re looking for a simple and clean appearance with a lot of white space, how you place your props will bring everything together. Have fun with it! Bring along more props than you think you’ll need, swap things in and out, and move them around until you’re happy with the end result!

photo-1457301547464-91995555cd25.jpg
Color Palette

Color can really make your flat lay photograph pop! Whether you’re looking for a cool or warm feel, color is everything! Take a look at a color wheel and see what colors and tones compliment each other.

photo-1603021607842-8c376c9effb6.jpg


Color-Study.gif

SHOOT FROM ABOVE


Last but certainly not least, shoot your picture from above! A very slight angle can still make for great flat lay photo but your goal is flat. Now get out there and take some pictures!!

photo-1522507266150-3f9bdb9d4efb.jpg
 
proxy-7-gif.1083312
View attachment 1082701 :frowView attachment 1082702 View attachment 1072776 View attachment 1072737 View attachment 1072726 View attachment 1069013 View attachment 1056869 View attachment 1056702 View attachment 1055365 View attachment 1054592
downloadfile-2-gif.1039180
rad-gif.554999
spam_1-gif.557223
evillaugh-gif.557222
View attachment 1037687 View attachment 1037684 View attachment 1032443 View attachment 1032442 View attachment 1026049 View attachment 1018789 View attachment 1018791
fallin-down-beer-gif.1016933
View attachment 556997 View attachment 556998 View attachment 554988 View attachment 554989 View attachment 554990 View attachment 556997 View attachment 554988 View attachment 554989 View attachment 554990
gig-gif.553870
chickn-emoji-gif.553872
jumpy-gif.553873
rant-gif.553874
idunno-gif.553875
yippiechickie-gif.553876
hmm-png.553877
49
chochypnosmiley-gif.553502
default_useless.gif
319218437.gif


View attachment 702505 View attachment 702506 View attachment 702508 View attachment 702510 View attachment 554988 View attachment 554989 View attachment 554990 View attachment 556997 View attachment 556998
devil-gif.554958

View attachment 1018801 View attachment 1018802
2cents-gif.554945
:hugsView attachment 1095822
stand-on-garden-rake_smilie_0016-gif.1034096
View attachment 1101685 View attachment 554988 View attachment 554989 View attachment 554990 View attachment 556997 View attachment 556998 View attachment 702505 View attachment 702506 View attachment 702508 View attachment 702510 View attachment 1018789 View attachment 1018791 View attachment 1018801 View attachment 1018802 View attachment 1026049 View attachment 1032442 View attachment 1032443 View attachment 1037684 View attachment 1037687 View attachment 1054592 View attachment 1055365 View attachment 1056702 View attachment 1056869 View attachment 1069013 View attachment 1072726 View attachment 1072737 View attachment 1072776 View attachment 1082701 View attachment 1082702 View attachment 1095822
We’ve only had poultry for about two years, and my knowledge of Marek’s disease virus (MDV) was pretty superficial at the beginning. I knew about Marek’s but thought it was rare in backyard flocks. I did inoculate our first group of barnyard mix chicks that we hatched with the common, acellular HVT (herpesvirus of turkeys) vaccine. We then purchased two separate groups of purebred chicks from a local, well-known breeder who did not vaccinate but “bred for resistance”. We lost only a few chicks from the first breeder group, but most chicks from the second group died before 2 mo old. At the same time, we started losing older juveniles from the first, POL breeder group. Picture is of Lemonhead, 5 month old East Frisian Gull cockerel, our first bird diagnosed with Marek’s. State lab necropsies showed that all dying birds had Marek’s, which weakened their immune system so some died from coccidiosis or other diseases. Current day, more than a year after buying those two sets of breeder chicks, we’ve lost almost all of those breeder birds at various, vulnerable times: chicks, POL, maturing roosters, after fights, after treating mites, etc. We’ve lost none of our original, backyard mix, HVT vaccinated birds. We now only buy chicks that have been Rispens strain MDV vaccinated, or I vaccinate with Rispens as eggs at day 17-18 if we are breeding them. We don’t sell or rehome chickens. We’ve lost none of these vaccinated, broody raised chicks (knock on wood) which are now POL or just past laying age, even as we’ve continued to lose our unvaccinated chickens.


As for the numerous news article mentioned earlier about Marek’s vaccination leading to hotter strains of virus, those all refer to the same study. That study does suggest that our huge, commercial poultry houses have indeed engaged in a biological arms race between MDV and its vaccines. However, what it shows is that, IF chicks contract the most rapidly lethal strain of MDV, termed highly pathogenic or very virulent Marek’s disease virus (vvMDV), then the vaccine protects them long enough that the virus has time to replicate and be shed by those birds, potentially infecting other birds. IF they are not vaccinated, then they all die so fast that the birds don’t have time to shed virus.


Instead of reading the news articles about the study, go to the actual study, which is freely available at: https://www.ncbi.nlm.nih.gov › pmcWeb resultsImperfect Vaccination Can Enhance the Transmission of Highly Virulent Pathogens

Look at Figure 1, which shows three different outcomes of interest, from top to bottom: percent of chicks surviving after MDV inoculation, MDV shedding over time, and cumulative or total amount of virus shedding over the time that the birds are alive. The unvaccinated groups have dashed lines or lighter color shading. From left to right, we have MDV of different virulences, from mildest to hottest. The first, HPRS-B14, is an older, less virulent MDV where “only” 60% of chicks die. The last strains, like Md5, are vvMDV, where all chicks die. If you have a less virulent MDV, then both vaccinated and unvaccinated chicks get infected and spread virus. But, the vaccinated chicks shed LESS virus, because the vaccine kicks up the immune system of vaccinated birds so they fight viral replication. In addition to shedding less virus, the vaccinated chicks are more likely to survive. IF your have a hotter, vvMDV strain, then just the fact that the vaccinated chicks survive means that they are still capable of shedding virus. The unvaccinated chicks are all dead, so no virus shedding is going on there.


My take on this: Considering that there are probably few chicken flocks that are really MDV free, it makes more sense to me to vaccinate and increase the likelihood that our birds live when a hotter virus strain makes its way to us. Backyard flocks aren’t the ones driving this evolutionary arms race, and we aren’t able to escape it either.
Yes, lots of space and a safety hole.

This is how I, and others accomplish....
https://www.backyardchickens.com/articles/integrating-new-birds-at-4-weeks-old.72603/

Still following the ....
Integration Basics:
It's all about territory and resources(space/food/water).
Existing birds will almost always attack new ones to defend their resources.
Understanding chicken behaviors is essential to integrating new birds into your flock.

Confine new birds within sight but physically segregated from older/existing birds for several weeks, so they can see and get used to each other but not physically interact.

In adjacent runs, spread scratch grains along the dividing mesh, best if mesh is just big enough for birds to stick their head thru, so they get used to eating together.

The more space, the better. Birds will peck to establish dominance, the pecked bird needs space to get away. As long as there's no copious blood drawn and/or new bird is not trapped/pinned down and beaten unmercilessly, let them work it out. Every time you interfere or remove new birds, they'll have to start the pecking order thing all over again.

Multiple feed/water stations. Dominance issues are most often carried out over sustenance, more stations lessens the frequency of that issue.

Places for the new birds to hide 'out of line of sight'(but not a dead end trap) and/or up and away from any bully birds. Roosts, pallets or boards leaned up against walls or up on concrete blocks, old chairs tables, branches, logs, stumps out in the run can really help. Lots of diversion and places to 'hide' instead of bare wide open run.
Good ideas for hiding places:
https://www.backyardchickens.com/threads/a-cluttered-run.1323792/
 
I compiled this information to help newbies rumage through this to hopefully find some info helpful to them in owning or considering owning Coturnix Quail AKA Japanese Quail etc
smile.png


Coturnix quail in their native lands are migratory birds. They were captured, and kept for their singing ability (which is funny since they don't sing really, but the male will do a "koo-tur-nix!" call during breeding season- hence their name), they were then bred for their egg and meat production. However, as for their call...us as breeders seem to agree it sounds like they are saying "Look-at-me" or "how'm-I-Doin?"
lau.gif


They are native to Europe, Asia, and Africa. All the species from these areas were interbred to make one domestic bird.

They migrate over the mediteranian sea and that's where the Egyptians collected the weak flying in from the sea and where a lot of the domestication seems to come from. Also in Japan.

Coturnix and the coturnix subspecies seem to have been interbred together during domestication.

Coturnixs are known as Pharoah Coturnix, and Jumbo Coturnix to name a few

Pharoah pretty much means the wild type, Jumbos are just larger selectivly bred Coturnix

Colors are as follows (though not limited to-- because many new morphs are able to come up all the time).

*Pharoah Coturnix- Wild color
*Jumbo Brown Coturnix- Wild color but bred larger
*English White- smaller than the below A &M but closely related to it as EWs are the gene that was incorporated to produce the A&Ms...come in pure white to pure white with brown spots mainly on back of head but also can be found on back. Pure white meat.
*A & M- Selectively bred by A & M Texas college for their white meat and pure white feathers- can also have brown spots on back of head and or on the back.
* Golden (aka Manchurian, Golden Speckled)- in normal size and jumbo
- theres also a Cinnamon Gold
smile.png

*Tibetan (aka British Range)- dark coloring- can come in light and cinnamony forms as well
*Tuxedo- this bird is produced by breeding an A&M to a British range
* Silver
*Cinnamon- this color is also known as Red some people misrepresent it as Fawn/Ginger. Cinnamon also comes in tibetan/range pattern
*read head- from what I read on labratory studies this bird is white with a RED head....interesting!
*black-
idunno.gif
this may be "black at hatch" which is a dark tibetan/range
*Fawn- this color is known as Rossetta in the tibetan/range form it also has a wild form more solid fawn coloring visit this link to see a Fawn, a normal and a Cinnamon together:
https://www.backyardchickens.com/forum/viewtopic.php?id=207640

Normal adult coturnix quails are around 3 1/2 to 5 ozs

Jumbos are said to get up to an lb in weight

Coturnix breeding season

March through September it seems however if kept under artificial lighting for atleast 14 hours a day, they can lay all year long.

Click HERE for picutres of Browns and Golden roos in breeding plumage

Coturnix hens will lay an egg a day for their lives once they are 6-8 weeks old during breeding season, OR under artificial lighting. Eggs come in speckled, dark brown,blue, blue brown and pure white.
Examples:
IMG_0906-1.jpg
IMG_0903.jpg


I finnally got a blue egg while I had a white egg!
wee.gif
!!!!
13329_a1.jpg

13329_a2.jpg

^It may be hard to tell upclose but in smaller pictures you can REALLY tell
smile.png


The birds seem to loose fertility as they age...a bird over a year old seems to have much less fertility than a younger bird. I personally plan to move out birds over a year old for newbies. As it seems birds at 2 years old dont produce as much, or their eggs dont' seem to be as fertile---not my experience other breeders experiences im taking into consideration and sharing with you all!
smile.png
If you let your birds not lay during winter season (by not providing artificial light) it will give them a break from laying eggs and they should live and lay longer for it!
smile.png


Sexing

Sexing chicks can sometimes be challenging, but in browns and goldens, it's sometimes easy to sex them at 3-4 weeks old just simply by taking a gander at thier breast feathers. These chicks are 3 weeks and 1 day old and it's extremely easy to see who's male and who's female in my batch so hopefully this gives you guys a vantage point for your own batches:

A Video I reciently made on Brown and Golden Coturnix Sexing: http://www.youtube.com/watch?v=LfTv831gilc
Male
(note the rusty color coming in):
a1-6.jpg

aa1-2.jpg


Female (note the obvious spots with no rust coloring):
a2-5.jpg

aa2-2.jpg


VENT SEXING: https://www.backyardchickens.com/forum/viewtopic.php?id=150049
You
can sex males by breast colors in the normal browns, and in some other colors listening for their calls or vent sexing may be needed.

Male coturnix CROWING:


In vent sexing the males will have a small pimple like bump...hens will not. Also the males you can actually press your fingers lightly together near the upper vent and if a white foam (almost looks like foam mousse) comes out that is a male...this substance isn't sperm, however it aids the sperm when breeding.
Foam substance (please note that you will ONLY get this foam when the birds are in breeding season..otherwise you'll just get a spit-like substance that I have learned is NOT the foam even the hens can express this spit substance so it's not a good way to sex...also these males that are in breeding season will have swollen bottoms):
malefoam.jpg


Breeding roos also seem to have a growl of sorts they do... this could bea possible way for you to sex your mature and breeding roos out of your group pen: https://www.backyardchickens.com/forum/viewtopic.php?pid=2335873#p2335873
Normal
wild colored males (and goldens) will have a red (rusty) breast simliar to a male american robins breast....the hens will have a speckled breast (similar to a female american robins breast). Oddly enough, american robins are also a good size comparison with the normal wild (pharoah) coturnix quails size- except robins weigh less. Examples:
abcc-1.jpg
Male on left, hen on right

a1-3.jpg

^ Two males

IMG_3307.jpg

^ Hen on left male on right (bad photo, they were in a molt).

ahawn.jpg

Male golden

2lightgoldensinfrontofnormgoldens.jpg
^ Young hen golden on right, unsure of the sex on the golden on the left as it's almost white instead of golden.
smile.png
Note the speckled breast on the golden hen just as on the brown hen.

Other colors are very hard to tell visually by feathers, however a breeder I talk to seems to think that Tibetans (british range) coturnix's can be sexed at an early-adult age by the color of their beaks. Supposedly she has come to realize that all her dark beaked tibetans are males, where as her lighter beaks tibetans are hens. Theres no documented proof of this though.

I do believe this theory above to be true....as here is a male---note the BLACK beak:
maletibe.jpg


This is a hen tibe note the very dull colored beak not a bold black:
tibehenStarling.jpg


I do not go by the beak method though because I don't mind waiting the 5-6 weeks it takes for the roos to start crowing then I just take the boys out one by one as they crow and put a legband on so I can ID the roos.
smile.png


Breeding Ratio
Ideal breeding situations seems to be either in LARGE living facilities in collonies more hens than males ofcourse

or seems 1 male to 4-5 hens

I personally have both methods planned for my birds depending on colors and who I want to selectively breed.

Breeding Genetics
There is dominant and recessive colors in genetics. Dominant means that it WILL be the visual color you see. Recessive means that it needs TWO birds with the same color to produce it where as dominant only needs one bird of this color for the color to show up. For example...Golden is a dominant color, you can breed a golden to a normal brown, and produce a golden...because it's dominant. Heres a list of what I have learned is recessive and dominant. Incomplete dominant means mainly that it will cover only certain places of the bird, and that not every chick born will be that specific color (from what I have learned).

Black- Dominant
Cinnamon- Recessive
Extended Brown- Incomplete dominant over normal colored (i dont know much about this one).
White (A & M/English)- Recessive
Red Head- Recessive
Silver- Incomplete Dominant
Tuxedo- Recessive
Golden- Dominant (incomplete... if you breed it to a brown you will get MOSTLY Goldens but some browns)
Range (british range- tibetan) Dominant- incomplete .....if you breed it to white or A & M you'll get tuxedo

As I learn how to produce certain colors I will happily post the findings.

Golden is said to be fatal if breeding Golden to a Golden. Said to loose 25% of hatch, where as others have had 100% hatches out of breeding Golden to Golden. If you want to be on the safe side just breed your Golden to a brown and you'll get mostly Goldens. If not, possibly expect some eggs not to hatch. I've had 100% hatches however, breeding Golden to Golden so I am unsure how true this fatal issue is.

How to produce a Tuxedo- cross an A & M (i was told a nicer cross is with english) with a British Range.
If a brown carries the A & M or white gene, and is crossed with a tibetan (or tuxedo) some of the resulting offspring WILL be tuxedo marked!
smile.png
<---prooven this with my own breedings.

A Golden bred to any white looks to produce a bird that's mostly white with golden feathers, very pretty! *I have had one in the past but cannot say what was bred to produce it for sure*

Breeding a PURE White (no spots) *either a & m or english white* to another pure white (no spots) will produce 25-50% pure whites, others will more than likely have spots (wild colored spots on back of head neck and possibly back).


Housing
What has been shown to work greatly for others is 1 sq ft per bird.

Wire flooring seems to be ideal, however many also have them on solid ground with bedding like wood shavings (no cedar bedding as it can harm their respiratory systems).

They can be housed indoors or outdoors even in large rabbit hutches.

They do well in winter weather as long as they have shelter and are free from drafts just like any other bird should be cared for in.

Most do keep them outside however mostly because of their high ammonia smell.

Very nice set up built by a BYCer: https://www.backyardchickens.com/forum/viewtopic.php?id=143419
An awesome watering system!
https://www.backyardchickens.com/forum/viewtopic.php?pid=1621838#p1621838

My Pens and Hutch:
Pens on left hutchon right covered in heavy duty tarps to the ground on cold/windy/wet days to keep them sheltered well:
pens1.jpg


The front of the hutch pen:
hutchpen.jpg


My 6 hole pen with all but one pen occupied:
pens.jpg


And here is both pens and hutch before they were occupied:
IMG_1751.jpg


^^showing you my enclosures to give you ideas

Feeding
Nonmedicated game bird feed is ideal- crumbles is also ideal

I also reccomend grinding up kitten food (kibble or canned) and feed that to them atleast once a week if you can. It's best to feed chicks kitten kibble and adult quail cat kibble as too much fat in kitten food can really harm quail. A breder of 30 years told me that adult quail should only really be supplimented with cat food in the colder months because they need fat to burn for energy to keep warm, but in the summer months it can harm them (too much fat that they can have trouble processing).

Boiled eggs chopped up they also love

Mealworms, crickets, wax worms great treats and great protien

Grit for good digestion, oystershell for extra calcium

Fruit chopped up make a great treat as well as nonpesticied sprayed greens

Millet as a treat- it's not nutritionally complete for a full meal

You can feed chicken crumbles, however you will have to realize that it shouldnt be medicated, and you will need to incorporate more protien as quails need more protien than chickens do from what I have learned.

My experienced reccomendations
Clip their wings if you are planning on keeping them outdoors....all too often my quail enjoy hopping out of their pen when im in cleaning it, which is okay as I keep their wings clipped so they cannot fly away. They are STRONG fliers, and if they get spooked, I know of many breeders who have been devistated to loose a few. If one does get loose, calmly follow it and try to corner it (calmly i cannot stress this enough) and when you're close enough grab for it...idealy a net would be great here however I dont use a net but come to thnk of it i should probably get one ha ha!

Coturnix quail DO NOT PERCH...no need for branches in their enclosure unless you're using them for natural cover.

Fighting can occur...if it does remove the offender, or build a bigger cage with great hidey areas. Coturnix quails can and will kill eachother if left to their own devices. Feather picking is a big sign of stress.

To stimulate egg production indoors (or outdoors during off season) they need atleast 14 hours of light a day, and around 2 weeks you can expect eggs as long as the birds are healthy, mature, HENS, not too old, and fed well.

Here is what a hen announcing her fertility to roos sounds like, so if you start hearing this and haven't got eggs yet they will be on the way in a week-2 weeks. If you see the roo mating the hen (or hens) then you should expect eggs in a week or so! https://www.backyardchickens.com/forum/viewtopic.php?id=174830
Incubation of eggs
*Incubation period is 16-17 days but can go as long as 18 days (almost all of mine hatched at 18 days...so i plan my hatches around 18 days just to be safe)
*Turn eggs atleast 3 times a day
*Stop turning atleast 4 days before eggs are due to hatch
*Every quail breeder has their own humidity and temp preferences....I keep the temps in between 99.5F and 101F...however I try to keep it at 99.5 Fas much as I can. (in my new incubator *a cabinet* I now keep it at 100.6 and I still have gorgeous hatches) Humidity I keep in the 40s until the last four days of incubation where i up it to 60%

It's best to have a towel or a kitchen mat or something similar that the eggs can lay on in the incubator so that when the chicks hatch they dont get their legs stuck in the tiny wire....as their feet are so tiny they will fall through.

Brooder
Tupperware containers, and even aquariums make great brooders

It's ideal to put a soft top on the top of the brooders as spooked chicks will shoot straight up and can injure their heads (deaths have even been reported). I use 1/2" craft foam..and i super glue it or tape it to the top of each brooder works great!
smile.png
Kitchen mats also work great. A blanket or towel could work as well.

Just like with chicken chicks...make sure you have bedding, some use paper towels for the first few days to avoid splay leg...i start out with aspen or pine bedding thickly placed on the bottom of the brooder, the chicks walk on it fine as long as it's thick (atleast an inch thick). Avoid using newspaper it's slippy and can cause poo to get stuck on their toes and dry and this makes it very hard for them to walk.

Raising Chicks
Chicks do well on game bird starter crumbles, you can grind it up more for them however they do well on it as is.

They mature at 6 weeks old

They can be let out of a brooder type environment at 4 weeks old but if what you're planing on putting them in next has a big temperature difference, it's important to make the transition gradual (temperature wise). You can do this by moving the brooder light farther and farther away while the chicks are nearing 4 weeks.

IMPORTANT- water needs to be full of marbles, or full of something that's nontoxic to keep chicks from drowning. I personally use craft animal stuffing...works GREAT!
smile.png
They can walk on it and not even get really wet and learn quickly (with a few beak dunks) to peck away some of the fibers to drink. UPDATE::: I no longer use anything in the waterers as long as you keep the water AWAY from the heat and have a big enough brooder the chicks don't hang around the waterer enough to drown in my experience.

Speaking of beak dunking, it's smart to show the chicks thier water by lightly holding their beak tip to the water quickly then letting them lift their head to drink it up. Some chicks instinctually know where to drink and eat but others need some help. I assist my first group and the first group usually teaches the second group hatching a few hours later. I poke around like my pointer finger is a beak at their crumbles to get them interested in that.

Keep their brooder clean, I cleaned my brooder of over 30 chicks every 3 days, kept smell down and kept them clean. I change water atleast 3 times a day.

Most reccomend red heat lamps....I used both....had no problem with either. No picking, no bloodshed nothing in either tank. I did notice though in the red heat lamp brooder, the chicks got startled more when the red light went out until they adjusted to normal lights. I perfer normal colored heat lamps myself.

Coturnix Uses
*Genetics- various colors it's a lot of fun
*Eggs (sushi quail eggs are none other than coturnix eggs)!
*Meat- DELISHIOUS are ready for culling at 6 weeks in normal and 8 weeks in jumbo! All are dark meat except the A & M.
*PETs- I must say in my experience they are the most ideal quail to make as a pet...i call them "Mini chickens' for a reason.
*Dog/puppy flush and retrieval training

Processing Your Quail
https://www.backyardchickens.com/forum/viewtopic.php?pid=1554953#p1554953

Color picture examples
Pharoah & Jumbo Brown *wild color/pattern* (also known as XLD or whatever...):
Chick:
IMG_1719.jpg


Adult:
aba.jpg


Golden:
Chick:
chickanimation.gif


Adult:
hawn2.jpg


Tibetan (british range):
Chicks:
IMG_1715.jpg


Adults:
ab.jpg


Tuxedo: adult:
Tuxedohen.jpg


chick:
IMG_4964.jpg


A & M: adult:
ams.jpg
<---these hens were in a breeding cage at the breeders so they have some feathers off of their neck from the male breeding them, once they get all their pretty feathers back in I'll get a better picture.

chick:
IMG_5001.jpg


Cinnamon Range (aka Red Golden) ALSO COMES IN TUXEDO!: ADULT:
atruered.jpg


chick:
onecutie.jpg


Cinnamon *in wild pattern* (aka Red): Adult: (red bottom of picture above is a normal brown to show the difference):
agold.jpg

Red: Adult (red on left brown on right):
redgoldennexttoabrown.jpg


Chick:
IPB1.jpg


What I'm calling "Red Tibetan" can also be known as Dark Tibetan/Dark Range Adult:
aret.jpg


chick:
isthisared.jpg


Fawn Range (aka Rosetta) Adult:
orangetibe.jpg


chick:
orangechick.jpg


Red and Tibetan/Range Comparisions:
https://www.backyardchickens.com/forum/viewtopic.php?id=199217

Cute facts:
Coturnix quails will call despiratly when they see you (esp if they are hungry)...it reminds me of a purring yelk (Yelk like what a hen turkey does but quieter) but with a purr to it. I will try to get a video of my quails doing this. It sounds pitiful...these guys seem to always be hungry. They are very willing to eat out of your hand as well.

THey dont like being held, and may even act like you're killing them (crying) not all cry but some do and it's also pitiful and sort of comical. Kind of sounds like a "purreeee!" cry.

Sudden light changes (like the flick of a switch while they've been in a dark area for a long time WILL cause them to freak out so try to be considerate lol)!
gig.gif


I've been puked on SEVERAL times by coturnixs that didn't want held. I don't think they use it as a defence mechanism I think they just freak out and upset their corp and BLAHHHH!
sickbyc.gif
lau.gif


They can have little spats over food, however never any feathers pulled or blood shed, they remind me of siblings fighting over a remaining piece of candy.

A happy coturnix will bow and then bop up a few inches in a little dance...it can sometimes look like popcorn popping when more than one at a time is doing it.

They make a small growling sound when they see a bird flying overhead, they cock their head sideways and look up with one eye to the sky and one or two will growl, its' very light sounding but audible....all the quail will freeze in place when the growl goes out and they all watch the sky until the "threat" is gone.

They LOVE to dust bathe, they will dust bathe in just about anything- their food, bedding, sand, dirt. Give them a dusting box with sand in it and watch them play! They can also eat the sand as grit!
smile.png
WARNING: they WILL make a mess
wink.png
.

Chicks normally hatch in unision....my experience is they hatch in small batches within just seconds from eachother. They call in the egg to eachother and they seem to synrinise thier hatching this way. Don't worry if they ALL dont hatch together give them time.
smile.png
I know of some coturnix quail hatchers that their chicks took DAYS after their true hatch date to hatch....so be pacent I know it's hard though!
hugs.gif


They sound like crickets, or peeper frogs...esp as chicks, but even adults will make the noise.
smile.png


Mine huddle in a heep of birds when they're taking a nap...it's extreemly adorable. Most lay on their sides all carefree. *in the pic the small one in the middle is not a coturnix, it's a button quail*
IMG_4292.jpg


Chick vid:

adult quail vid:


will add more as I get more pictures and information. HOpe this helps newbies!
smile.png


I removed the state permits and laws for coturnix because it's wayyy too much to keep up with! LOL! Anyone who would like to post thier states laws on coturnix (and other quail) can post on this thread and let others know! thanks!
smile.png
 
This one is really good!

When you pick up a chicken hold their wings down to their body to prevent all the wacked out flapping. She wan't her feet supported. The flapping IS the reason you cover the wings!


https://the-chicken-chick.com/the-right-way-to-hold-handle-chicken/

Put one hand under the keel bone and the other hand holding the wings to the body.. I bred Silkie's for several years.. they are no different than any other chicken really even though they don't reach as large of size as a full grown large fowl chicken would.

The video shows good handling technique.. but our Silkie ladies and fellas.. tucks right in like a football facing forward and get carried wherever, comfortably AND happily.. BUT they are creatures of habit with their own personalities.. They recognize up to 100 different faces AND will interact with different individuals accordingly! Spend the time, be consistent your Silkie will settle down and comply.. OR you accept what she's trained you into.. just letting her perch on your arm. :)

Hope this helps some. :fl
 

New posts New threads Active threads

Back
Top Bottom