Metal fabricated waterer with wintertime heater

Dirty Farmer

Chirping
8 Years
Jun 2, 2011
126
3
91
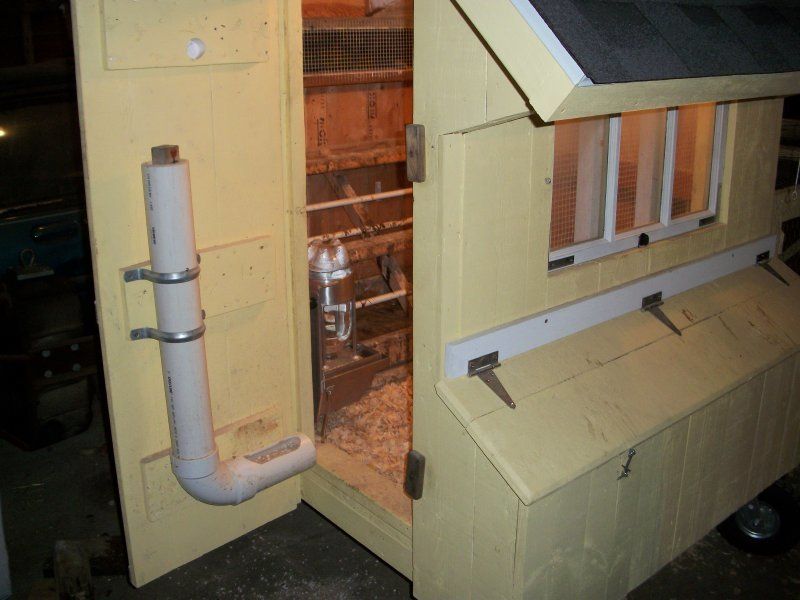
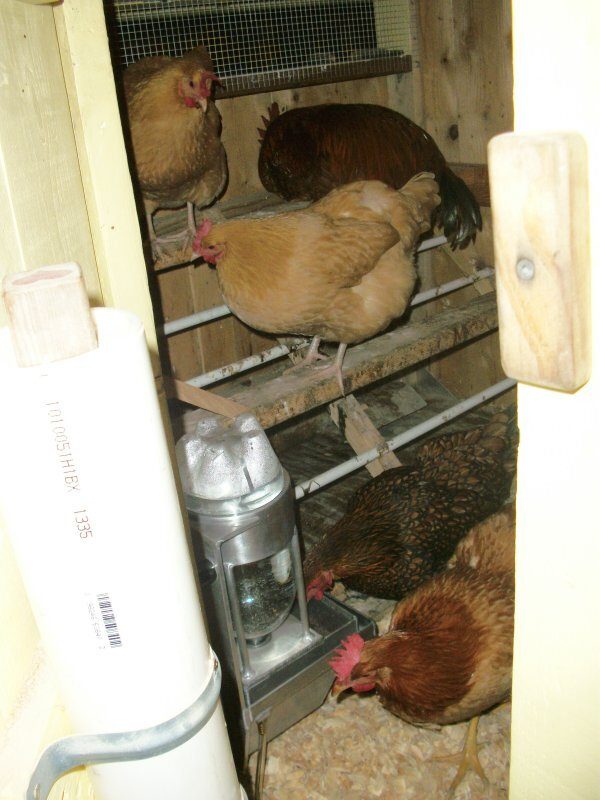
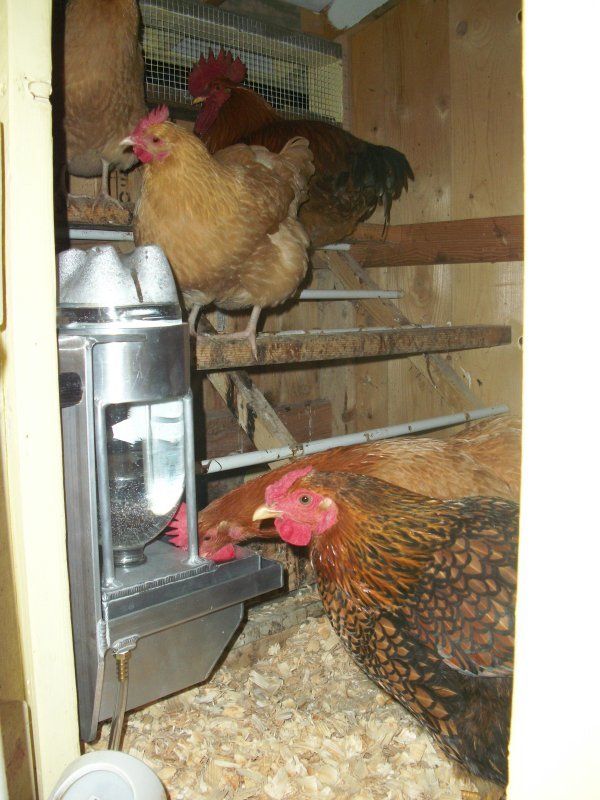
I had some free time today, so I started on the "Winter Waterer"

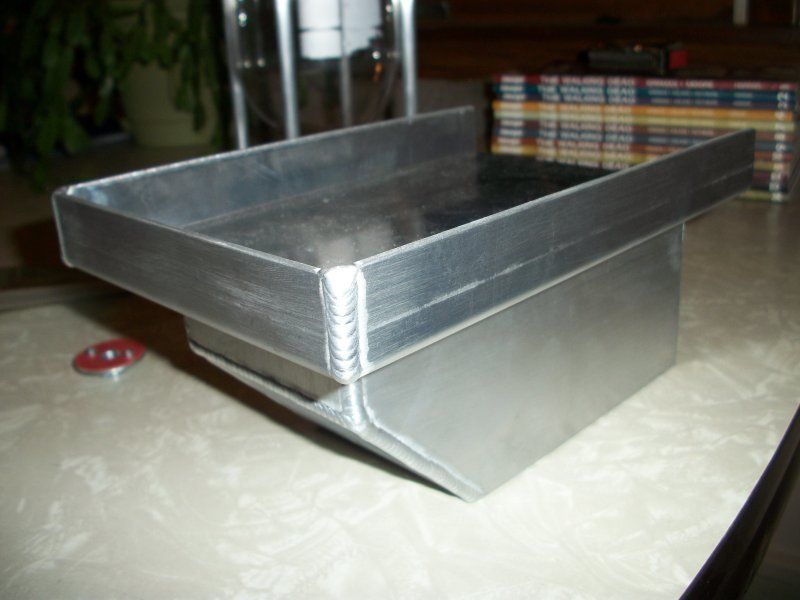
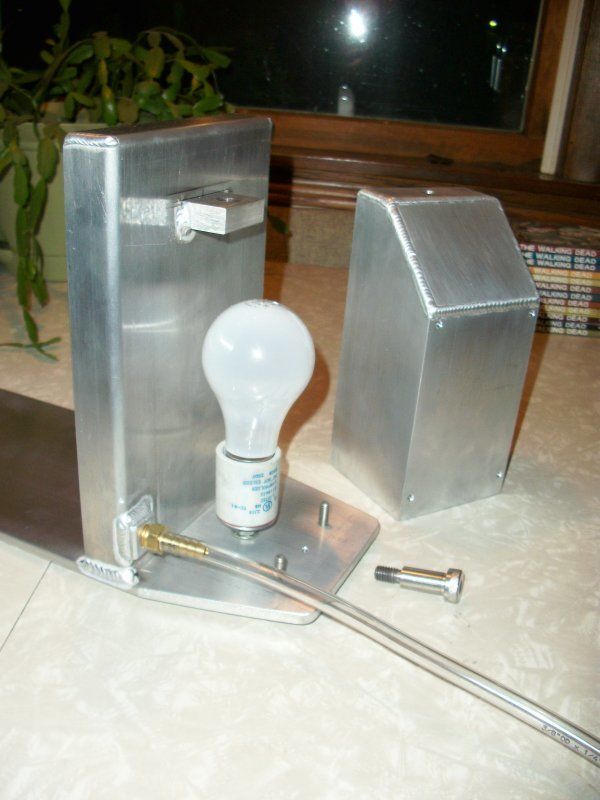
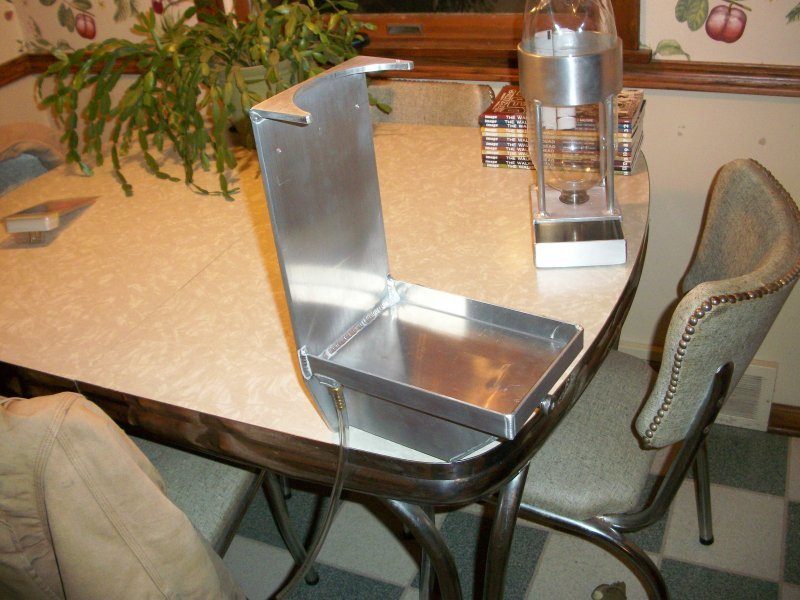
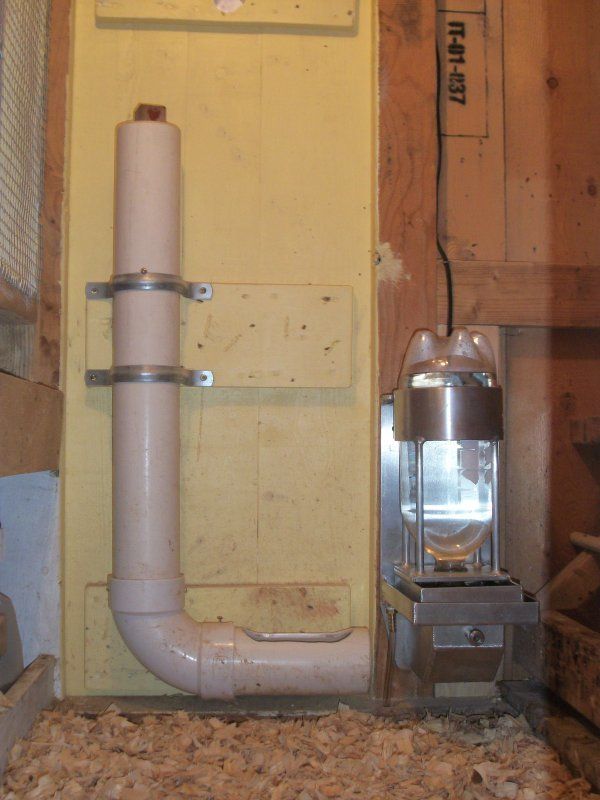
I needed to come up with something to water my chickens in the winter time. So I came up with this. I have to make a heated base (a project for another day) that this will sit on yet, to keep the water from freezing on the cold days.

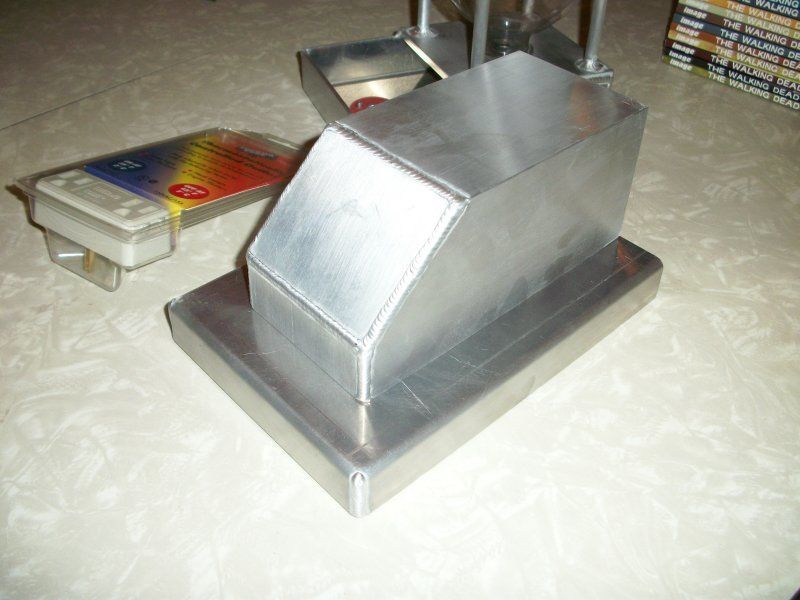
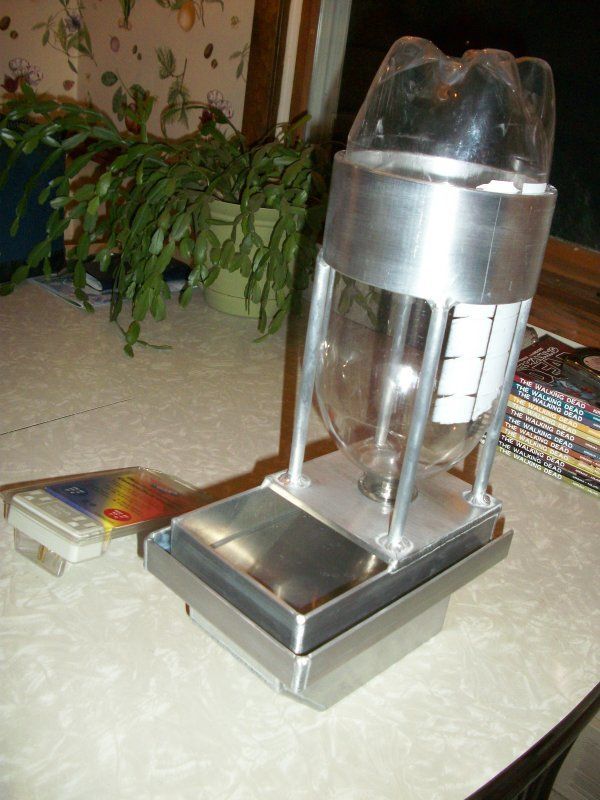
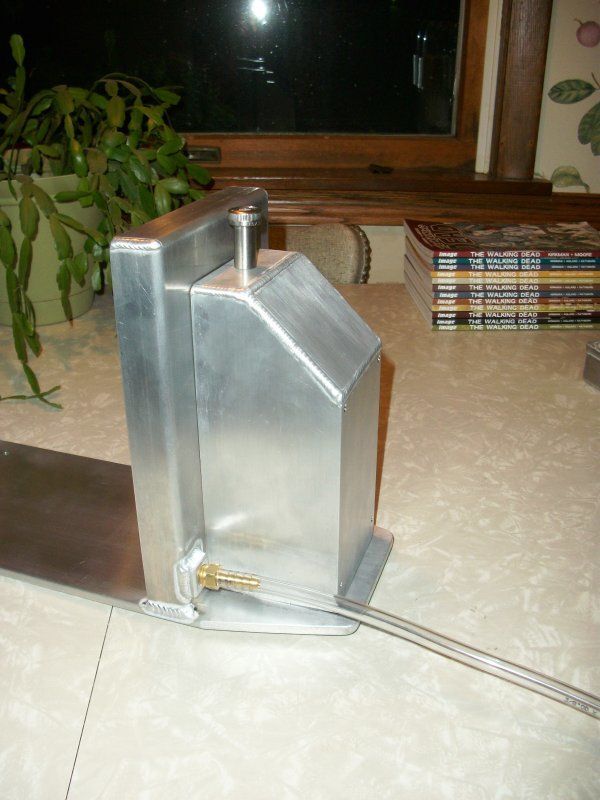
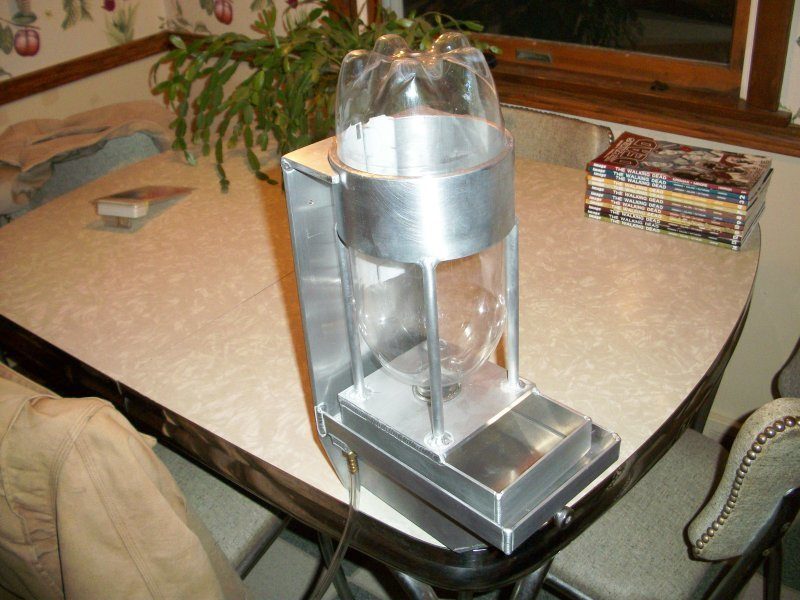
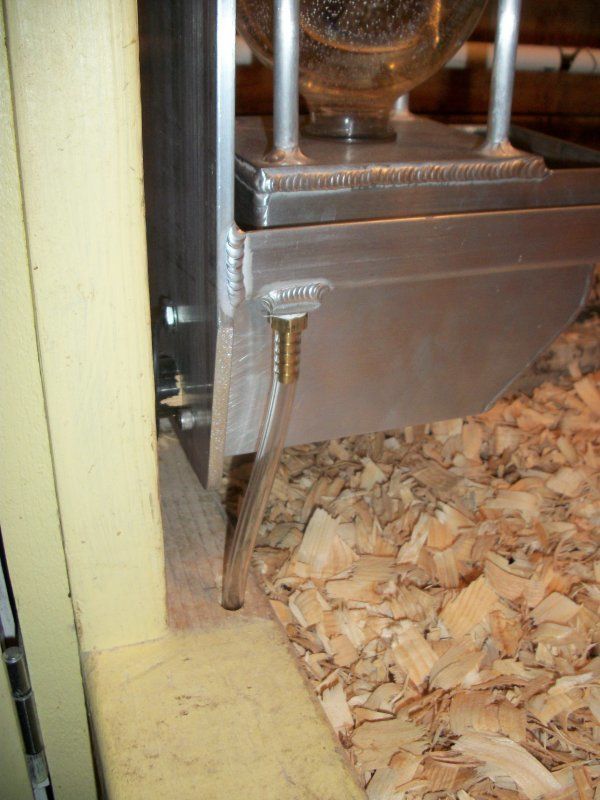
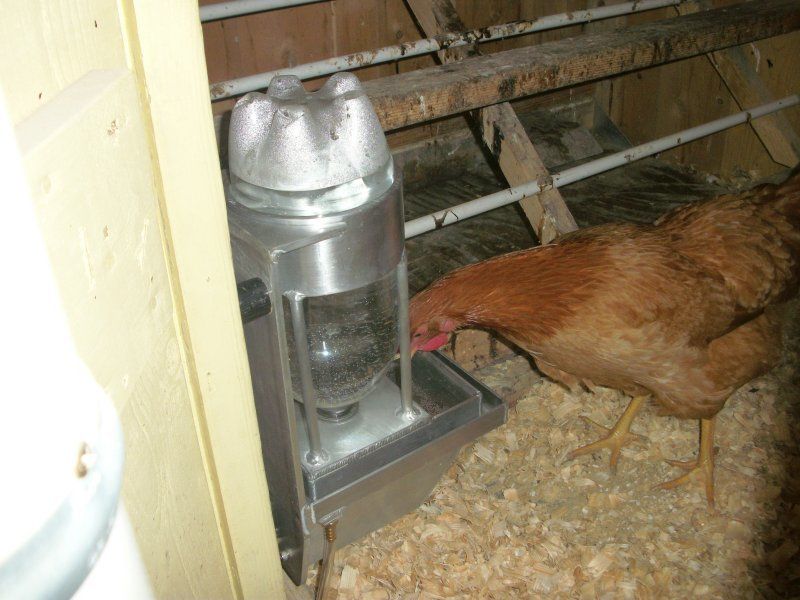
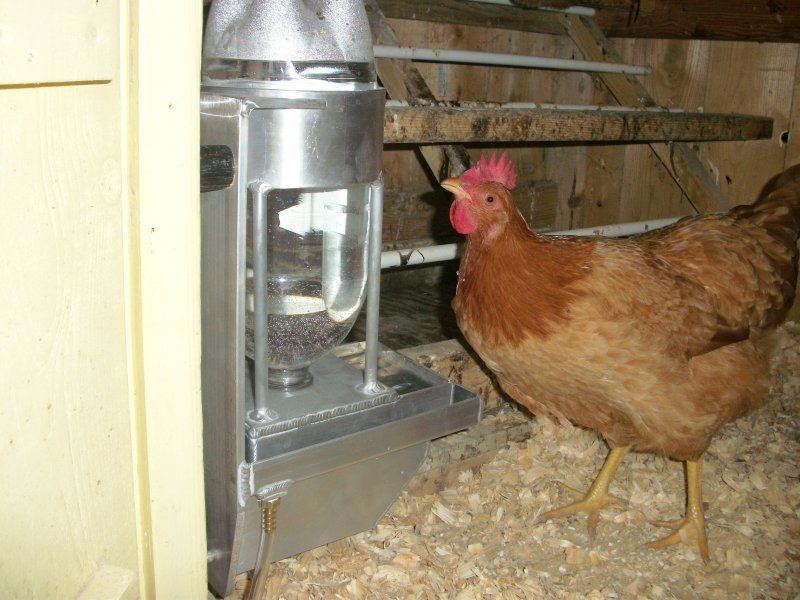
I made it out of Aluminum. and I'm using a 3-liter soda bottle for the container. That way I don't have to lug a bucket of water out to the barn to fill up the waterer, I can have a full bottle on hand in the house, and just exchange out the low/empty bottle with a full one. I didn't really have a plan, just an idea in my head, and I looked to see what we had sitting in the metal rack, to work with, and I came up with this.

94470_100_2008.jpg

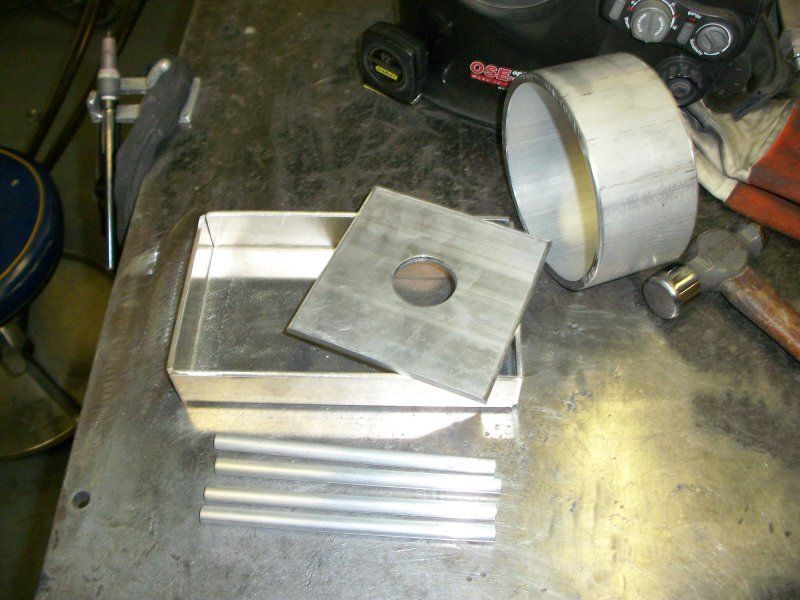
I formed up a pan for the base out of 1/8" sheet, machined a hole in the top plate that fit the 3-liter bottle, and cut a piece of tube that fit the outside diameter of the bottle. (to my suprise it fit the bottle perfectly) Then tig welded it all together.

94470_100_2010.jpg


94470_100_2011.jpg


94470_100_2015.jpg


94470_100_2016.jpg

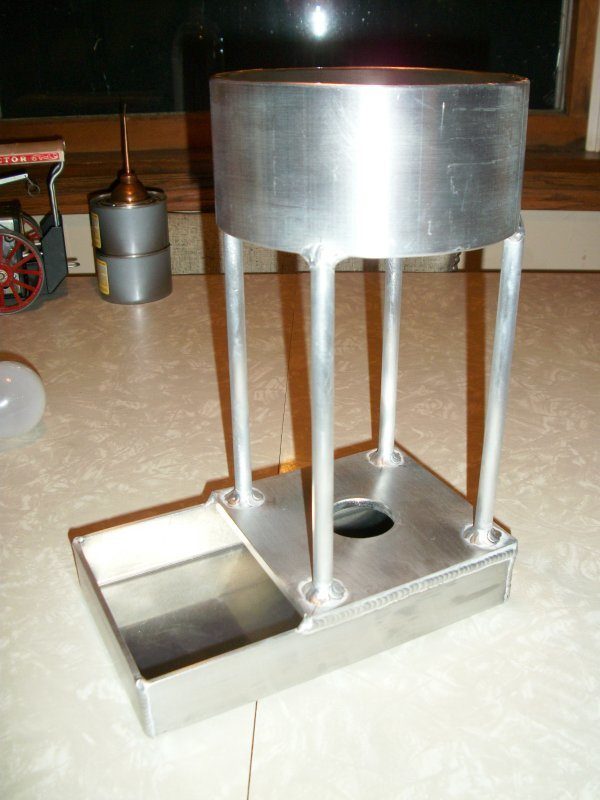
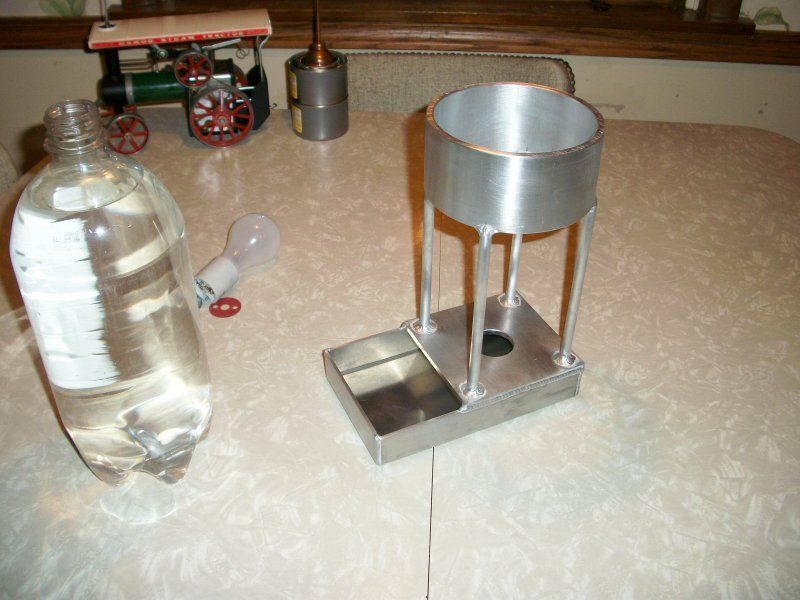
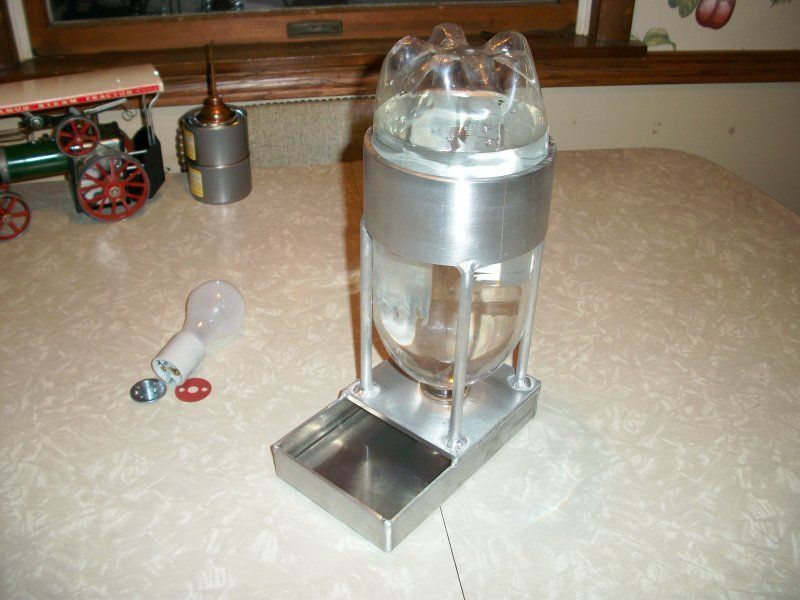
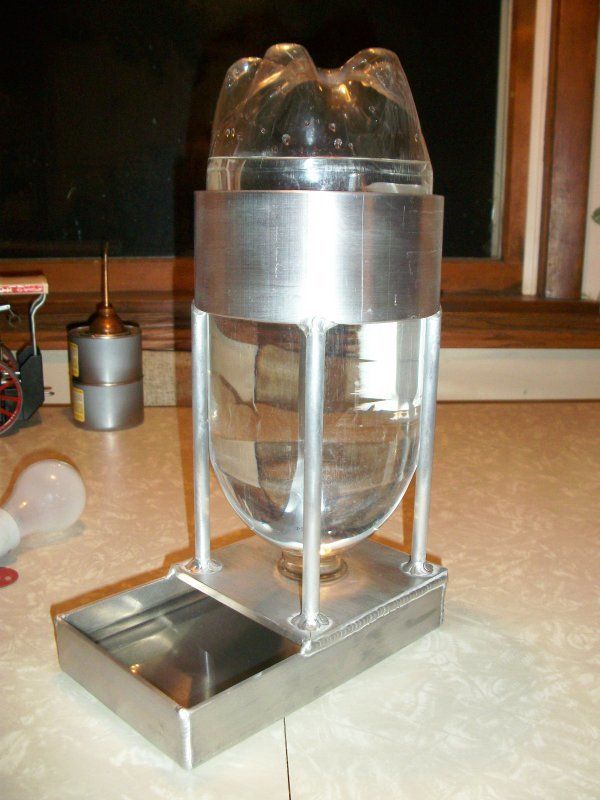
I have it so that it fills up the bottom of the tray with about 3/4" deep of water.
 
I had a little extra time today to work on the heated chicken coop water'er.

So far the heating tray, and the lightbulb housing are done. The lightbulb housing will be removable from the bottom of the tray, to access the light bulb inside.
94470_100_2056.jpg


94470_100_2055.jpg


Here's what it will look like from the bottom side. The light bulb will be inside there.
94470_100_2057.jpg


94470_100_2054.jpg


The heating tray that the waterer sits in/on, will also double as a water containment tray. That way if any water spills over, it'll catch it and flow out of a tube attached to the bottom, that will run to the out side of the coop. Maybe I'm over thinking it, but I'd like to keep the inside of the coop and wood shavings as dry as possible.

I'm not sure what wattage bulb will be required, to keep the water from freezing. I see experimenting with different wattage bulbs, in my future........
hmm.png
 
Last edited:
Very nice!!! Was wondering about doing something like this also from Aluminum... I just got access to the shop at UW and as a starving student I dont have to pay for most of my materials. I havent worked with aluminum much but doesnt aluminum start to oxidize and is that and issue with the water quality???
 
Quote:
For marine applications that see heavy salt water emmersion, you would send out the part to get anodized first, before being put into use. Anodizing will prevent any oxidation from happening to Aluminum.

This chicken waterer that I'm building, will just see tap water, so it'll be fine. It will dull up over time and lose its shinyness, but that will be about it. Even then, being inside a building out of the elements and enviroment, it'll take years.
 
Well, there doesn't seem to be much interest in the heated waterer. But it's finished now, so here's the final product.

94470_100_2175.jpg

Here's the attached cover for the heating element (light bulb
tongue.png
)

94470_100_2177.jpg

Here's with the cover removed, showing the inside. The cover has two holes in it, that slide over two studs attached to the back plate, and then is secured/attached by a sholder bolt in the front, that I can turn in and out by hand. So if I need to access the bulb, I can just turn out the bolt, and remove the cover. (no tools required)

94470_100_2179.jpg

The waterer will attach to the wall of the chicken coop with three screws. If for some reason water spills out of the waterer, and over flows into the heating tray, it will drain out of the attached clear tube. The tube will be placed to go from the tray, to the out side of the coop.
That way I should have no wetness problems, with the pine shavings on the floor of the coop.

94470_100_2180.jpg

I put some ears on the back plate to secure and center the waterer, when it's setting in the base.

I have a few hours into it, so them dang hens better appreciate it
wink.png
(I know....I know, their chickens.....they couldn't care less
lol.png
)
 
Last edited:
Got the waterer wired up and mounted in the coop.

Here it is, inside the coop, mounted next to their feeder. (took picture thorugh pop door)
94470_100_2257.jpg


It's right inside the main door for easy access, to change out the low water bottle with a full one.
94470_100_2262.jpg


The spill drain tube goes through a hole, to the outside of the coop. So no mess or wet pine shavings.
smile.png

94470_100_2263.jpg


The chickens took right to it.
94470_100_2267.jpg

Down the hatch...
94470_100_2269.jpg


94470_100_2274.jpg

Come one, come all.....plenty for everyone
94470_100_2272.jpg


I have it pluged into a Thermo-cube. Now to see how it does on the cold days.
 
Wow !!! That is definitely a mil-spec poultry waterer , amazing craftmenship !!!
Unfortunately not an easy project for most without welding equipment or experience.

Very nice, thanks for sharing your project with us..


Zekii


Quote:
 

New posts New threads Active threads

Back
Top Bottom