- Apr 2, 2012
- 46
- 40
- 24
First of all, I would like to return some of the knowledge that we have learned here, so we are going to try our best to return the favor by helping our modified "Purina" Coop (Our coop will be a 4' x 6' design) with full details and pictures to go along.. Thanks for looking and hopefully this will help with your own design or cost on building and figuring out what do do with own coop. We are going to do the whole project in 5 weeks in 5 stages.. Our 6 chicks will be ready when the coop is all done!
 PLEASE NOTE!
THIS IS STAGE ONE OF FOUR that we will have for the coop. We WILL put the drawings with FULL dimensions up within a couple of days.. Thanks for your posts and comments! EACH STAGE HAS ITS OWN POST, PLEASE SEE LINKS BELOW.
First, a picture of our 6 chicks (3 Tetra Tints and 3 Red Sex Link)

Stages
First stage will be basic structure with floor. ** COMPLETED **
Second stage will be walls and laying box. DIRECT LINK HERE.
Third stage will be the roof and venting system.
Forth stage will be any remaining stuff for the coop
Fifth stage our protective run, since in Connecticut we have many predators (Hawks, Skunks, Raccoons, Opossums, Fisher Cats, Owls..)
After we complete the build I will edit this thread to put all materials and prices in one collection. Prices here are a reflection on NEW materials from one of the large chain stores.
Well here we go!
Time required: 2 Hours
Tools needed:
Circular Saw, Drill, Square, Pencil, Chalk Line, Safety Glasses
Materials for Stage One
11 - pressure treated 2x4x8 ($3.20ea. Total: $35.20)
1 sheet of 3/4" int/ext plywood ($22.00)
1 box of 3" weather-grade screws. ($9.00)
Total cost for Stage One: $66.20 + tax
We chose pressure treated for mail carrying supports since these will be partially buried for stability, you may use standard but will need to paint/stain to make them last. costs will be lower also.
Make all the cuts now, so can put the saw away after the first step!
Cut 4 2x4x8 to 66" (makes two back leg supports)
Cut 4 2x4x8 to 72" (makes two front leg supports)
Cut 2 2x4x8 to 6' (makes front/back rail supports)
Cut 1 2x4x8 to 44 3/4" (2 pieces, make left and right supports)
Cut 3/4" plywood to 4x6' sheet (main flooring)
Use a remaining 2x4 and cut 4 pieces approx 4" long (extra floor supporting)
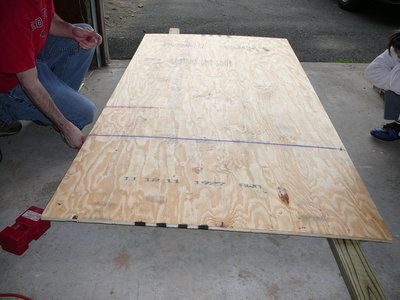
Chalk lines help on making straight cuts

Measure twice and mark and square once so no cuts are wrong!
After the cuts where all done, we started the built, let's go!
Step 1: Make two back leg supports - do this step twice
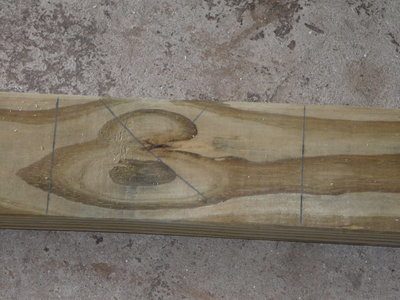
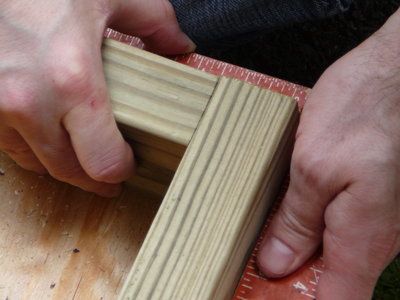
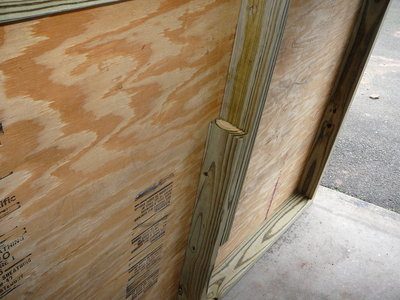
Place 2 of the 66" boards together aligning the ends and edges together as shown. Make sure that the wood grain has the small "C" towards each other as in the picture below. Why? if the boards ever buckle, twist, etc. this will stop most of the twisting.. boards always twist towards this way and by screwing them together will stop this process.

Keep the 2x4's grain like this.. it will save you later on twisting issues!
Keep the 2x4's square when screwing them together!
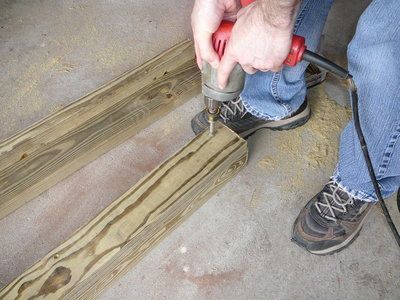
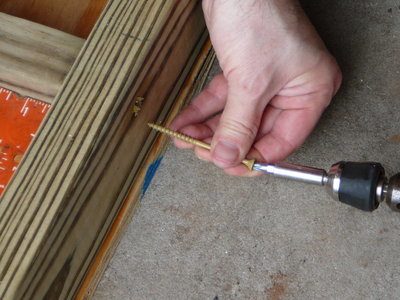
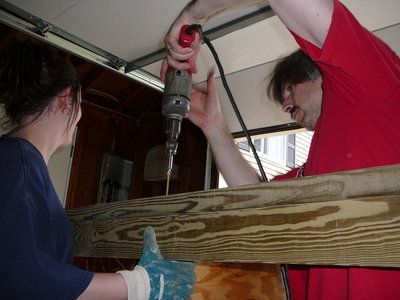
Screw the 2x4's together start about 3" in to stop from splitting ends.. then every foot or so to get about 5 screws in each leg section.
Step 2: Make two front leg supports - do this step twice
Repeat the above steps using the 72" 2x4's.
Step 3: Mark the four legs for carrying the flooring
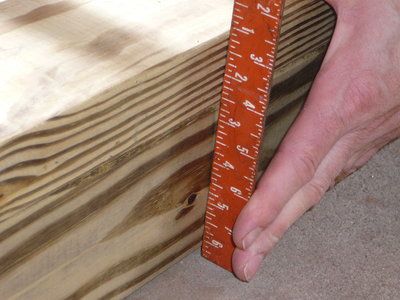
Mark the 4 legs that you created 23" from the end of the legs.. as seen below. We plan on direct burying 6" for stability. You could place directly on the ground and mark at 17".. this is up to you.
Measure 17" or 23" up from the end of all four legs, draw a line using a square to get a perfect line.
Measurement of the 17 or 23" line for the floor joist position.
Step 4: Building support structure for main flooring
Use the two 2x4's that you cut to 6' and the two 2x4 cut to 44 3/4" and place on the plywood as shown. Screw them together on the ends and make sure they are square and flush!

Laying the 2x4's in place prior to screwing together
Make sure to keep the 2x4's square and flush prior to screw the ends together!
Step 5: Adding one more floor support in the middle of the floor.
Since we are adding another 2' to the length of the coop, we decided to add a little more support to the middle of the unit. We basically took two of the left over 2x4's and screwed them together and added to the center of the flooring from prior step.

Take two piece of scrap 2x4's and screw them together
Attach them together at the center point
Final middle floor support
Step 6: Flip it and attach plywood to the floor structure
Now, with help from another person, flip the structure over so that you can screw the 3/4" plywood to the result of step 5.

Flip the structure, plywood on top!

Measure and screw every 1' or so.
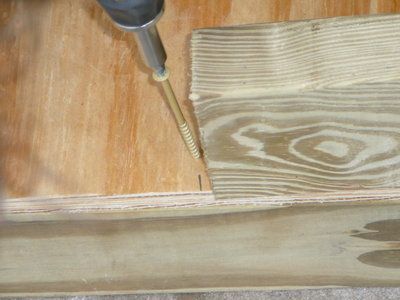
Use a piece of 2x4 scrap to make sure you hit the joists in the center as shown.
Make sure to screw the center joist to the plywood also, we measured twice to make sure we hit the beam.
Measure the center joist to make sure our screws hit the beam for added support
Step 7: Attach legs to flooring section.
Ok, first of all the floor and leg structures are HEAVY at this point, do not do this alone.. I had a lot of help doing this step, there is probably a better way of doing this step, but that is what family and friends are for!
Stand up the flooring structure and align the 2 rear legs to the flooring with the marks applied in step 3. align the marks to the BOTTOM of the floor joists as seen below.
MAKE SURE YOU PUT THE TWO SHORTER LEGS ON ONE SIDE AND THE TWO LONGER ON THE OTHER SIDE!
Make sure that the wider side of the legs structure is on the front side of the coop

Make sure that the wider part of the leg is on the front of the floor structure.. also the wider on the rear side too.
Attach the flour legs with screws on both front and sides
Flipping the unit to add the other two legs is difficult. We had four people for this step, along with a few "choice" words along the way.
Finally we added four additional supports under each corner to make sure the floor would never move.

Added four support blocks under the floor to make sure it never moves
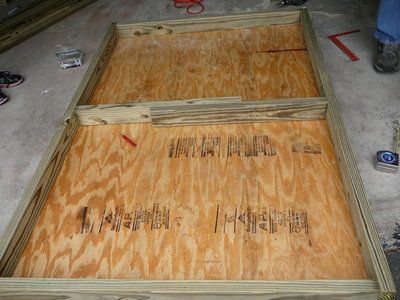
Well, Here it is...
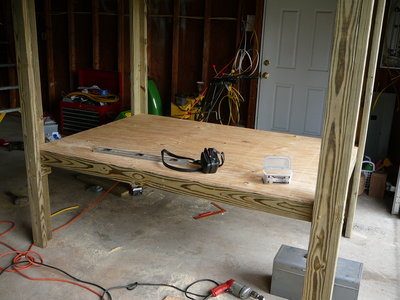
Completed Stage 1 results
The one thing that we should have done different was to mount the 4" supports to the leg structures first, this way the floor could have been laid on the legs are strapped easier.. (live and learn)
The completed Stage 1, questions? just ask..
Stage two will be posted Saturday (April 21st)
THIS IS STAGE ONE OF FOUR that we will have for the coop. We WILL put the drawings with FULL dimensions up within a couple of days.. Thanks for your posts and comments! EACH STAGE HAS ITS OWN POST, PLEASE SEE LINKS BELOW.
First, a picture of our 6 chicks (3 Tetra Tints and 3 Red Sex Link)
Stages
First stage will be basic structure with floor. ** COMPLETED **
Second stage will be walls and laying box. DIRECT LINK HERE.
Third stage will be the roof and venting system.
Forth stage will be any remaining stuff for the coop
Fifth stage our protective run, since in Connecticut we have many predators (Hawks, Skunks, Raccoons, Opossums, Fisher Cats, Owls..)
After we complete the build I will edit this thread to put all materials and prices in one collection. Prices here are a reflection on NEW materials from one of the large chain stores.
Well here we go!
Time required: 2 Hours
Tools needed:
Circular Saw, Drill, Square, Pencil, Chalk Line, Safety Glasses
Materials for Stage One
11 - pressure treated 2x4x8 ($3.20ea. Total: $35.20)
1 sheet of 3/4" int/ext plywood ($22.00)
1 box of 3" weather-grade screws. ($9.00)
Total cost for Stage One: $66.20 + tax
We chose pressure treated for mail carrying supports since these will be partially buried for stability, you may use standard but will need to paint/stain to make them last. costs will be lower also.
Make all the cuts now, so can put the saw away after the first step!
Cut 4 2x4x8 to 66" (makes two back leg supports)
Cut 4 2x4x8 to 72" (makes two front leg supports)
Cut 2 2x4x8 to 6' (makes front/back rail supports)
Cut 1 2x4x8 to 44 3/4" (2 pieces, make left and right supports)
Cut 3/4" plywood to 4x6' sheet (main flooring)
Use a remaining 2x4 and cut 4 pieces approx 4" long (extra floor supporting)
Chalk lines help on making straight cuts
Measure twice and mark and square once so no cuts are wrong!
After the cuts where all done, we started the built, let's go!
Step 1: Make two back leg supports - do this step twice
Place 2 of the 66" boards together aligning the ends and edges together as shown. Make sure that the wood grain has the small "C" towards each other as in the picture below. Why? if the boards ever buckle, twist, etc. this will stop most of the twisting.. boards always twist towards this way and by screwing them together will stop this process.
Keep the 2x4's grain like this.. it will save you later on twisting issues!
Keep the 2x4's square when screwing them together!
Screw the 2x4's together start about 3" in to stop from splitting ends.. then every foot or so to get about 5 screws in each leg section.
Step 2: Make two front leg supports - do this step twice
Repeat the above steps using the 72" 2x4's.
Step 3: Mark the four legs for carrying the flooring
Mark the 4 legs that you created 23" from the end of the legs.. as seen below. We plan on direct burying 6" for stability. You could place directly on the ground and mark at 17".. this is up to you.
Measure 17" or 23" up from the end of all four legs, draw a line using a square to get a perfect line.
Measurement of the 17 or 23" line for the floor joist position.
Step 4: Building support structure for main flooring
Use the two 2x4's that you cut to 6' and the two 2x4 cut to 44 3/4" and place on the plywood as shown. Screw them together on the ends and make sure they are square and flush!
Laying the 2x4's in place prior to screwing together
Make sure to keep the 2x4's square and flush prior to screw the ends together!
Step 5: Adding one more floor support in the middle of the floor.
Since we are adding another 2' to the length of the coop, we decided to add a little more support to the middle of the unit. We basically took two of the left over 2x4's and screwed them together and added to the center of the flooring from prior step.
Take two piece of scrap 2x4's and screw them together
Attach them together at the center point
Final middle floor support
Step 6: Flip it and attach plywood to the floor structure
Now, with help from another person, flip the structure over so that you can screw the 3/4" plywood to the result of step 5.
Flip the structure, plywood on top!
Measure and screw every 1' or so.
Use a piece of 2x4 scrap to make sure you hit the joists in the center as shown.
Make sure to screw the center joist to the plywood also, we measured twice to make sure we hit the beam.
Measure the center joist to make sure our screws hit the beam for added support
Step 7: Attach legs to flooring section.
Ok, first of all the floor and leg structures are HEAVY at this point, do not do this alone.. I had a lot of help doing this step, there is probably a better way of doing this step, but that is what family and friends are for!
Stand up the flooring structure and align the 2 rear legs to the flooring with the marks applied in step 3. align the marks to the BOTTOM of the floor joists as seen below.
MAKE SURE YOU PUT THE TWO SHORTER LEGS ON ONE SIDE AND THE TWO LONGER ON THE OTHER SIDE!
Make sure that the wider side of the legs structure is on the front side of the coop
Make sure that the wider part of the leg is on the front of the floor structure.. also the wider on the rear side too.
Attach the flour legs with screws on both front and sides
Flipping the unit to add the other two legs is difficult. We had four people for this step, along with a few "choice" words along the way.
Finally we added four additional supports under each corner to make sure the floor would never move.
Added four support blocks under the floor to make sure it never moves
Well, Here it is...
Completed Stage 1 results
The one thing that we should have done different was to mount the 4" supports to the leg structures first, this way the floor could have been laid on the legs are strapped easier.. (live and learn)
The completed Stage 1, questions? just ask..
Stage two will be posted Saturday (April 21st)
Last edited:

