Sooner - Sorry I wasn't able to read posts last night. I'm headed to BVille in a few minutes to spackle and paint the rent house. Carpets go in on Wednesday. I should be stoked, but I'm just worn out. My instructions for the apron are cryptic, but I think you'll be able to follow them to make some aprons. If you want the dimensions for a scrap fabric apron that requires no sewing, let me know and I'll get the drawing and dimensions posted tonight.
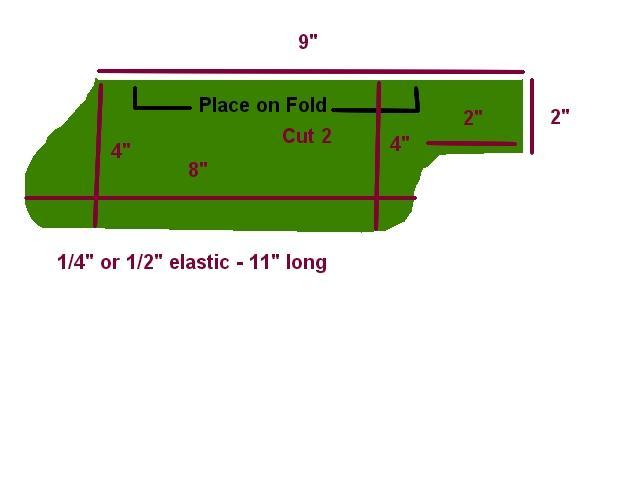
Apron: Place pattern on fold. Cut 2. Cut elastic and pin each end at a shoulder point on one of the fabric pieces. Stitch in place, then remove pins. Next, pin right sides together.
Stitch a 5/8" seam around the outside edge, leaving the top open so the fabric can be turned right side out. Clip the curves. I usually double stitch any area I have clipped.
Turn the pieces right-side out. Iron flat, making sure all seams are smooth. Stitch a 1/4" seam around the outside edge, leaving the top open. You'll turn this down for an
elastic casing in a minute.
Use a long stitch and tack the elastic along the top edge of the apron (open end will be held shut now with long stitches through the elastic). This makes it easy to fold your casing the right size and not stitch through your elastic with your short stitches. Reset your stitch length to the shorter length. Fold tacked elastic down once, and then once more, forming the elastic casing. Stitch the bottom edge of the casing, 1/4" seam. Pull the long stitches free to release the elastic. Adjust the elastic so it is even on both sides. It will slide in the casing, which makes putting it on and taking it off easy.


")

