- Thread starter
- #10
Knighstar679
Crowing
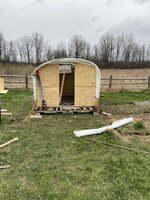
So now we have a roof, and the framing for the walls. It just has to now be Enclosed to keep the weather out, and the ducks in.
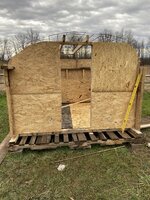
So we moved on to the plywood. When we did this we noticed that no one piece was going to cover the 9 foot sides all at once. So we split it up into 2 4.5 pieces. across the bottom. Then we had a bit at the top where the roof wire met the frame that we wanted to cover to try and give it a more finished look and give it less of a chance to catch on anything if the wind caught it.
The first side we did it ended up even with each. Which would have worked great but the wire pushed it out where all for pieces of wood met.
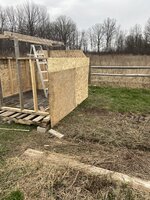
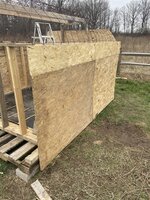
That wasn't an overly great idea and we really wanted a back up plan just in case of water seeping. So we had to come up with another idea for the next side.
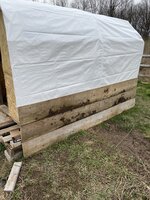
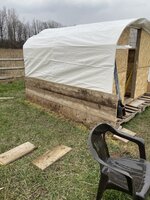
On the next side we decided to over lap the top board with the bottom board like one would do with a roof so that any water that would come down onto the boards should there be a leak would hopefully run off and down onto the ground below. This seemed to work really well for an idea for the other side and the back.
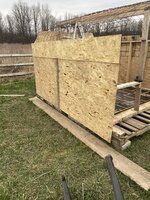
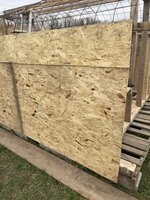 The side came out pretty good over all.
The back we left open at the top for ventilation. The idea is to cover the opening with hardware cloth before we put on the tarp roofing.
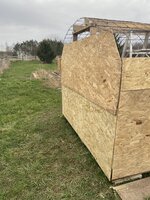
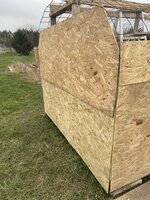
We are also thinking about adding in a top open window in this spot that can be completely sealed up in the winter but opened in the summer to add in the chance of a cross breeze.
Its coming along next will show the front enclosing and the hardware cloth being appiled.
So we moved on to the plywood. When we did this we noticed that no one piece was going to cover the 9 foot sides all at once. So we split it up into 2 4.5 pieces. across the bottom. Then we had a bit at the top where the roof wire met the frame that we wanted to cover to try and give it a more finished look and give it less of a chance to catch on anything if the wind caught it.
The first side we did it ended up even with each. Which would have worked great but the wire pushed it out where all for pieces of wood met.


That wasn't an overly great idea and we really wanted a back up plan just in case of water seeping. So we had to come up with another idea for the next side.
On the next side we decided to over lap the top board with the bottom board like one would do with a roof so that any water that would come down onto the boards should there be a leak would hopefully run off and down onto the ground below. This seemed to work really well for an idea for the other side and the back.

 The side came out pretty good over all.
The back we left open at the top for ventilation. The idea is to cover the opening with hardware cloth before we put on the tarp roofing.


We are also thinking about adding in a top open window in this spot that can be completely sealed up in the winter but opened in the summer to add in the chance of a cross breeze.
Its coming along next will show the front enclosing and the hardware cloth being appiled.

