
Chick Brooder Tips and Tricks
Chicks! One of the most exciting parts of raising backyard chickens. The fluffy butts, tiny bodies, curious beaks, and all the antics! No one ever gets bored with chicks. As cute as they are, they’re also very fragile, and having a safe, clean, spacious, and functional brooder is key for the start of your flock's life.Starting with brooder setup, this article will give you some tips for putting together your chick brooder.
Brooder setup
When setting up your chick brooder, there are lots of factors to consider. Chicks are very fragile babies, requiring optimum housing and care for the first few weeks. It’s not as impossible as it may sound to take care of such tiny dependent babies, and it’s difficult, but with the right setup, you’ll have healthy chicks, and truly enjoy keeping them!When setting up a chick brooder, you’ll want to consider a couple of important factors. Size, sturdiness, security, protection, and ease of cleaning. The last one may sound less important, but trust me, you’ll be glad you considered this when you're cleaning out your future brooder.
We’ll start with size. For the first 4 weeks, chicks require 6 inches of space per bird. Becoming 1 sq. ft from 4 to 8 weeks, and 2 sq. ft from 8 to 12 weeks. If you plan on keeping your chicks in the brooder until 6 weeks of age (my recommendation depending on the climate) you’ll need your brooder to have at least 1 sq. ft of space per bird. This gives your babies plenty of room to jump, run, squabble, play, explore, and stretch their legs and wings.
Sturdiness and security are very important. Depending on where you keep your brooder and what predators it will be exposed to, you will need to adjust the security of your brooder. All brooders should be sturdy. The walls should not be flimsy or able to be pushed over/torn through. They should have tall sides that chicks can not fly over. I like about 3ft walls.
If you have young children, the latch or door to your brooder should be secured and not be easily opened. If your brooder will be exposed to predators, outdoor or indoor, your brooder should be predator-proof. For indoor predators depending on the prey drive, sturdy walls cannot be torn through or toppled. A sturdy chicken wire lid with a secure connection to the brooder will probably be enough for cats. Hardware cloth would be used with wooden walls for any outdoor predators, or dogs with a high prey drive. Have the brooder secured in a quiet room away from your dogs if they are excitable around chickens.
Last, when you’re planning a brooder that’s easy to clean, having no tight corners, a wide door that allows access to the whole brooder, and a thick layer of the substrate are all factors. I use a modified version of the “deep litter method” for my chicks. When I do this, I put down 3-4 inches of bedding, and turn it by tossing treats on the ground so the chicks can do it for me. I’ve gotten away with 0 cleaning until 6-8 weeks of age with this method. This depends on the size of your brooder, so keep in mind that the larger the brooder, the less cleaning.
Moving on, let’s find out what items you can convert into a brooder and how well they work. Note I’ll be rating the brooders at the bottom of the section to show which I like best. Each will be rated out of 5 stars.
Modified deep litter method
As I mentioned, I like to use a modified deep litter method for my chicks. For the traditional deep litter method, you would use a coop with a dirt floor and add 12 inches of bedding to use as your base. Pine shavings are the most common base for the method. Every day after the birds have made a mess, you turn the bedding, allowing the droppings to fall to the bottom. This allows the shavings to compost, keeping the bedding dry and clean.As long as you keep the bedding 6 inches deep by replenishing it with shavings, straw, hemp bedding, hay, or other compostable material, the bedding can compost while staying dry and clean.
For chicks, I do about 4-5 inches of bedding in an enormous space. You want to have a brooder with a realistic amount of room per bird. I used this method in a kiddie pool with 3 bantams and it worked great, though I’m sure that more birds in this space would work just fine. To churn the bedding, tossing treats on top will encourage the chicks to scratch (which they do plenty of already) and most of the time you only the to turn it minimally or not at all. Keeping the bedding at the desired depth and turned often keeps you from having to clean the brooder often, or depending on the number of chicks at all.
Brooder Conversions
The Plastic Tote
The plastic tote brooder is a very common, and easy brooder to get supplies for. You can use a plastic Rubbermaid container or another tote as the brooder box. To make a simple cover, cut an opening on the lid and cover the opening with hardware cloth. This provides ventilation, and allows you to easily see your babies! This brooder is very sturdy and secure. Suitable to protect from indoor predators such as cats, though any brooder should be supervised around pretty driven dogs.

Photos by @fatty and friends and @JustBabyMargo Thank you!
Pros:
- Easy to get supplies for, and setup
- Easy to reach into
- Secure and sturdy
- Low cost
- Repurposed item
Cons:
Very small, and not spacious enough for growing birds. It will need to be replaced with a different brooder as your babies grow.Opening from above (scares chicks because of aerial predators)
It may not be predator proof
Verdict:
 - I'm giving this brooder 3 stars because of the small size. It also opens from above which can scare chicks. It still makes a great secure brooder.
The Dog Crate
Dog crates make great brooders! They’re sturdy, easy to come by and require very little setup. Are secure enough to protect from indoor predators such as cats or dogs. Though these brooders aren’t suitable for outdoor use. Wire crates can be changed with cardboard around the inside to keep the shavings in.The reason these brooders aren’t my first pick is that your chicks will outgrow this brooder quickly. Dog crates aren’t that large, and need to be upgraded as the chicks grow.
The second photo shows another creative way to use a dog crate, by zip-tying the top and bottom of a plastic crate together! Doubles the space and works efficiently. Just make sure you include a lid with this setup. The member who used it placed a metal grid over the top to keep babies in.


Photos by @Silkie Princess and @KaleIAm Thank you!
Pros:
- Easy setup requiring no additional predator proofing
- Wire crates allow for lots of visibility
- Tall sides with a secure top
- Protection from indoor predators
Cons:
- The small door makes it difficult to get into
- Can be difficult to clean because of the small opening
- Wire crates need to be used with cardboard
- Small and will need to be upgraded
Verdict:
- Like the brooder above, this setup gets 3 stars because of its small size. Very sturdy and secure, if it was just a little bigger.Dog Play Pen
Dog playpens make great brooders! These brooders are very large along with a sturdy entryway. You can purchase playpen covers for them as well. This makes covering the top easy, which can help protect from indoor predators.Playpens can open from the side, making chicks more comfortable when you reach in to clean, grab babies, or refill feeders or waterers. An issue with playpens is that the bars are very wide. Small chicks might get out depending on the brand of the playpen.
Covering the inside of the pen with hardware cloth, or cardboard, will protect your chicks from escaping, cats reaching in, or older chicks getting stuck between the bars. This also keeps bedding from falling outside the playpen. This brooder can be set up to protect from indoor predators but isn’t suitable for outdoor use.

Photo by @PippinTheChicken Thank you!
Pros:
- Large size
- Tall sides
- Easy setup
- Easy to reach into and clean
- Sturdy and secure
- Opening from the side
Cons:
- Large bars need to be covered with hardware cloth
- Can be pricey
Verdict:
- Playpens really do make great brooders. I'm only giving it 3 stars because of the large bars. With the price of the playpen already, adding hardware cloth to that bill can get pricey. Otherwise, great brooder, with very little setup required.The Swimming Pool
Another common brooder, with materials that are easy to get ahold of. Requires more setup than the tote, but it's been my go-to brooder in the past.By wrapping a kiddie pool in cardboard or hardware cloth, you can make tall, secure walls that keep chicks in and household pets out. A wire is recommended if you are keeping the brooder in an area with cats or dogs, though not suitable for outdoor use.
Using a cinch-down strap to hold wire or cardboard to the pool is helpful. Do this by wrapping the cardboard around the pool loosely, then wrapping the cinch-down strap around the cardboard, and around the pool. Connect the hooks at the ends and cinch the strap until the cardboard dits flush with the pool.
Adding a chicken wire or harder cloth top by using a staple gun, or tying it to the cardboard or wire works well. I poked holes in the cardboard, then used string to “weave” the string through the holes on the wire and back through the cardboard.
Pros:
- Easy to get supplies for
- Spacious, with enough room for small groups of chicks until its time to go outside
- Secure and sturdy with the right setup
- Low cost
- Repurposed item
Cons:
- More difficult to clean
- Requires more setup, but not too tricky
- Maybe opening from above (scares chicks because of aerial predators)
- It may not be predator proof
Verdict:
- Swimming pools are very large which is key when choosing your brooder. The base makes a sturdy setup, though not sturdy enough to protect it from dogs. 3 stars because of security, setup time, and effort, though it takes the win for easy-to-source supplies, and size.The Bathtub
Bathtubs make fantastic brooders!PLEASE NOTE: it is unsafe to use a bathtub in your home with an active water faucet. If the faucet were to turn on, it will flood the tub and drown your chicks.
ONLY use a free-standing bathtub or a tub that is not connected to water. If you choose to use a bathtub that is connected to water, please consult the Tote brooder above and place the tote inside the bathtub. Otherwise, make a great sturdy brooder.
A lid can be created by framing scrap wood to the shape of the tub, then attaching hardware cloth, or chicken wire to the wood.
Photo by @saysfaa Thank you!
Pros:
- Easy to setup with minimal supplies
- Spacious enough to last for a few weeks (depending on the number of chicks)
- Easy to reach into
- Low cost
- Repurposed item
Cons:
- Faucet hazard
- Won't accommodate chicks until adulthood
- Can be difficult to clean
- Opening from above (scares chicks because of aerial predators)
- Sides can be short depending on the bathtub
- It may not be predator proof
Verdict:
- Bathtubs make sturdy brooders that give the chicks an exceptional amount of space to roam. Though the size isn't quite big enough, they are still fairly secure. They do open from above which scares chicks, which contributes to the low review.The Watermelon box
Watermelon boxes are great for brooder setup because of their large size and availability. Most stores would be happy to get an extra watermelon box off their hands, making it very affordable. They also have very tall sides which will keep chicks from jumping out, are large, and are made of sturdy cardboard.Adding a chicken wire lid is cheap and easy as well. I used a staple gun for mine, but making a 2x2 wooden frame, then attaching wire makes an easily removable lid.
Pros:
- Spacious
- Easy to source and affordable
- Easy to reach into
- Tall sides
- Low cost or free
- Repurposed item
Cons:
- Made of cardboard (not suitable for indoor predators or outdoor use)
- Can be difficult to clean
- Opening from above (scares chicks because of aerial predators)
- Tall sides with no door
- Not predator proof
Verdict:
- Watermelon boxes are large, sturdy (enough), and cost very little to nothing. That's always a plus! Though the top opening, and being difficult to reach into, and of course, cardboard, are keeping this setup from a 5-star review.Brooder Panels
Brooder panels aren’t only easy to put together, but they’re easy to source online and are sturdy and secure. They have tall sides, require no handy work, and can be quite large depending on the number of panels purchased.If your brooder is exposed to indoor predators such as cats, having a secure chicken wire lid fitted to the top of the brooder is important. Make sure the lid has a good connection to the brooder, and can’t be pushed off.
Having a sturdier wire such as hardware cloth is necessary if the brooder will be exposed to dogs or cats who are excitable around chicks. If you use chicken wire, make sure that the panels are tall enough that your kitty can not read through the holes and paw at the chicks.
This brooder is not suitable for outdoor use. It is not predator-proof and won’t hold up to outdoor predators.
Pros:
- Good size and can be easily expanded
- Sturdy
- Easy to put together
- Tall sides
Cons:
- Can be pricey
- Opens from above (scares chicks because of aerial predators)
- Not indoor predator proof (no easy way to secure a cover)
- Difficult to reach into and clean
Verdict:
- Brooder panels get 4 stars because of ease of setup, tall sides, and their large size. They can also be expanded which is a plus. Though they lose the 5th star due to the opening from above with no easy door making it difficult to reach into. Plus there is no easy way to add a cover since they have smooth sides.The Stock Tank
Stock tanks are easy to source at TSC, and make great brooders! They are large, sturdy, have tall sides, and require no setup other than the inside of the brooder. All in all, stock tanks make a great instant brooder. Making a simple cover is as stated above in the Watermelon box paragraph.
Photos by @JustBabyMargo Thank you!
Pros:
- Tall sides
- Sturdy and secure
- Large size
- Makes setup easy
- Easy to source
- Easy to reach into
Cons:
- Opening from above (scares chicks because of aerial predators)
- Pricey
Verdict:
- Love these brooders! So instant and easy to use. Only give it 4 stars because of top opening, and cost. Otherwise, perfect brooder for anyone looking for a quick and easy setup.Crib Brooder
Used baby cribs aren’t hard to find used, or even better, you have one on hand you can use. Cribs become large brooders with tall sides. Some cribs even have one side that pulls down, allowing you to clean and reach into the brooder from the side.Wooden cribs have large bars, covering those bars in hardware cloth or cardboard is necessary to keep chicks from escaping, or getting stuck in the bars. It will also help keep bedding inside the brooder. Anything larger than hardware cloth may allow shavings to fall out.
Adding a cover could be as simple as wrapping chicken wire around the top if your crib has a folding/collapsable side. If your crib doesn’t have a side that opens, creating a cover for the brooder with scrap wood and wire is a good idea for indoor predators. This brooder is not suitable for outdoor use.
Pros:
- High sides
- Large size
- Collapsable side for easy cleaning/access
- Repurposed item
- Simple setup
- Sturdy
Cons:
- Large bars (needs to be covered with wire)
- No collapsable side, opening from above
Verdict:
- I can't think of too many things I don't like about this brooder. They're large, sturdy, tall, and easy to access, what's not to love? Simple cover with scrap wood, and covering the bars with cardboard or hardware cloth makes a great brooder. Simple setup, of course depending on your environment and the crib.The Rabbit Hutch
Rabbit hutches are built way too tiny for rabbits. No hutch has enough space for a rabbit to get enough exercise as a permanent home, but they make great chick brooders! One pet's garbage is another pet treasure.Rabbit hutches can be large depending on the hutch, usually offering more space for a small batch of chicks. They are sturdy and secure, covered, large, and can be repurposed if found used. They’re instant. Some hutches may need to be covered in hardware cloth over the wire grade, but this depends on the brand of the hutch. Very secure from indoor predators, and viewing is from the side, which makes chicks more comfortable.
The biggest complaint is that most hutches only have small doors on the side, so you have to clean the brooder from the top. This can scare chicks. If you have a double-decker hutch, clean the bottom from the small doors, which will be a pain.
Pros:
- Large size
- Sturdy and secure
- Tall sides and covered
- Easy setup
- Repurposed item
- Easy to source
Cons:
- Small doors on the side, opening from above
- Can be pricey
- Not suitable for large batches of chicks until adulthood
Verdict:
- 5 stars, though keep in mind they're not suitable for large batches of chicks. This brooder would work great for a small batch of chicks, and is a great way to reuse an old hutch that is no longer needed.Prefab Chicken Coop
Much like rabbit hutches above, prefab chicken coops are large, sturdy, covered, and can be repurposed. Most prefabs aren't nearly big enough for chickens to be happy long term, nor are they predator-proof or well-ventilated, but they are perfect when repurposed as a chick brooder!Very secure, and very instant. Most chicken coops also have a run, so you can use the coop area as the heat box, etc, and use the run for the rest of the setup. I wouldn't suggest using prefabs with raised coops, since chicks could fall off of a ramp and are very delicate.
Photos by @EEforMe, Thank you!
Pros:
Large sizeSturdy and secure
Tall sides and covered
Easy setup
Repurposed item
Easy to source
Cons:
Small doors on the side, opening from aboveCan be pricey
Not suitable for large batches of chicks until adulthood
Verdict:
- 5 stars for the same reasons as above. Not suitable for large batches of chicks, and keep in mind the opening from above.Cabinet, Armoire, or Dresser Brooder-
Who would have thought? Dressers are readily available used on Craigslist etc and are a fantastic item to repurpose as a brooder. They're sturdy, secure, and easy to clean and reach into. The opening is also from the side which helps keep chicks more comfortable during viewing and handling.It's difficult to find a large enough dresser, and it’s not likely you’ll find one suitable for a large batch of chicks. When doing a small batch, cabinets work great! They require a bit of handy work. If the dresser or cabinet has glass in the doors, that can be removed and replaced with hardware cloth or chicken wire.
If the dresser or cabinet has wooden doors, they will have to be removed and replaced with DIY doors. You can make doors by screwing scrap wood or 2x2’s together and attaching wire to that with screws and washers.
Attach with hinges, you have yourself a brooder!
Pros:
- Easy access/cleaning
- Side opening/viewing
- Sturdy and secure
- Requires little additional setup
- Repurposed item
- Not pricey if purchased used
Cons:
- Not suitable for large batches of chicks
Verdict:
- Dressers make great brooders! Can be repurposed, and offer a side view with easy cleaning and access. They do require some handiwork, but nothing an aspiring chicken owner can't handle. Note these brooders are great for small batches of chicks, large batches may need to refer to some larger options above.Cage Brooders
Cage brooders are repurposed outdoor cages you may have used for your flock or other animals. This can be anywhere from an old chicken run to an old dog run. Any old cage you aren’t using anymore. Note that this cage must be predator-proof.Now that you know your cage is predator proof, let’s turn it into a chick brooder! If your cage doesn’t have a coop or wind/waterproof enclosure, you need to add one. This cage also needs to be covered, even with an additional weatherproof area inside.
Use the weatherproof area to add your feed, heat source, and water. These brooders are protected, secure, sturdy, large, and repurposed! Please refer to the learning center for more tips on outdoor brooding. Or as in the comments below! There’s too much info on it for this quick paragraph.
")

Photo by @JustBabyMargo, Thank you!
Pros:
- Outdoors, chicks feather faster, don't have to accumulate to new temps, exposed to dirt/soil and possibly other chickens
- Large
- Sturdy and secure
- Easy access/cleaning
- Walk in, no above opening
- Repurposed item
- Suitable for large batches of chicks
Cons:
- Requires more handiwork
Verdict:
- I love the idea of outdoor brooding! It's more natural for the chicks and allows them to have access to other chickens' outdoor noises, dirt and soil, and temperature swings, and they feather faster. It's more natural for them, and the brooder is easy on the keeper. Sturdy, secure, large, and easy to clean, what more could you ask for?Note: All of these brooders are for use indoors only. None of them are sturdy enough to stand up to outdoor elements and predators. If you are interested in brooding your chicks outdoors, consult the "heat" section of this article. I will link some helpful articles for brooding outdoors, and alternate heat sources for doing so.
Setting up your brooder
Now that you’ve chosen a brooder to convert, you're ready to set up and prepare your brooder for your babies! The most important thing to think about at this point is keeping things clean and organized. Not only for yourself but for your chicks as well.Chicks are energetic, curious, silly, and messy babies. They want to peck everything, scratch everything, and mess up everything. Bedding in the feed, feed in the bedding. It may sound impossible to keep your brooder clean and functional, but if your plan is much more doable than, you might think.
I’ll start by listing brooder supplies below. Begging with bedding, going to brooder accessories. Accessories will comprise waterers, feeders, and water and feeder hacks.
Brooder supplies
Bedding
Bedding is the first supply you have to add to your brooder and the one that will take up the largest part! I'll list different bedding options below and explain the pros and cons.Shavings: Pine shavings are one of the most commonly used bedding for chick brooders. They’re readily available, easy to clean and last a long time in your brooder.
I love using shavings. I don’t have to clean them often since I can use a modified deep litter method, and it requires minimal cleaning. Of course, this depends on the number of chicks in the size of the brooder, but if you have a brooder on the larger side, it works very well.
Shavings can be a pain because they are easy to scratch into feeders and waterers as most bedding materials are. It’s very difficult to get away from that factor.
Photo by @JustBabyMargo, Thank you!
Straw: Straw is very similar to shavings in cleanliness and efficiency. I found it was less dusty, and larger chunks made it a bit more difficult to scratch into a feeder with small holes. Of course, chicks still get the feeders dirty, but straw slightly reduced the mess in the feeders. Also readily available, and easy to source.
Requires minimal cleaning if you have a large brooder for your chicks.
Hemp bedding: Hemp bedding is another creative option for chicken coops and brooders. It is slightly dusty but has a pleasant scent which also helps reduce the ammonia smell. That’s always a plus when raising chicks indoors or in any confined space.
Like straw, it has large chunks, possibly reducing the mess in feeders. Hemp bedding is also very absorbent, so it’s great for use with ducklings who are always getting water everywhere, or for all poultry around waterers. This bedding is not readily available in feed stores, but you can purchase it from Chewy or Amazon.
Sand: Sand is longer-lasting bedding you can use in your coop. It needs to be cleaned often to be used efficiently, but this comprises simply scooping the poop off the top of the sand and removing it. Simple daily cleaning only takes a few minutes, keeping your brooder clean, and smelling fresh.
This is one thing I love about sand. It’s easy to separate the sand from the waste and clean it. The above beddings need to be removed as they become dirty.
Note that the best sand to use is construction, bank, or river sand, which is heavier and not as dusty.
It’s very important to use these types of sand rather than play sand. That is because chickens have very sensitive respiratory symptoms, and inhaling dusty sand isn’t food for adult chickens or young delicate chicks. Please keep this in mind when considering sand for your brooder.
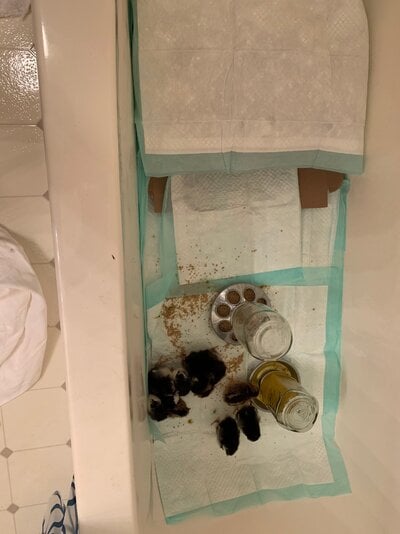
Paper towels/puppy training pads: Paper towels or puppy pads are also very common in chick brooding. Often used for young chicks who may not know the difference between shavings and food.
I have been successful raising chicks right from shavings without issues, but if you have real curious babies, better safe than sorry. Paper towels are easy to clean since you can simply lay them down and pick them up. Highly absorbent and easy to come by, plus inexpensive.
Paper towels get dirty quickly though. Daily replacement may be necessary depending on how many chicks you have in your brooder.
Please note that you can’t use the newspaper for your bedding! Newspaper is not absorbent and will create a slippery surface which can cause straddle legs in chicks. Not something you want to deal with. Please try to use paper towels that are absorbent and won’t cause this issue.
Photo by @saysfaa, Thank you!
Brooder Accessories
Feeders and waterers
There are so many feeder options out there for chicks! From the simple gravity feeder to pricey no-spill feeders. I'm going to start with feeder and water purchases and tricks to keeping them clean and organized.Basic Gravity feeder & waterer: The basic gravity feeder and the waterer can be easily found at your local TSC or other feed stores. They're readily available and easy to fill and empty. Though they aren't easy to clean. Picking out a feeder and waterer keeping cleaning in mind is crucial.
Chicks will get everything messy, you can count on it. Plus, waterers may get slimy if they aren't cleaned regularly, or are placed in a sunny area. The rivets on the inside are difficult to clean, and so is the rest of the waterer since you can't get your hand into the bottle. I'll explain other waterer options below.
Rent a Coop Waterer and Feeder: Rent a coop makes well-built chick feeders and waterers with cleaning and ease in mind. The Rent-A-Coop waterer is much easier to clean with no rivets that algae can hide in. It's also a nipple waterer, so chicks can't kick shavings into it or get it dirty.
If you are concerned about your chicks not using the nipple, you can purchase drinker cups that attach to the water nipples to make using the waterers easier for your chicks.
The Rent A Coop feeder is a No spill feeder that helps keep chicks from kicking bedding into the feed, perching and pooping on the feeder, or scratching the feed right out. Chicks are curious and silly, and this feeder helps prevent behavior that might waste your feed.
Don't squawk at the price, the feeder can hold up to 5lbs of feed, and helping to prevent waste is going to save money as well. A feeder definitely worth the price, something I would suggest the new chick brooder.
Chick Feeding Area Tricks
The Bucket Feeder Trick:
If you're not in the position to purchase a Rent-A-Coop feeder, this bucket trick can add the same benefits at only a fraction of the cost. If you have the supplies and the tools, this feeder trick is definitely worth a try!If you already have a simple gravity feeder on hand, you can use a 1-gallon bucket to create your own no-spill feeder. Take your 1-gallon bucket and place the gravity feeder inside it. Make sure it fits well. If it fits snuggly to the sides, mark 8 holes where the feeder holes line up with the bucket. Make each mark slightly higher than the gravity feeder base when it sits inside.
Next, take a hole saw, using a fitting appropriate to the size of your chicks' heads and necks. Something big enough to allow them to reach into the bucket since the gravity feeder will be inside. Use the saw to cut holes in the bucket over the marks you made. Now you're finished!
Give the bucket a good wash to make sure no plastic shavings are left over for your chicks to eat and place your full gravity feeder inside. You can overflow the feeder a bit to make it easier on the chicks.
You can set up a very similar waterer for ducklings using a small Rubbermaid container. Simple cut 6 holes in the top of a sandwich container with a snap-able lid, fill with water, and boom! You have a waterer that ducklings can't swim in, but they can still dunk their heads.
Since ducklings raised in a brooder aren't waterproof, you can't offer swimming water until they're a bit older. Using this waterer allows them to dunk their heads which is curtail for ducklings and adult ducks to keep their respiratory systems healthy.


Photos by @Quatie and @KaleIAm, Thank you!
The Cookie Tray Trick
Another great trick for chicks and other poultry is the cookie tray trick. Chicks are notorious for spilling feed and water. Spilling water in the bedding will make the bedding damp as moisture can spread throughout the bedding in the brooder. Using a cookie sheet to catch any feed and water that is spilled can help save feed, and keep bedding from getting soiled quickly.To set up this trick, simply place an old cookie sheet in the area you want to set up the feeder and waterer. Then place the feeder and waterer on top of the sheet instead of in the brooder bedding. This gives a bit of room around the feeding station so it’s harder for chicks to kick bedding into the area. This helps keep the feeder and waterer clear of debris. It also catches any feed or water that chicks may spill.
The only thing I don’t like about this setup is that when the chicks poop, it will build up on the cookie tray since there’s nothing for the poop to fall into. It can also get “mucky” pretty quickly if your chicks spill a lot of feed. If you have a large number of chicks, the sheet will need to be cleaned often.
One way to help solve this problem is by placing a cookie/baked good cooling rack over the cookie sheet. This creates a wire bottom effect. It’s helpful because way bedding that gets kicked into the area will probably fall through the drying rack to keep it from being tracked into the feeder/waterer. It also allows any poop, feed, or spilled water to fall through the holes, so it doesn’t need to be cleaned as often. Your chicks also won’t be stepping into their poop if you can’t clean it right away.
Perches for Chicks
Like adult hens and roosters, chicks will enjoy perches to practice on as well. You can purchase perches from Amazon, but simple DIY perches are easy to throw together, and supplies can be sourced cheaper than purchasing pre-made perches.Amazon perches:
Amazon perches are a great go-to. Easy requiring no setup, and not too expensive. Some even come with a mirror which I think is a great touch!- Large Chick Jungle Gym Perch - Love the size of this perch! The cutouts at the bottom of the triangle are great allowing chicks to run in and out the sides.
- Mini Chick Perch with Mirror - This perch is on the small side and would fit great in a smaller brooder. The mirror is a cute touch!
- Large Chick Perch - This perch is a great size with very large cutouts making it easier for chicks to run in and out. It also has lots of roosting bars at different levels for chicks of all ages.
DIY Perches:
#1- The first and simplest perch you can make for young chicks can be made with paper clips and a thin stick or dowel. Simply clip two paper clips to either end of the dowel to create legs. It should resemble a saw horse.#2- If you're using a wire pen, using a corner and placing a stick or dowel through either side of the wire can create a secure perch. If you have a plastic tote, cutting a hole in the shape of the dowel on either side of the bin, or corner can work. Then place the dowel through the holes on either side.
#3- Place a branch in the pen. Often times branches are oddly shaped and rise off the ground enough to create a perch for your chicks.


Photos by @Sally PB and @PippinTheChicken, Thank you!
Last but Certainly Not Least: Heat
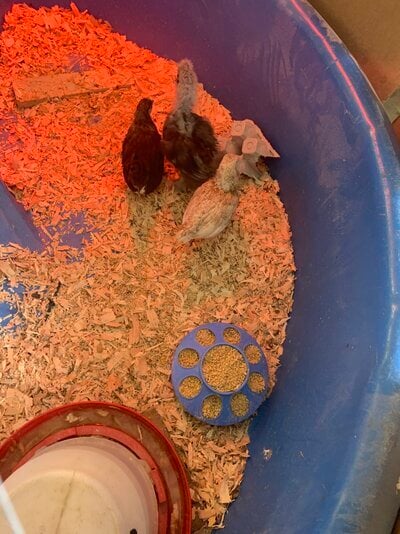
Heat is by far one of the most important parts of your brooder setup. Chicks need heat until they have grown all of their feathers or else they can become chilled. I'll explain the heating options you have for your brooder below.The Heat Lamp:
The heat lamp is the most common setup for heating a chick brooder. Easy to source at feed stores, affordable, and effective heat lamps seem like a no-brainer, right? Yes, and no. Heat lamps do a great job of heating the space, but are also very unnatural for your chicks. They emit a vibrant bright light and pose a serious fire hazard if the fixture isn’t secure. Barn fires are most commonly caused by heat lamps that fall into the bedding, or heat lamps that are too close to the bedding, causing it to overheat.Along with that, if you have a small brooder, heat lamps often the entire brooder. When using a small storage container, it's difficult to create a cool side to help keep your chicks from overheating.
If you must use a heat lamp, be sure to use a red light, or black reptile heat light. Using white light is very harsh on your chicks, as the light is bright and protrusive. Also, make sure that your lamp fixture is VERY secure, and there’s no risk that it could fall.
Now, there is a plus to heat lamps. They are very warm, and even though a heating plate (shown below) may be more natural, heating lamps are crucial when you are brooding shipped chicks. Shipped chicks are often chilled when you get them out of the box. Heat lamps are warm enough to help get chicks’ body temps up to 104 degrees quickly.
Heat plates are NOT warm enough to warm get their body temps up fast enough, and can cause death even if your plate works properly.
I still think that plates are a more natural option, so you can start using a heating plate if desired after 5-7 days of using the lamp. By then, the chicks are well established and no longer need the light to help them find their way. It can annoy chicks at this age to have a light on since it is no longer necessary.
The Heating Plate:
The heating plate is another more common heating option for chicks. They’re also much safer, and much more natural for your babies. Heat plates may not be as affordable, or as easy to source, but they are very worth it.Heat plates are made to simulate a mother hen and the way they would keep the chicks warm. By sitting on top of them and tucking them under her feathers. They’re a very effective and reliable way to keep your chicks warm. There’s a much lower risk of fire hazards and doesn’t emit a bright and obnoxious light.
Your chicks can dart underneath if they are cold, and run out if they are hot. No need to worry about the warm and cool side of the brooder. Overall, well worth the cost. It’s worth not having to stress about a lamp overheating the shavings. I highly recommend looking into a heating plate, this is a favorite of mine and a very reliable brand.
The Heating Pad:
Heating pads can be a great heating source for your brooder. They’re reliable in reducing the risk of fire hazard that comes with heat lamps. While you should always monitor a heat source surrounded by shavings, pads shouldn’t get hot enough to set a fire.Heating pads can simulate a mother hen and don’t emit the bright light a lamp does. Like the heating plate above, they are much more natural for your chicks, and a great alternative to a heat lamp.
Heating pads can also be turned into a heating “cave” that works the same as a brooder plate. This article explains how a member in the past created a cave using a heating pad.
Outdoor Brooding Without a Heat Source:
This article has a fantastic idea for brooding outdoors without a heat source. This keeps you from having to worry about fire, or running electricity, to an outdoor brooder. The setup is simple and only requires a few items.Along with no electricity, there are many benefits of brooding outdoors. Foremost, it keeps the chicks out of your house. If you're doing more than a small batch of chicks, the smell is going to be a problem unless your brooder is very large.
Outdoor chicks also feather faster. It allows them to get used to the other chickens, their future coop, and the environment, making them much more confident in their future home. This also makes the introduction to adult birds much easier. This article shows how to, and reasons to, brood your chicks outdoors.
Caring for your chicks
Now that you’ve read up on how to set up the perfect chick brooder, it’s time to add some chicks! Caring for your chicks can be terrifying. How is a person supposed to simulate mother hen? After all, she is built for this, feathers, attitude, broody poops, and all. Let me reassure you, you’ve got this!When caring for chicks, as long as their food and water are full and clean, their bedding is clean, and their heat source works correctly at the right temperature, your chicks are going to be just fine.
When I’m caring for them, I think to set up a type of schedule. I go out every morning before breakfast and check on them. Fill up feed and water and make sure it’s clean. If you're using the cookie sheet method, pull out the sheet and clean it off before putting it back in the brooder. Cleaning it daily will keep the sheet clean and prevent droppings from building up. Gotta keep those toes clean!
If you're using an alternative heat source, checking the heat source for the first few days with a calibrated thermometer can be helpful to make sure it’s working correctly, and your chicks aren’t too hot or too cold. To check a heating plate, place your hand on the plate and hold it. It shouldn’t be hot enough to burn your hand but should feel warm to the touch. You should always calibrate your heat source beforehand as well. This will allow you to make adjustments to the height, of the heat source, or replace it if it isn’t working correctly.
Note: Heating plates should be placed at a slant. This means that two legs should be taller than the others, so there’s a warmer and cooler part of the heat source. Adjust as needed.
While doing this, check the bedding and make sure it’s clean. That doesn’t mean spotless, but it’s not spoiled, wet, or overly messy. If you using the modified deep litter method, you can toss some chick-safe treats on the bedding. For chicks younger than 1-2 weeks, simply tossing some feed on the bedding will get them excited.
If they’re older and you have chick grit available, tossing grass, spinach, or other leafy greens, a few mealworms, or similar, all make great treats. These will all entice your babies into scratching up the bedding. If you don’t have any treats on hand or are concerned about giving your chicks treats at a young age, adding fall leaves, hay, straw, or another new substrate in a pile will encourage scratching. You can also turn the bedding by hand, the point of this is to get the droppings to fall into the bedding to “compost”, instead of building up on top.
It’s also important to check all of your chicks. Are they all active? Are their crops full? Is their behavior normal? I won’t go to into depth here, but a healthy chick will be eating, drinking, and hanging in and outside the heat source. You can scroll through BYC threads to get examples of ill babies, but usually, all of your babies should be just fine. Don’t get too nervous or crazy here. Remember to enjoy keeping your chicks and don’t worry too much about problems unless you see any. You just want to include this in your routine so you can notice anything in encase it’s something concerning.
Look out for pasty butt. This is a common occurrence in chicks and young fowl. It can be caused by stress or being too hot, or too cold. Most often by stress. It can be the stress of a new environment, shipping, or if noticed after coming home, the old environment could be an issue. If you notice any pasty butt, you can read about treatment here.
After checking your chicks quickly for any new behavior or illness, spend some time with them! If friendly lap chickens are important to you, then simply start by sitting outside the brooder. Talk to your chicks so they know your voice. Offer small amounts of treats. This can bring interest to you. A soupy mash is a great treat for chicks. I didn’t mention it above because it’s not good for encouraging scratching, but if you want to get to their hearts through their stomachs, wet chick feed is the perfect treat! Safe and easy to digest. Your babies will go nuts!
Eventually, work up to holding and petting your chicks. Feed them out of your hand and get them excited about seeing you. You’ll have friendly fowl in no time if you put the time in when they’re young.
Whether you're a first-time mother hen or you’ve done it in the past, it's scary to raise chicks. They’re fragile, and sometimes it feels like it’s impossible to do it right. With time and dedication, you can do it just as well as a mother hen! It takes energy, work, resources, a budget, and maybe a little chicken craziness, but brooding chicks will only get easier each time you do it. I hope this article was helpful to you! Good luck with your babies!


")