Quote:
Thanks 1AcreRooster.
I did make some modifications to it by putting in some galvanized flashing to divert airflow off the eggs (they were drying out too much during my first hatch) and put a GQF thermostat in the heat chamber. I also use dual light bulbs and haven't had an issue with them going out yet. (knock on wood) I like the fact that I have two lids. One to the egg chamber and one to the heat chamber. If a bulb did burn out, I can quickly put a new bulb in without loosing much heat.
After this hatch, however, I think I'll move the GQF thermostat a little closer to the bulbs. I think this will make it less sensitive to minute adjustments. At the present, I have to tap it just a fraction of a hair to move it 2 to 4 tenths of a degree up or down. Maybe I should just leave it and count myself lucky I can move the temperature in tenths of a degree.
The lowest it has been is 89.4 (DD and AC episode) and the highest has been 100.0 degrees.
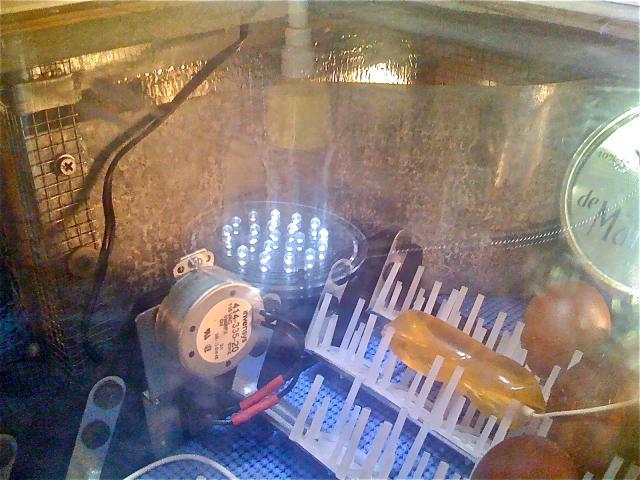
Here's a couple of updated pics. The top one shows how I diverted the airflow around the eggs and turner.
This one shows how I closed the air vent up so newly hatched chicks wouldn't get caught in the wind tunnel. I use screws, washers and half-inch PVC pipe splicer fittings.
Quote:
Thanks for the compliments Jen. This is my second hatch and I'm please to say it is going so much more smoothly. No weird spikes, or power outages. The only thing I really have to worry about is the DD turning down the AC.
She did it a couple of times and the outside temp dipped to 72 degrees. I couldn't figure why my temps inside my incubator were dropping until I saw the thermometer I placed next to the outside intake vents.
These seemed pretty easy to make. I had a lot of fun doing it, but I like to build things. It could use some stain or paint but I was in a hurry to get some eggs in there to hatch. LOL