I keeping thinking..... 5 pound bag, 10 pounds of stuff.
Same.
How about investing some of the money and effort you're putting into the big run into adding on to the coop? For 11 chickens you want 44 square feet inside with 11 feet of roost and 11 square feet of permanent, 24/7/365 ventilation, which is best located above their heads when they're on the roost.
6x8 -- essentially doubling the width -- would give 48 square feet.
Alternately, you don't have to keep all the chickens that the hatchery sent. I intentionally ordered more than I wanted to keep and will sell the extras as POL pullets once I decide which ones I like best.

 The 14" is the room between the roosts.)
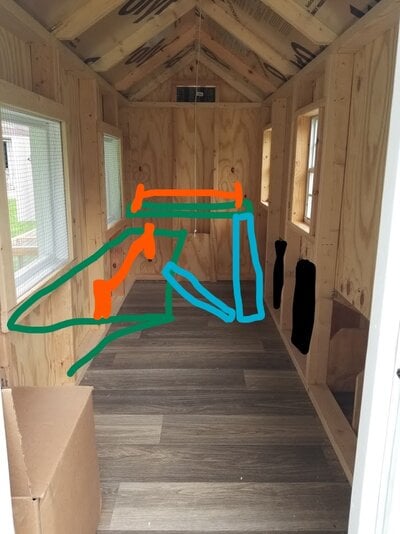
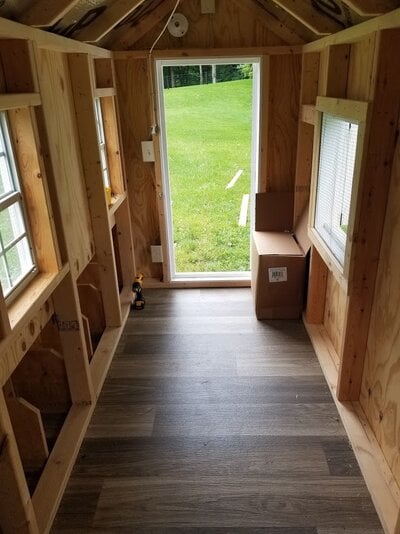
 We've just disassembled them and now this is what we have to work with! (pix below)
 We considered doing horizontal stair-step bars across the whole width of the coop, but wanting the droppings boards made that not possible with the space we have. If I wasn't dead-set on the boards, I think that setup could work excellently in our coop with a few minor tweaks. I assume your coop is not a walk-in type then? I peeked at your profile and found one partial pix of a light green coop and wasn't sure if it was a walk-in or not.
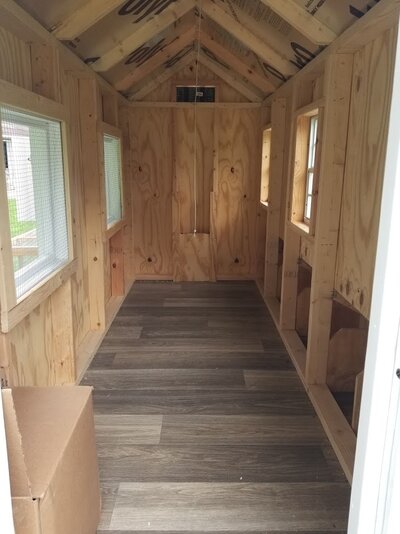

 Thanks for your ramp "recipe"...I was curious if there was a standard people generally used.
 But construction is NOT our forte, which is why we bought this one pre-made. We have a lot of skills--that is just not one of them! Plus, the chicks will be ready in about a week to go out, so we're kind of short on time. They are already spending 6+ hours a day in the run and here in Indiana our nighttime temps haven't been getting below 60.
 If it were only roosts, that might work; but with added poop boards that most say need to be 24" wide with a roost centered over it, the most we could do would be an L-shape (I'd do the left side and then back).