
The overall size is 3’ wide by 18’ long by 6’ tall. The coop itself is 3’x 6’x 4’ and raised 19” off the ground. Made to house 3-6 chickens.

My coop building adventure begins here in the Pacific Northwest, a few miles west of Portland, Oregon. Many years ago I owned horses and rented a cabin in the country, but after I got married and we bought a house in the suburbs, everything changed. One of these days we’ll get that farm we’ve always been dreaming of… but for now, I get my "country" fix from some garden beds and my quirky chickens.

So I’ve only had chickens for a few years now. I started with 3 fluffy chicks and this cute little prefab coop, which was beautiful when it was new. But it was so tiny the poor gals had to spend all day free ranging, right?

Well, free ranging chickens (aka garden destroyers) in the backyard only lasted about a year before they were found guilty on way too many counts of murder (my precious plants) and sentenced to the side of the house. I built this gate with the bars so I could still see them from the backyard, but it looks an awful lot like jail.

After its second year, that little coop was just a leaking rickety mess in desperate need of replacement.
Now my new coop had to fit in that same long narrow space on the side of the house because, but no matter how big I made it, I still didn’t want to keep the chickens “cooped up” all the time –even in a decent-sized run. I like to let them out all day and the side yard provides more space beyond the run, and also protects my flowers when I’m not looking.
The run enclosure is fully secure and the pop holes are always open. Since they have free access to leave the coop and hang out in the run, I won’t feel guilty if I don’t let them "out" at the crack of dawn, or if we leave town for a while.
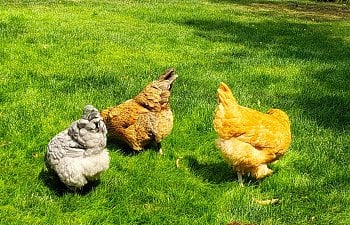
The side of the house is where they spend most of their time, but don’t worry, my ladies still get plenty of time on the grass every day… it’s just supervised time.
I love having chickens and I especially love their eggs!

This last winter was the first time the hens stopped laying and boy, did I miss those eggs! I did some homesteading research (and some soul-searching) and realized that I wanted to try some sort of regular flock rotation every year or so, to keep the eggs coming through winter (I’m not into the supplemental lighting thing). This rotation would involve occasionally rehoming or “processing” my oldest birds, and in the meantime, there would be periodic integrating of new arrivals. My new coop had to facilitate that situation.
So that’s why I made two runs and included a brooder space. Now I can easily raise chicks outside and they can have their own safe place to grow while the older hens can “look but don’t touch,” which leads to seamless integration. After the chicks are grown, these spaces just become part of the community but could also be used to separate an injured bird or confine a bully... though would not be effective as a quarantine area.
My newest little ones started off in the coop brooder using the Mama Heating Pad method. No heat lamp! If you’re not familiar, there’s lots of alternative heat source information here on BYC… you can start here or here. I did have to run an extension cord for the heating pad, but it was only for a few weeks.


After about a week, their own pop door was opened to give them access to their half of the outside run, then a week after that, the wire barrier was changed. The big girls can’t fit through those 3½" spaces, but the chicks could easily return to safety if they felt threatened.
Then the babies decided on their own when they were finished with the brooder and started happily mingling and roosting with the big girls by 5-6 weeks old!
THE PLAN
I’m fortunate to live in an area where hurricanes and tornados are not a concern. My house and the fence offer enough shield from strong winds so I didn’t find it necessary to anchor the coop to the ground with cement. Because of my space limitations I couldn’t go big or wide… I had to design it long and narrow.
This build is about as straight-forward as you can get, I think. I knew it had to be simple as possible… as I did not want to cut notches or angles, or have to drill pocket holes or do any “fancy carpentry” because I don’t have that many tools and I wasn’t very confident in my novice building skills.
I had some scraps lying around, but most everything I needed would have to be purchased new and I was gonna have to be thrifty.
DESIGN REQUIREMENTS
- Modular – non-permanent, simple to take apart and relocate if necessary
- Brooder/Isolation Pen – for raising chicks and easy separation
- Size – had to fit within a fenced 7’x42’ side yard, not block the AC unit, and have enough room around it to roll a wheelbarrow past.
OTHER CONSIDERATIONS
- Easy to Maintain – painted & washable walls with large doors to offer full accessibility inside.
- Lightweight - I certainly didn’t want to frame it with heavy 2x4s –that’s what they build people houses with –we’re talking chicken house here, folks! I only wanted to use mostly 2x2s… half the weight!
- No Permit - I didn’t want to get a building permit so I kept it under 6 feet tall as it wouldn’t be seen from the road.


I originally printed all these pages blank and wrote additional notes & adjustments as my building progressed.
HOW MUCH LUMBER TO BUY?
Using the plans as a guide, I made a list to keep a tally of all the lengths of boards I would need and labeled those pieces A, B, C etc.
Next, I outlined 6’ and 8’ boards on graph paper, arranged & labeled the corresponding pieces and marked where I would make the cuts. I figured I would get 12’ and 16’ lengths and have them cut in half for easier transport home. Excuse my “chicken scratch” here… I don’t understand it much either anymore. I was just trying to arrange the cuts so I would have the least amount of waste from each board.
Then I added it all up and bought the lumber and additional supplies from various places. I found a discount lumberyard on Craigslist, where the 2x2 boards were somewhat random lengths, but nearly half the cost of big box stores, and in better shape.
Now armed with my painstakingly planned plans and all of my supplies purchased and ready to go, the hard part was already behind me. Right?
And so I thought “With all this planning, surely I will not be one of those people who has unexpected issues or has to make 50 extra supply runs.”
Well… with all my mistakes, interruptions and improvising, this build (working mostly by myself in my spare time) took 2 months longer than my anticipated one month. It also took about 50 more supply runs. I've included a list of materials at the end of this article.
CONSTRUCTION BEGINS
I started with the “foundation.” This ugly strand board was left over from another project so I used it for the floor. Building upside down, I framed the floor with 2x4s on the outside because for whatever reason I wanted the floor to sit flush with and inside the floor frame. I also used some old 4x4s from a disassembled fence for the coop legs.

I sealed the floor with white primer and sealed the cut ends of 4x4 with weather proofer. Probably not the best option, but it’s what I already had in the garage, and better than leaving bare wood. The primer was old, like lumpy pudding. I couldn’t just throw it away, so I kept adding water and mixing and mixing until it smoothed out. Good as new.

I had to use 2x3 floor supports so they wouldn’t show behind the 2x4 frame (that sunken ½ inch floor would make 2x4 supports visible by a ½ inch)

Still upside down, I clamped the base 2x6s to the legs to keep steady while attaching the screws.

And added hardware cloth to the back side since it would be difficult to reach this area later on.

Then flipped right side up and screwed the floor to the supports.
Vinyl comes in 12’ widths so I only needed a 3’ length to cover my coop floor and poop board. Found some in the clearance bin at Home Depot for $40, which was still more expensive than the cheapest new on the roll. But luckily the sales guy either wasn’t keen on cutting new stuff or really wanted to get rid of this remnant, so he marked it down even more. Woot!

Stapled the outside edges to the floor. Those staples will be covered up when the walls are added.

THE WALLS
Labeled then cut the 2x2s for all the wall and run frames according to my handy dandy graph paper chart.

Grouped each wall section together all throughout my yard… ready to assemble


I predrilled every single hole before I added screws. And I mean EVERY SINGLE HOLE throughout the whole building process. I did not want my skinny 2x2s splitting.

After assembling the first wall and making sure it’s perfectly square by measuring the diagonals, I placed the next wall frame on top so I could just copy it. Even though the front and back walls were different heights, they were still close enough.


As much as I wanted to avoid it, I found it was necessary to make an angled cut for the roof line because, just attaching a square board at an angle to the vertical sides was too awkward. So I traced the angle and took the board to the chop saw and set the miter blade to match, which was 9°. Easy Peasy! I don’t know what I was so afraid of. Now all I wanted to do was cut angles. Of course, I could have found that angle by calculating the rise and run between those exact points, but who wants to do math?


While I was building the frames, even though the wood appeared to be in great shape, I noticed there were lots of rough edges and splinters. And after spending quite a long time with a sanding block until my elbows ached, DH handed over his electric sander. So I gave it a doubtful try. Then the heavens opened and sent down a choir of beautiful angels to sing lovely praise and surround me in melodic hallelujah. My neighbors probably just heard an incessant buzzing, but everything from then on became smooth as silk.
Well, the lumberyard guys suckered me into buying this fakish-type of fancy textured siding that came in 48”x50” pieces instead of regular ½ inch plywood. This stuff was really soft and the corners frayed easily. I believe it’s paper-faced OSB T1-11 and I would not recommend it, but after much turmoil it finally worked out okay in the end.

After the first coat of paint/primer on a couple sheets, and seeing how it soaked in and practically disappeared, I decided to make all the cuts first so as not to waste paint on discarded pieces. Then labeled where each piece went and crossed out the leftovers.
Made interior cuts for the doors with a jigsaw. I laid that board you see across the top to keep the cut pieces from wildly breaking free as the blade reaches the end of the cut. This front door section was clamped to some other boards for support and then repositioned about halfway through cutting to avoid damaging the sawhorses.
Then attached them to the frames. Umm… which is when I discovered the next problem with that fake plywood… IT WASN’T SQUARE! Uggh! I wondered why the panels weren’t lining up to my wall frames. Now I had to use the jigsaw again to square off the edges so they’d fit right. So frustrating!

Looking back, I should have cut the egg door opening slightly bigger than the frame opening. Daylight and drafts could pass through the cracks there so I had to add extra framing inside to seal it better.
I painted everything before assembly because I wanted each and every wall section to be its own separate unit. If I painted it all afterward, the walls would essentially get “glued” together. And the space where the coop was going was too cramped next to the fence, and impossible to reach the back. Painting that plywood stuff needed at least 3 coats or more to seal it well… and that took F.O.R.E.V.E.R! I ended up having to buy a second gallon. Here’s the back wall… this side won’t ever be seen after the coop gets assembled.

Gotta paint the run frames too. Thank you hubby!

It took SO MANY days to paint, and I didn’t want to keep cleaning my brushes and rollers… so I bagged everything (paint trays and all) and stored in the fridge to keep it fresh for my next use. That way I could just whip out a painting session in my spare time without any prep or cleanup… until I was finally finished.

HARDWARE CLOTH (HWC)
Cutting hardware cloth is my least favorite thing. Ever.
I wore gloves and clipped off the pokey ends over a small bin.

I found that rolling it out with the inside facing up somehow seems to make it fit closer to the frame. Clamps are a big help! I cannot imagine trying to do this on an already built upright structure with this sharp material whipping all around.
Cutting on the diagonal was a bit tricky. I found that I had to cut the HWC straight across at the tallest point, clamp to the frame, then mark where to cut with a Sharpie… then undo it and roll the end piece away as I cut the “diagonal.”

I debated over how to secure the HWC to the walls… each method has its merits. After reading this thread and doing some other research, I decided to go with staples because I just felt it was more practical in my case and looked a lot tidier.

Spacing the staples close together (inch and a half apart) in conjunction with the hardware cloth actually improves the integrity of my puny 2x2 frames.
Stapling diagonal over the X keeps it from slipping. Wobbles eliminated!

Let me warn you… make darn sure that HWC is positioned correctly before stapling! Because removing a row of those giant deep-seated staples is a nightmare. Yeah, I don’t see how any critter could push through there without pliers and a big set of muscles.
ASSEMBLING THE COOP
Finally, it was time to get this thing to the location where it belonged! I moved the little old coop out of the way and blocked off entry to my new work site… so the chickens would be safe from my “highly organized” building tactics. Leveled the ground and set the 2x6 base frames.
I’ve found that 2x6s are a good foundation to hold in the bedding and raise the run frames so they won’t directly touch the ground. This is the only section I used washers for the HWC at the bottom on both sides… so it could be undone later.


Attached a hardware cloth apron around the outside perimeter to deter digging predators. I overlapped the existing PVC poultry netting (more about that later) and used garden pins to secure it to the ground.

The HWC wouldn’t fit well between the fence, so I lined the back with bricks.

The walls went up super quick. But I have to say… they didn’t exactly turn out to be lightweight.
I had to have help moving and lifting them up to the floor, especially the large extremely heavy back wall.


You can see how the frames just sit right on the floor, with the lower siding covering the floor frame. They fit together… like a glove! My plans actually worked!


Walls were attached to the floor using 2½" screws. Then caulk was added to the seam along the floor to keep moisture or shavings from getting caught in between.
All 4 walls are connected to each other with (6) 3” lag bolts on the left and right sides only. Easy to assemble, easy to take apart. These “flat” bolts will get covered up when the run is attached.
Before attaching the runs, I had to mark where the screws would not collide into the lag bolts because I'm very talented at running into something I'm trying to avoid. I used 3" screws here to account for the extra ½" of siding.
Run down… run to go! (couldn't resist)
THE ROOF – PART 1
So… I thought I could avoid pocket holes by offsetting the purlins… but it turns out I had to use the dreaded mini pocket jig to make the front row look continuous. (This was after a sad attempt at trying to drill diagonal screws for the back run framework) The jig worked well and it seems my carpentry skills are getting fancier!

Then I dry fit the first roof frame. Good thing I did because although the roof frame itself was perfectly square, the coop footprint was not. I never checked the "squareness" of that blasted piece of floor plywood that the whole coop was built around! Unbelievable! Another setback to disassemble and reassemble the roof section slightly skewed to fit the overhead shape of the coop.

Hardware cloth sandwiched between the siding will act as ventilation and additional protection in case the coop ever stands alone someday.

“Correctly” skewed roof frames in place awaiting the polycarbonate panels.

Ta Da!


Except...
At this stage I discovered a major problem during a rainstorm.
The roof panels leaked and my original improvised gutter didn’t work right, flooding water to the inside of the coop. No bueno!
I also realized that this layout –with the run door next to the coop instead of at the far end- left a dead space inside there at the end -where young pullets could get cornered. Normally that probably wouldn’t matter at all with a bigger area, but that space was only 3 feet wide and my concern was urgent, although possibly irrational.
And since most of the roof had to come off anyway, the beauty of a modular design is that it wasn’t too difficult to just turn that wall up side down so the door was on the other end!
After that, I finally felt this thing was really coming together and nearly finished so I did what any normal person would do... I got some new chicks! They stayed in a big Rubbermaid bin for almost two weeks until the coop brooder was ready.

SOLVING THE GUTTER DILEMMA
With all the rain here in the PNW, a gutter is a necessity, otherwise rainwater will cascade behind the coop, flooding the ground and pooling a muddy mess into the run… where it’s supposed to stay dry. This happened with my old coop that had a tiny roof and I didn’t want it happening again.
Because of the narrow area between my house and the fence, the coop had to fit close to (as in almost touching) the fence, so there would be enough space at the FRONT to fully open the doors.
Since the back of the coop was inaccessible now, attaching a real gutter was problematic… actually impossible. I needed something that could be attached to the topside of the roof and also had the same U shape function as a gutter.
My first failed attempt utilized some upside down L-flashing to create a V shaped gutter. The only reason this didn’t work in my case was because the pitch wasn’t steep enough to actually drain the water away (it was only sloped 9° remember?) which just overflowed and seeped back under the roof and into the coop.
So… I needed something to drop down lower… J-Channel flashing looked like it could work. However, to be able to attach it to the top of the roof, I had to modify the original shape: I clamped the flashing to a board to use as leverage as I pressed and bent it lengthwise. It would have been a good idea to wear gloves for this part. Even though I was careful, I still managed to cut myself twice.
Fastened it to the back edge of the roof with as few as possible roofing nails (keeping in mind this will have to come apart someday). Then connected the seam with silicone caulk and Gorilla tape. It’s ugly, but no one will see it.
I fashioned a gutter guard out of some leftover PVC poultry netting that squishes firmly between the fence and roof panels. I placed a bucket at each end to catch the rainwater for now, but I want to improve this setup by making a real rainwater collection system.

THE ROOF – PART 2
This time I used closure strips under the polycarbonate roof panels and fastened the back row overlapping the J-channel “gutter”.
My old tiny coop was way too dark inside and I wanted it light and bright for the new coop, so I chose Suntuf corrugated polycarbonate panels in Solar Gray. They block 99% of UV rays and should also offer some shade.
Since I used two screws to secure the purlins to the rafters, it made it difficult to add a perpendicular screw in the same location to attach the roof panel. I ruined a few fasteners this way and couldn’t get them past the opposing screws (my special talent). So I started again only this time I offset the fasteners at those intersection points. Time will tell if that was a bad idea.

I also added some silicone sealant around all the washers to prevent possible leaking since the slope was so shallow.

Remember how the darn overhead coop footprint wasn’t square and I had to alter the roof frames to fit? Well, this happened:

Oh well, just adds character, right?
Chicks were growing fast and I was anxious to get everyone moved in together, so the second run and some final touches had to wait for a while.
The rest of the article is out of order, but I just couldn’t document everything here as it happened.
THE DOORS
To start back towards the beginning, I primed the run doors, trim and egg door white so the spray paint would be brighter with less coats. I used Rustoleum Key Lime.


Added corner braces to the inside of the run door frames. Whenever handling any of the painted panels, I always placed them on the grass or flat cardboard so they wouldn’t get scratched on the pavement. I also discovered that clamps can peel the paint as well… so from then on I always put a piece of wax paper between the clamp and the painted surface.

I attached hinges to the door first, then I shimmed the door within the frame as I installed it. Some HWC had to be cut away a bit to allow the hinges to lay flat.

To mount the coop doors, I had to get creative. There was nobody to help hold them in place while I attached the hinges and I could not get them to hold still where I wanted. So I rigged this bucket with a wide board on top of a skinny board to act as a lever. Then I set the door on top and pressed my foot on the “lever” to adjust the height to the correct position, marked the holes quickly, predrilled the marks… then repositioned the door to screw in the hinges.
Go ahead and laugh… but it totally worked.
Deciding on the right type of closure for the double doors was a bit challenging. Even with a slender overlapping flange and a slide bolt, they didn’t close as tight as I would have liked.

So I added 16mm countersunk rare earth cup magnets to the inside frame that attach to strike plates behind the left flanged door for a really strong hold. The magnets pull the doors so snugly against the coop I may have to add some handles to get a better grip for pulling them open now.

I had to purchase a special ½" Forstner bit to get the perfect hole because a regular hole saw wouldn’t work at all and a spade bit drilled away the center part where the magnet’s screw had to go.

The run doors are secured this way as well. The magnets are set inside both the upper and lower doorstops, and the metal corner braces serve as the strike plates.

I love having my doors swing all the way open and lay flat so they’re not in the way when I walk past.
A regular door handle wouldn’t have worked here, as it would not allow the open door to lay flat and would also dent the HWC when pressed against it. But I found that these gate stops work perfect when mounted flush on the inside edge of the door.
It was a lot of extra work to make the lower doors that swing open from the front, but I didn’t want my only access underneath the coop to be from the sides.
These doors (and the egg door) are latched with spring-bolts that stay in position until you forcefully push them back.

I filled this section underneath the coop with sand for a dust bathing area, but it’s actually the chickens’ favorite spot to just hang out and poop. I use a children’s rake to reach the back, then sift out poop as needed, but it’s not super fun crouching down that low.
INTERIOR & OTHER FEATURES
One of my favorite “easy maintenance” features is the poop tray. It’s made from a scrap piece of ¼" plywood and some vinyl, then framed with a 2x2 ledge. The tray can be removed, along with the supports that just rest inside metal fence brackets. I keep it filled with Sweet PDZ for easy scooping and that keeps the coop smelling much fresher than plain sand (which I used in my old coop). And it's fine for the compost.


I’ve tried a few different configurations for the roosts. At first I had them mounted on shelf brackets, but I didn't like that they weren't removable. The next version was a little better, but the top one was too close to the wall and droppings mostly landed on the edge of the tray between the wall. So now I’m trying out this single unit made from 2x3s with a lath base. Both bars are the same height to eliminate competition for the top.

My vertical nest boxes were designed to conserve floor space and they’re built as a free-standing unit to fit between the studs… though I did secure them to the walls with two screws.

I originally intended to use dish pans for the nest liners but it seems more roomy without them, so the insides just have a piece of removable vinyl flooring for easy cleaning. I've been using these thick nest pads for a couple years and the chickens seem to love shaping them just the way they want... and they're not as messy as shavings or straw. The pads are one piece so I just shake them out every so often to keep clean, and if an egg breaks or they become soiled, I can just hose off that part and let dry. When they're worn out after several months, they go in the compost.
The upper section is accessible from the egg door and makes a great little storage area.
The tall windows in the front allow me to see both levels inside the coop without opening the doors.

The bare HWC adds some extra ventilation and air flow in warmer months. When it gets colder, the windows can be closed by slipping in a sheet of clear acrylic behind adjustable storm clips.


The ramps are made with leftover lumber pieces and attached like the Wichita Cabin Coop.

I like to keep 2 water stations available and there is always free choice oyster shell and grit. I’ve been using this type of PVC gravity feeder for a couple years and they work awesome.
I learned from another blog post somewhere that adding an extra coupling to the feeder wye makes a longer reach and prevents feed from scattering out. The bottom is just an upside down plastic drinking cup. They’re attached to the HWC with bungi cords so I have some flexibility to fit my wide funnel when filling the tubes.


So far I’ve only put up one perch in the run but will be adding more soon. The girls love to sit here and preen themselves every morning.
THE GROUND
Just going back to when I mentioned the PVC poultry netting earlier. This was actually the first thing I did to prepare the ground before I built the new coop. Mud in the side yard “alley” had previously been a problem when it rained. I happened to find this great mud management solution from Newland Poultry in the UK and stole the idea! I covered the ground with PVC netting before covering it with wood chips.
Lucky me! It just so happened that we had this big ugly maple tree in our front yard that needed to be removed. So I asked the tree-cutter guys if I could keep the contents of the wood chipper in addition to my fire logs. Yay! Free stuff! (Except cutting down the tree wasn’t free)

As you probably already know, chickens will scratch bedding down to the dirt… or deeper, which is fine in a dry environment like a coop or covered run. But rain on top of wood chips on top of bare ground would get stirred up into a muddy wood chip stew, which would eventually just sink down and disappear, leaving another muddy mess.
The poultry net barrier keeps the bedding separate from the mud, no matter how much they scratch. Chips on top, dirt underneath… no mixing! I prefer the plastic version over wire because it won’t rust or hurt my chickens’ feet, a possible cause for bumblefoot.

OK so, the PVC netting is a bit expensive, skip it if you want, but whatever you do –don’t use landscape fabric as a cheap alternative –unless you want fluffy chunks of it sticking up all over the place, leaving patches of bare ground (aka mud) in all the spots where they scratched it up (aka everywhere). Don’t ask me how I know this.
The ground inside the run is just bare dirt with pine shavings so my girls can enjoy some true digging if they feel like it. I'll keep adding fresh litter throughout the year until it’s time to change it out in the spring. The old litter will sit in the compost until the following spring when it gets added to my garden beds as beautiful rich soil.
THE END
Tools Used
chop saw (all framing lumber)
circular saw (siding/roofing cuts)
jigsaw (interior siding and minor cuts)
tin snips (cutting hwc & flashing)
heavy duty stapler (attaching hwc)
power drill/screwdriver (wouldn't attempt building without these)
electric sander (way better than a sanding block)
level (self-explanatory)
clamps (invaluable)
knee pads (life-saving)
Supply List
lots of 2x2s (520 linear feet) $100
(4) 2x3x8 (floor supports/roosts) $10
(3) 2x4x8 (minimal framing) $15
(3) 2x6x12 (base) $45
(2) 6’ 4x4 (coop legs) repurposed
(1) strand plywood sheet (coop floor) repurposed
(6) 48”x50” siding sheets $9.50 ea.
Vinyl Flooring $10 (clearance)
(3) gallons Exterior semi gloss paint/primer $25 ea.
(3) cans spray paint (trim/doors) $5 ea.
(2) rolls PVC poultry netting (for ground) $24 ea.
3’x50’ + 3'x10' hardware cloth $55 + $12
(5) 8’ Suntuf roof panels (cut in half) $22 ea.
6 pks closure strips $5.50 ea.
(2) pks roof fasteners $10
(2) 10’ steel J-channel flashing (gutter) $11 ea.
Plexi glass $10 (discounted for chipped corner)
Humidity thermometer $10
Earth cup magnets (latches) $20
Bucket of 2½” exterior screws $30
Hinges, latches, corner braces & misc. hardware $100 (high estimate)
Other supplies on hand
wood putty
wood glue
silicone caulk
Total cost was roughly $800
I had hoped to only spend $500-600 but what I ended up with is so much better than what I could have purchased already made, and it completely fits my needs. I’m super pleased with how my coop turned out! I just love the colors and I feel so much better knowing my chickens have a more suitable and safe home.
Although many design decisions were made based on my current space limitations, if I could go back and change anything:
- I would definitely change the roof. I wish I would have built each entire section as a complete unit (like the walls) and attached them from underneath. But there were some complications in the details I couldn’t figure out and I just wanted it done.
- I also would have made a deeper poop tray because the chickens seem to scatter the PDZ over the shallow edge.
- Oh, AND… if I wasn’t so worried about keeping it under 6 ft. tall, I’d have made it at least a foot higher underneath the coop for easier access.
Some things to know about building your own coop:
- You can use materials you already have.
- Don’t be afraid to ask for a discount, sometimes you’ll get it.
- Always ALWAYS check for square!
- You will probably need more screws than you imagine… just go for the large bucket.
- Don’t overlook the value of plain old cheap lath: it can be used for so many different applications: coop trim, picket fence chick divider, shims, a door flange, small door backstop, ramp footing, covering seams, etc.
- You don't have to be an experienced builder or have a bunch of people to help you. You really can do it yourself!


Building this coop took quite a lot of trial and error… more error than I would have liked. But hopefully I could at least offer some ideas and helpful tips. Best of luck in your own coop building adventure!


 and amazingly well done, detailed article!
  Thank you SO much for sharing!!