I grew up in the city of Chicago - truly in the city, not the suburbs and claiming I was from Chicago (that's a bit of a Chicagoan thing). Chicago's laws are very lenient on livestock and poultry - there's not much in Chicago's municipal code regarding livestock and poultry. However, having chickens in the city was frowned upon by family and friends growing up. I purchased my first home in Humboldt Park, a neighborhood known for it's Latino culture, especially Puerto Rican - I was the only white guy on the block and knew nothing of the surrounding culture except for a little bit about the food. I would later find that raising chickens is quite common for my neighbors. A number of my neighbors in the neighborhood kept chickens. The crow of a rooster when walking our dogs became a common thing.
I was put off the first time I heard and saw a chicken in Humboldt Park. However, over the two years that we lived there I became intrigued. When we decided to grow our family, I sold the property in the city and moved out to the suburbs to have a single family home with a large yard, get closer to family who had moved out of the city already, and a better school district for my child's future. That large yard led to a rather large garden, which I dived off the deep end into. As we began gardening I saw the extra space along the back fence as needing some occupancy - I couldn't put a structure within 5 feet of the property line by local ordinance so it was just dirt that used to be an unmanaged flower bed. That interest in chickens followed me from Humboldt Park, and only grew due to the rural charm of our suburban town. Before long I was researching where to get chickens and how to care for them. Also, my in-laws retired to Tennessee during all this time and my mother-in-law had begun to keep chickens. I asked her a bunch of questions. Against her advice, I purchased day-old chicks - my mother-in-law refuses to raise chicks and would rather purchase pullets. I wasn't looking to get too fancy, so I got 5 chicks from Farm and Fleet during their "Chick Days" event. I talked to their "chicken lady" on the phone, and she recommended a few breeds based on what I wanted in a flock - the only chicken I knew I wanted was Light Brahmas. I ended up with two Light Brahmas, a Golden Laced Wyandotte, a Speckled Sussex, and a Cuckoo Marans. I had built a brooder and successfully brooded all 5 chicks. A few months later I met another local chicken lover here on BYC a few towns over from me, and ended up purchasing 2 Orpington chicks, a Lavender and a Blue Laced, from her. I successfully brooded both of them as well. Before I knew it I had 7 hens (I can only keep 8 hens [no roos] max by local ordinance), and I was collecting eggs and enjoying watching the hens. My son was 1 when we bought those first 5 hens. It's nearly a year later and he's 2 and loves his pet chickens, as well as eating their fresh eggs!


I find a lot of joy in raising our chickens. We love their eggs! Our Speckled Sussex has become our favorite. She not only is a reliable egg layer, but has a huge personality. She was the first to learn to jump over the garden fence. She will walk right up to the patio doors and look into the house. She lets my son pet her. She knows he's a good source for treats. She likes to follow us around the yard and will attempt to follow us right into the house if we were to let her.
Along this incredible journey, I met incredible people here on BYC and learned a lot. I soon became a bit jealous of those who can keep larger flocks and roosters so they can breed their chickens. I didn't want to move any time soon - maybe one day - so I was stuck being limited to 8 chickens. I only had 7 and couldn't bare to see 1 lonely hen try to assimilate into the flock - my original 5 established a pecking order and even keep the 2 younger Orpington hens at the bottom of the pecking order and force them too rely on each other for companionship. So how could I have more birds, stay within the law, and not have to watch 1 hen suffer?
QUAIL!
I found here on BYC that quite a lot of people keep quail in order to raise birds and circumvent laws limiting or preventing them from raising chickens. I also learned that quail are significantly quieter - my hens' egg songs are quite loud and my neighbors don't seem to mind or even enjoy it, but I didn't want to push the limits too far. Quail fit the bill.
How many quail? Where would I house them? Where would I buy them?
I decided I will raise quail on wire. I would build 8 foot long (convenient given standard lumber comes in 8 foot lengths) cages with miniature coops for the quail to get protection from harsh weather. I then decided, due to the inability to find a local source, to order quail eggs. I ordered 50 Jumbo Brown Coturnix eggs, an incubator, and an egg rotator. Now, I realized that the egg rotator could hold 34 chicken eggs and assumed people used the same for quail eggs and I would just have to hatch the best looking 34 eggs and toss the rest. I found out some people do just that, but then there's these things called quail rails for the egg rotator. What!? So I ordered some quail rails online and made sure they would arrive before the eggs.
Now those quail rails hold more eggs... a lot more eggs... 120 eggs! So why limit myself to 50 eggs. Next thing you know I placed an order for another 50 eggs, Texas A&M Whites. I was even able to contact the hatchery and have them ship the eggs together all in one b
While waiting on the eggs I got to work on the first quail cage. My son, 2 years old, enjoyed helping me with this part - or so he thought he was helping. I loved seeing him get involved. He has become the key reason I keep the chickens and started with quail - he learns so much about food sources, animals and work ethic. It's truly amazing how much he picks up on and how hard he tries to help care for the animals he loves so much.


So I had one quail cage built. The incubator, egg rotator and quail rails arrived and I assembled it all and got in running. And then... the shipment of quail eggs was delayed by USPS... just no updates for days in the tracking details... I called USPS and they couldn't tell me anything other than the little information in the tracking details... Ugh! The supplier I ordered from was kind enough to offer to send a replacement shipment since the original eggs would not be viable by the time they arrived. They were really awesome and provided incredible customer service. PM me for their contact information if you need a source for quail hatching eggs.
A few weeks after I placed the order the replacement order shipped and arrived in just two days. Ironically the original order showed up two days later out of the blue - the eggs weren't rotten but were too old to hatch so they got scrambled, cooked well, and then fed to the chickens and our two dogs. The replacement shipment of eggs arrived in perfect condition, each egg tucked into a hole in a foam mat specifically made for holding quail eggs. There were 4 extra for us just in case. Now do the math - I ordered 100 eggs and received 4 extra and there's 103 that went into the incubator. Yea... I put my finger right through one of the eggs when I was rushing to get all of them out of the foam mats. Lesson learned: take one's time during all steps when hatching eggs. The remaining 103 did get put in the incubator and are actually incubating still as I write this article. Here's the eggs one day 1 of incubation.

Now I have 103 eggs... With even 50 hatching and brooding to 8-9 weeks of age, that one quail cage that measure 8'x3' is not going to suffice. Additionally, I already know I want to breed my quail and hatch more. I hope to have 80-100 quail growing, breeding and laying eggs. I also want to be able to fill the freezer with some quail... the gruesome part, I know, I know. It's all about teaching my little guy animal husbandry, work ethic, responsibility and where food comes from... Meat comes from dead animals, and we enjoy meat around here. So where will I house all these quail? I already mention earlier I decided to raise them on wire. The initial idea was 4 of my quail cages organized in two stacks out in the back of the garden next to the chicken coop and run. Then I got to thinking about how much valuable gardening space the chickens and quail are/will be taking up. I would like to have more beds of fruits and vegetables (again show the little guy where food comes from and a bunch of other life lessons along the way). So, I'm going to MOVE THE CHICKENS (already sounds like a nightmare of them not knowing where home is anymore) and build a new coop that is better for them and us humans and the quail... (stepping onto a soap box) yes, and the quail. Please don't criticize my choice to house quail and chickens in the same structure. I did my research, and understand the possibility of disease transmission and yada yada. I've made an educated decision and am moving forward with it with or without your support (stepping off the soap box).
THE NEW COOP
I have decided to convert my shed into a walk-in combo coop with storage for flock supplies and yard/garden tools. Today is Friday and we have some nice weather this weekend, so here's my weekend project:


UPDATES ON THE BUILD:
Now it's been two days since I wrote everything up to this point. I managed to clear out the crammed shed; remove the existing shelves, hooks, tool hangers, and lots of random nails where things once hung. I then built a loft I could walk under above the chicken area and walled in the chicken area. I built a door for us to access the chicken are as well, but haven't found hinges in my bins of tools and parts in the garage just yet so it is not hung yet. I also began construction on the quail cages. I managed to get the floors in for two of the cages. I then had clean up and get things that I left in the yard when clearing the shed as we are expecting rain.
Here's the shed. I had already began moving things out of the shed by the time I took this picture. Prior to starting on this project, I couldn't walk but 2-3 feet into the shed.
Photos of the stuff I removed from the shed:
Here's the loft I put in for storage space.
Here the wall to enclose the chicken area is framed out and the solid wall between the quail cages and chicken area is completed.
The chicken wire is completed here. I also had to move a lot of tools back into the shed here as that expecting rain is coming. The left side will remain tool storage for my yard tools and some larger power tools like my table saw, miter saw and compressor.
You can see two of the quail cage floors laid in place. Sorry for all the clutter - avoiding the rain became a rushed effort.
MORE UPDATES ON THE BUILD:
Let there be light! I had installed a fluorescent light fixture but it acts up due to the cold weather. I also do not trust the bulbs too much - if one was to fall it would explode and send glass and toxic dust everywhere in the coop. Also the one fluorescent fixture led to a number of dark areas, especially in the chicken section of the shed. So I decided to install 4 light bulb sockets and 60W equivalent LED bulbs - I may swap them out later for incandescent bulbs to take some of the chill out of the shed. There's 2 bulbs now in the chicken section on the right and left side and 2 bulbs in the rafters to light up the main section and quail area. I also have completed the framing to install my window, which I should get installed tomorrow evening after work if I can get out there while there's still some daylight.
Light in left side of chicken section:
Light on right side of chicken section
Lights in the rafters
I also completed the framing to install a large window. I'm hoping to find some more smaller windows on craigslist to add to the shed as well.
Here's the one large window. It came from my parents house. It was just sitting in the garage never used when they bought the place. It didn't fit any of their window dimensions so they gave it to me. If memory serves me write it is 35 1/2" x 32". It has a screen, but I will be adding hardware cloth over the outside as well to keep any critters out when the window is open.
UPDATES (1/21/2019):
The window is in, I hung the chicken section door using a barn door kit, nest boxes built, roosts installed with poop boards, chicken door build/installed, feeder and water hung, bedding laid down and chickens placed inside. The chickens love it!
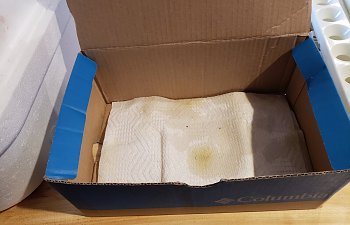
I still need to finish the quail cages. The quail eggs have hatched and they are in the brooder for now. Here's a pic of the quail chicks.
Here you can see the window installed. You can also see the door to the chicken area. It's just setting in place in this pic as I was testing the fit but did not yet install the barn door kit. I don't have a pic of the barn door kit installed. It's just a rail and pulley style rollers.
Here's my roosts and poop board. There's another roost in the upper right corner that is partly cut out of the picture. They are a funky design but provide lots of options and plenty of space for my 7 hens. I'll be putting sand and PDZ mixed together on the poop board about 1/4"-1/2" thick. The poop board is made of of 1x8 boards that fit snuggly together and slide into place. It is easily removable by just sliding each board forward. I made sure to put boards between the studs, should my hens decide to hang there butts over what would be a gap between the poop board and outter walls.
Another pic of the roosts and poop board from outside the chicken area. You can see the upper roost better. You can also see how I sandwiched the 1x8 boards for the poop board between to 1x4 boards for support, edging around the poop board, and a sliding system that allows the 1x8 boards to be removed by sliding them forward (or to the right from this perspective). Ignore the yellow extension cord. It's just a temporary solution until I install a covered outlet for the heated hanging waterer.
Here's the nesting boxes I built for the new coop. I am playing with the concept of a communal nesting box, hence the large box on the left. However, my hens are used to individual boxes so I sectioned off the right side as a single nest. I have found eggs in both, so I will just leave it as is. There's only 7 hens so these two boxes are enough. Their old coop only had two boxes as well. The blue blob at the bottom of the picture is my sons hood. He wanted to come out to visit his chickens.
Here you see the hanging waterer and feeder. I love hanging them becasue it adds a bit of entertainment for the hens when they move a bit, they are easy to adjust in height if needed, and they are easy to clean around/under or move out of the way. You can also see that there are tarps under my bedding, which is pine shavings for now. The tarps are just a barrier between the plywood floor and the bedding. I'm not completely happy with the tarps. I thought they would make changing litter easier - just pick up the tarp and dump it into the compost. The tarp does come up a lot and folds over at the edges. I think I'll put linoleum down when the weather warms up in the Spring. I'll cover the linoleum with sand, as that is the bedding I want in the coop. The pine shavings was just to get something in there right away that was cheap and easy to move. It adds some insulation as well to help the hens cope with our winter weather at the moment.
P.S. Ignore the black level. It's there from me working on installing the poop board.
UPDATES (2/3/2019)
It has been two weeks since I last updated, but they were the coldest two weeks of this winter. I was not able to spend enough time out in the shed coop to work on things until yesterday and today.
I did manage to put down sand on the poop board earlier this week during the frigid weather. I was sick of whacking frozen poop off the board. The sand is Sakrete tube sand. 1 70lb bag was plenty. It is a very coarse sand which makes it a great choice. It works much like kitty litter. I actually use a kitty litter scoop to clean the poop from the sand.
The chickens are loving their digs.
What I really got busy doing this weekend is some work on the quail cages. We have the floor and ceiling in for two of the cages. I managed to repurpose some old pallet boards as paneling to cover the gaps between studs along with some coated wiring and nails that were exposed. I still need to get the third cage built. The last step will be to get doors across the front of each cage. I still need to figure out what I'll be putting under each cage to collect poop. I'm thinking of building shallow drawers, but large baking sheets would be simpler. Here's a pic of the progress. Excuse all the tools - there's limited space in the shed thanks to all the tools I have out there. I haven't yet added storage shelving on the left side across from the quail cages to organize things.
Since I am writing about the quail cages, it's only appropriate that I include a picture of the quail chicks. They are 18 days old now. They are getting big quickly and outgrowing the brooder. I am hoping to move them to a larger indoor cage soon to provide more space, but keep them indoors until the weather warms up enough.
I was put off the first time I heard and saw a chicken in Humboldt Park. However, over the two years that we lived there I became intrigued. When we decided to grow our family, I sold the property in the city and moved out to the suburbs to have a single family home with a large yard, get closer to family who had moved out of the city already, and a better school district for my child's future. That large yard led to a rather large garden, which I dived off the deep end into. As we began gardening I saw the extra space along the back fence as needing some occupancy - I couldn't put a structure within 5 feet of the property line by local ordinance so it was just dirt that used to be an unmanaged flower bed. That interest in chickens followed me from Humboldt Park, and only grew due to the rural charm of our suburban town. Before long I was researching where to get chickens and how to care for them. Also, my in-laws retired to Tennessee during all this time and my mother-in-law had begun to keep chickens. I asked her a bunch of questions. Against her advice, I purchased day-old chicks - my mother-in-law refuses to raise chicks and would rather purchase pullets. I wasn't looking to get too fancy, so I got 5 chicks from Farm and Fleet during their "Chick Days" event. I talked to their "chicken lady" on the phone, and she recommended a few breeds based on what I wanted in a flock - the only chicken I knew I wanted was Light Brahmas. I ended up with two Light Brahmas, a Golden Laced Wyandotte, a Speckled Sussex, and a Cuckoo Marans. I had built a brooder and successfully brooded all 5 chicks. A few months later I met another local chicken lover here on BYC a few towns over from me, and ended up purchasing 2 Orpington chicks, a Lavender and a Blue Laced, from her. I successfully brooded both of them as well. Before I knew it I had 7 hens (I can only keep 8 hens [no roos] max by local ordinance), and I was collecting eggs and enjoying watching the hens. My son was 1 when we bought those first 5 hens. It's nearly a year later and he's 2 and loves his pet chickens, as well as eating their fresh eggs!
I find a lot of joy in raising our chickens. We love their eggs! Our Speckled Sussex has become our favorite. She not only is a reliable egg layer, but has a huge personality. She was the first to learn to jump over the garden fence. She will walk right up to the patio doors and look into the house. She lets my son pet her. She knows he's a good source for treats. She likes to follow us around the yard and will attempt to follow us right into the house if we were to let her.
Along this incredible journey, I met incredible people here on BYC and learned a lot. I soon became a bit jealous of those who can keep larger flocks and roosters so they can breed their chickens. I didn't want to move any time soon - maybe one day - so I was stuck being limited to 8 chickens. I only had 7 and couldn't bare to see 1 lonely hen try to assimilate into the flock - my original 5 established a pecking order and even keep the 2 younger Orpington hens at the bottom of the pecking order and force them too rely on each other for companionship. So how could I have more birds, stay within the law, and not have to watch 1 hen suffer?
QUAIL!
I found here on BYC that quite a lot of people keep quail in order to raise birds and circumvent laws limiting or preventing them from raising chickens. I also learned that quail are significantly quieter - my hens' egg songs are quite loud and my neighbors don't seem to mind or even enjoy it, but I didn't want to push the limits too far. Quail fit the bill.
How many quail? Where would I house them? Where would I buy them?
I decided I will raise quail on wire. I would build 8 foot long (convenient given standard lumber comes in 8 foot lengths) cages with miniature coops for the quail to get protection from harsh weather. I then decided, due to the inability to find a local source, to order quail eggs. I ordered 50 Jumbo Brown Coturnix eggs, an incubator, and an egg rotator. Now, I realized that the egg rotator could hold 34 chicken eggs and assumed people used the same for quail eggs and I would just have to hatch the best looking 34 eggs and toss the rest. I found out some people do just that, but then there's these things called quail rails for the egg rotator. What!? So I ordered some quail rails online and made sure they would arrive before the eggs.
Now those quail rails hold more eggs... a lot more eggs... 120 eggs! So why limit myself to 50 eggs. Next thing you know I placed an order for another 50 eggs, Texas A&M Whites. I was even able to contact the hatchery and have them ship the eggs together all in one b
While waiting on the eggs I got to work on the first quail cage. My son, 2 years old, enjoyed helping me with this part - or so he thought he was helping. I loved seeing him get involved. He has become the key reason I keep the chickens and started with quail - he learns so much about food sources, animals and work ethic. It's truly amazing how much he picks up on and how hard he tries to help care for the animals he loves so much.
So I had one quail cage built. The incubator, egg rotator and quail rails arrived and I assembled it all and got in running. And then... the shipment of quail eggs was delayed by USPS... just no updates for days in the tracking details... I called USPS and they couldn't tell me anything other than the little information in the tracking details... Ugh! The supplier I ordered from was kind enough to offer to send a replacement shipment since the original eggs would not be viable by the time they arrived. They were really awesome and provided incredible customer service. PM me for their contact information if you need a source for quail hatching eggs.
A few weeks after I placed the order the replacement order shipped and arrived in just two days. Ironically the original order showed up two days later out of the blue - the eggs weren't rotten but were too old to hatch so they got scrambled, cooked well, and then fed to the chickens and our two dogs. The replacement shipment of eggs arrived in perfect condition, each egg tucked into a hole in a foam mat specifically made for holding quail eggs. There were 4 extra for us just in case. Now do the math - I ordered 100 eggs and received 4 extra and there's 103 that went into the incubator. Yea... I put my finger right through one of the eggs when I was rushing to get all of them out of the foam mats. Lesson learned: take one's time during all steps when hatching eggs. The remaining 103 did get put in the incubator and are actually incubating still as I write this article. Here's the eggs one day 1 of incubation.
Now I have 103 eggs... With even 50 hatching and brooding to 8-9 weeks of age, that one quail cage that measure 8'x3' is not going to suffice. Additionally, I already know I want to breed my quail and hatch more. I hope to have 80-100 quail growing, breeding and laying eggs. I also want to be able to fill the freezer with some quail... the gruesome part, I know, I know. It's all about teaching my little guy animal husbandry, work ethic, responsibility and where food comes from... Meat comes from dead animals, and we enjoy meat around here. So where will I house all these quail? I already mention earlier I decided to raise them on wire. The initial idea was 4 of my quail cages organized in two stacks out in the back of the garden next to the chicken coop and run. Then I got to thinking about how much valuable gardening space the chickens and quail are/will be taking up. I would like to have more beds of fruits and vegetables (again show the little guy where food comes from and a bunch of other life lessons along the way). So, I'm going to MOVE THE CHICKENS (already sounds like a nightmare of them not knowing where home is anymore) and build a new coop that is better for them and us humans and the quail... (stepping onto a soap box) yes, and the quail. Please don't criticize my choice to house quail and chickens in the same structure. I did my research, and understand the possibility of disease transmission and yada yada. I've made an educated decision and am moving forward with it with or without your support (stepping off the soap box).
THE NEW COOP
I have decided to convert my shed into a walk-in combo coop with storage for flock supplies and yard/garden tools. Today is Friday and we have some nice weather this weekend, so here's my weekend project:
UPDATES ON THE BUILD:
Now it's been two days since I wrote everything up to this point. I managed to clear out the crammed shed; remove the existing shelves, hooks, tool hangers, and lots of random nails where things once hung. I then built a loft I could walk under above the chicken area and walled in the chicken area. I built a door for us to access the chicken are as well, but haven't found hinges in my bins of tools and parts in the garage just yet so it is not hung yet. I also began construction on the quail cages. I managed to get the floors in for two of the cages. I then had clean up and get things that I left in the yard when clearing the shed as we are expecting rain.
Here's the shed. I had already began moving things out of the shed by the time I took this picture. Prior to starting on this project, I couldn't walk but 2-3 feet into the shed.
Photos of the stuff I removed from the shed:
Here's the loft I put in for storage space.
Here the wall to enclose the chicken area is framed out and the solid wall between the quail cages and chicken area is completed.
The chicken wire is completed here. I also had to move a lot of tools back into the shed here as that expecting rain is coming. The left side will remain tool storage for my yard tools and some larger power tools like my table saw, miter saw and compressor.
You can see two of the quail cage floors laid in place. Sorry for all the clutter - avoiding the rain became a rushed effort.
MORE UPDATES ON THE BUILD:
Let there be light! I had installed a fluorescent light fixture but it acts up due to the cold weather. I also do not trust the bulbs too much - if one was to fall it would explode and send glass and toxic dust everywhere in the coop. Also the one fluorescent fixture led to a number of dark areas, especially in the chicken section of the shed. So I decided to install 4 light bulb sockets and 60W equivalent LED bulbs - I may swap them out later for incandescent bulbs to take some of the chill out of the shed. There's 2 bulbs now in the chicken section on the right and left side and 2 bulbs in the rafters to light up the main section and quail area. I also have completed the framing to install my window, which I should get installed tomorrow evening after work if I can get out there while there's still some daylight.
Light in left side of chicken section:
Light on right side of chicken section
Lights in the rafters
I also completed the framing to install a large window. I'm hoping to find some more smaller windows on craigslist to add to the shed as well.
Here's the one large window. It came from my parents house. It was just sitting in the garage never used when they bought the place. It didn't fit any of their window dimensions so they gave it to me. If memory serves me write it is 35 1/2" x 32". It has a screen, but I will be adding hardware cloth over the outside as well to keep any critters out when the window is open.
UPDATES (1/21/2019):
The window is in, I hung the chicken section door using a barn door kit, nest boxes built, roosts installed with poop boards, chicken door build/installed, feeder and water hung, bedding laid down and chickens placed inside. The chickens love it!
I still need to finish the quail cages. The quail eggs have hatched and they are in the brooder for now. Here's a pic of the quail chicks.
Here you can see the window installed. You can also see the door to the chicken area. It's just setting in place in this pic as I was testing the fit but did not yet install the barn door kit. I don't have a pic of the barn door kit installed. It's just a rail and pulley style rollers.
Here's my roosts and poop board. There's another roost in the upper right corner that is partly cut out of the picture. They are a funky design but provide lots of options and plenty of space for my 7 hens. I'll be putting sand and PDZ mixed together on the poop board about 1/4"-1/2" thick. The poop board is made of of 1x8 boards that fit snuggly together and slide into place. It is easily removable by just sliding each board forward. I made sure to put boards between the studs, should my hens decide to hang there butts over what would be a gap between the poop board and outter walls.
Another pic of the roosts and poop board from outside the chicken area. You can see the upper roost better. You can also see how I sandwiched the 1x8 boards for the poop board between to 1x4 boards for support, edging around the poop board, and a sliding system that allows the 1x8 boards to be removed by sliding them forward (or to the right from this perspective). Ignore the yellow extension cord. It's just a temporary solution until I install a covered outlet for the heated hanging waterer.
Here's the nesting boxes I built for the new coop. I am playing with the concept of a communal nesting box, hence the large box on the left. However, my hens are used to individual boxes so I sectioned off the right side as a single nest. I have found eggs in both, so I will just leave it as is. There's only 7 hens so these two boxes are enough. Their old coop only had two boxes as well. The blue blob at the bottom of the picture is my sons hood. He wanted to come out to visit his chickens.
Here you see the hanging waterer and feeder. I love hanging them becasue it adds a bit of entertainment for the hens when they move a bit, they are easy to adjust in height if needed, and they are easy to clean around/under or move out of the way. You can also see that there are tarps under my bedding, which is pine shavings for now. The tarps are just a barrier between the plywood floor and the bedding. I'm not completely happy with the tarps. I thought they would make changing litter easier - just pick up the tarp and dump it into the compost. The tarp does come up a lot and folds over at the edges. I think I'll put linoleum down when the weather warms up in the Spring. I'll cover the linoleum with sand, as that is the bedding I want in the coop. The pine shavings was just to get something in there right away that was cheap and easy to move. It adds some insulation as well to help the hens cope with our winter weather at the moment.
P.S. Ignore the black level. It's there from me working on installing the poop board.
UPDATES (2/3/2019)
It has been two weeks since I last updated, but they were the coldest two weeks of this winter. I was not able to spend enough time out in the shed coop to work on things until yesterday and today.
I did manage to put down sand on the poop board earlier this week during the frigid weather. I was sick of whacking frozen poop off the board. The sand is Sakrete tube sand. 1 70lb bag was plenty. It is a very coarse sand which makes it a great choice. It works much like kitty litter. I actually use a kitty litter scoop to clean the poop from the sand.
The chickens are loving their digs.
What I really got busy doing this weekend is some work on the quail cages. We have the floor and ceiling in for two of the cages. I managed to repurpose some old pallet boards as paneling to cover the gaps between studs along with some coated wiring and nails that were exposed. I still need to get the third cage built. The last step will be to get doors across the front of each cage. I still need to figure out what I'll be putting under each cage to collect poop. I'm thinking of building shallow drawers, but large baking sheets would be simpler. Here's a pic of the progress. Excuse all the tools - there's limited space in the shed thanks to all the tools I have out there. I haven't yet added storage shelving on the left side across from the quail cages to organize things.
Since I am writing about the quail cages, it's only appropriate that I include a picture of the quail chicks. They are 18 days old now. They are getting big quickly and outgrowing the brooder. I am hoping to move them to a larger indoor cage soon to provide more space, but keep them indoors until the weather warms up enough.